Are you looking to give someone specific access to your WordPress site without handing over full control? Adding a new user role lets you do just that.
It’s a simple way to customize what users can and cannot do, keeping your site secure and organized. In this guide, you’ll learn exactly how to create a new user role tailored to your needs—no technical skills required. Keep reading, and you’ll have full control over user permissions in no time.
User Roles In WordPress
User roles in WordPress control what users can and cannot do on a website. Each role has specific permissions. These roles help manage site security and user access. Knowing about user roles helps you keep your site safe and organized.
Default Roles Explained
WordPress has several default user roles. The Administrator has full control over the site. Editors can publish and manage posts. Authors write and publish their own posts. Contributors write but cannot publish posts. Subscribers can only manage their profiles. Each role fits different needs.
Why Add Custom Roles
Default roles may not fit all websites. Custom roles let you give specific permissions. You can limit or expand user capabilities easily. Custom roles help keep your site secure. They also improve teamwork by defining clear tasks.
Credit: www.inmotionhosting.com
Preparing To Add A New Role
Before adding a new user role in WordPress, some important steps must be done. Proper preparation helps avoid problems later. It also keeps your site safe and organized. This section covers key tasks to complete before creating the role.
Taking time to plan the role name and permissions is important. Making a backup protects your site’s data. Both these steps make the process smooth and secure.
Backup Your Site
Backing up your site is the first step. It saves all your files and database safely. If anything goes wrong, you can restore your site quickly. Use a reliable backup plugin or your hosting provider’s tool. Create a full backup before changing user roles.
Store the backup in a safe place. Check that the backup completed successfully. This step protects your content and settings.
Choose A Role Name And Capabilities
Pick a clear and simple name for the new role. The name should describe the role’s purpose well. Avoid using names that confuse users or overlap existing roles.
Next, decide what the role can do on your site. Capabilities include reading, editing, publishing, or deleting content. Choose only the permissions needed for the role’s tasks. Too many permissions can cause security risks.
Plan the permissions carefully to keep your site safe and organized. Write down the role name and capabilities before adding it to WordPress.
Adding A User Role With Code
Adding a new user role in WordPress using code lets you control user permissions precisely. This method is useful when default roles don’t fit your needs. You can create a role with specific capabilities tailored to your website.
Editing code might seem hard, but it is straightforward with clear steps. Using simple functions, you can define roles and assign permissions. This approach gives you flexibility and control over user access.
Using Functions.php
The functions.php file is where you add custom code for your WordPress theme. It controls many aspects of your site, including user roles. Adding code here will create new roles when WordPress loads your theme.
Access your theme folder and open functions.php. Add your code at the end of this file. Save changes and upload it back to your server if needed. Always back up this file before editing to avoid errors.
Key Functions To Use
WordPress provides specific functions to manage user roles. add_role() creates a new role. It requires a role name, display name, and capabilities array.
Capabilities control what users can do. Examples include read, edit_posts, or delete_pages. Assign only needed capabilities to keep roles safe and simple.
Use remove_role() to delete roles if needed. This keeps your site clean from unused roles. Always test your roles carefully after creation.
Example Code Snippet
function custom_add_user_role() { add_role( 'custom_editor', 'Custom Editor', array( 'read' => true, 'edit_posts' => true, 'delete_posts' => false, 'publish_posts' => true, 'upload_files' => true, ) ); } add_action('init', 'custom_add_user_role'); This code creates a role named Custom Editor. It allows reading, editing, and publishing posts. Deleting posts is not allowed. Users with this role can upload files.
Place this snippet in your functions.php file. After saving, the new role will appear in the WordPress user management area. Assign it to users as needed.
Credit: wedevs.com
Adding A User Role With Plugins
Adding a new user role in WordPress is easier with plugins. Plugins help manage roles without coding. They offer simple tools to create roles and set permissions. This method suits beginners and busy site owners. Plugins save time and reduce errors. Choose a plugin that fits your needs and start customizing roles quickly.
Top Plugins For Role Management
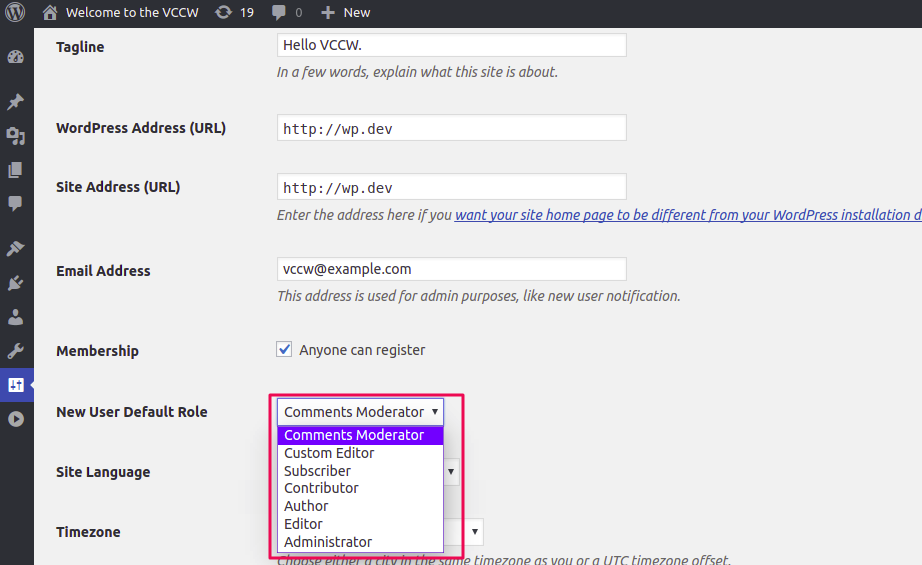
Several plugins help add and manage user roles. User Role Editor is popular for its easy interface. Members plugin by MemberPress offers control over roles and capabilities. Capability Manager Enhanced allows detailed permission settings. These plugins work well with most WordPress sites. They get regular updates and good support.
Step-by-step Plugin Setup
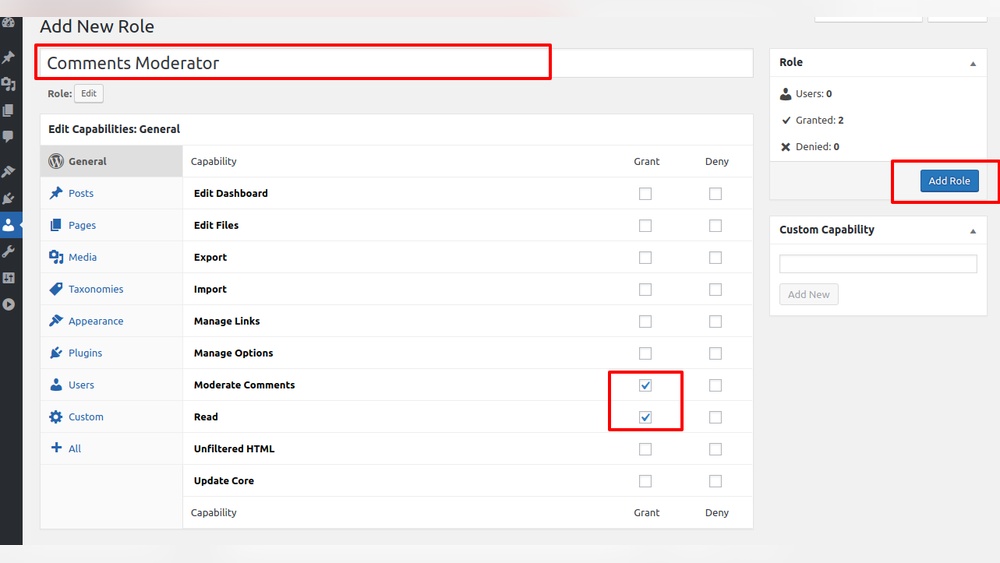
First, go to the WordPress dashboard. Click on “Plugins” and then “Add New”. Search for your chosen role management plugin. Click “Install Now” and then “Activate”. After activation, find the plugin settings in the dashboard menu. Open the role management section to add a new role. Enter a name for the role and save it. The new role is ready for customization.
Assigning Capabilities Via Plugins
Select the new role in the plugin’s interface. Check the boxes for the permissions you want to give. Capabilities include editing posts, managing pages, or moderating comments. Save changes to apply permissions to the role. Assign the role to users from the WordPress user list. This setup controls what users can do on your site.
Assigning The New Role To Users
Assigning a new user role in WordPress is a key step after creating it. This allows users to have the exact permissions and access you want. Properly assigning roles helps manage your site safely and clearly.
You can assign the new role to users in two main ways. First, by editing existing users. Second, by creating new users with the new role from the start.
Editing Existing Users
To assign a new role to an existing user, go to the WordPress dashboard. Open the “Users” menu and find the user you want to edit. Click on their name to open the profile.
Scroll down to the “Role” dropdown menu. Select the new role you created. Scroll to the bottom and click “Update User” to save changes. The user now has the new permissions.
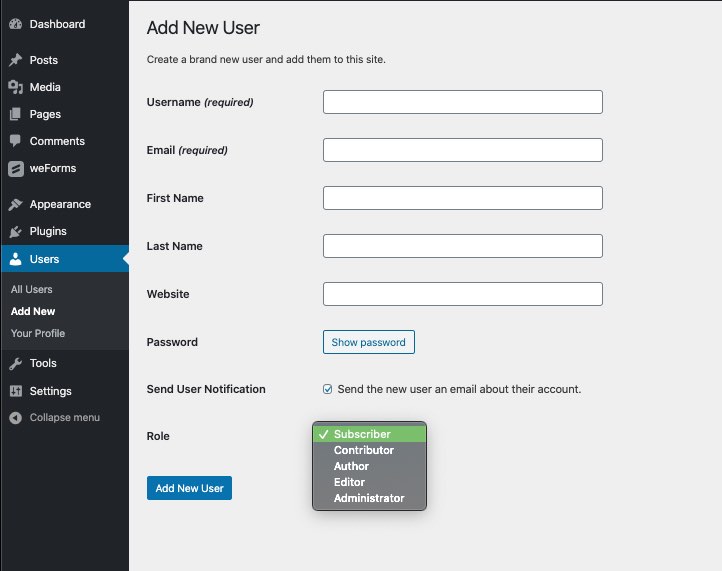
Creating Users With New Role
To create a new user with the new role, go to “Users” and then “Add New.” Fill in the required details like username and email. Choose the new role from the “Role” dropdown menu.
Click “Add New User” to finish. The new user will have the permissions set by the role you assigned. This method saves time if you want all new users to have the same role.
Testing And Managing Roles
After creating a new user role in WordPress, testing and managing it is crucial. This ensures users have the correct access without risking your site’s security. Proper management helps keep your website organized and safe.
Verifying Role Permissions
Check the new role’s permissions carefully. Log in as a user with that role to see what they can and cannot do. Test tasks like creating posts, editing pages, or managing comments. Confirm the role has access only to the features you want. This step prevents accidental permission errors.
Modifying Or Removing Roles
Sometimes roles need changes after testing. Use a plugin or custom code to edit permissions easily. Remove unnecessary capabilities to tighten security. If a role is no longer needed, delete it to keep your system clean. Always back up your site before making these changes.
Best Practices For User Roles
Managing user roles in WordPress requires careful planning. Assigning the right permissions keeps your site safe and organized. Follow best practices to maintain control over who can do what on your site. This helps avoid confusion and security risks.
Security Considerations
Only give users the permissions they need. Avoid granting admin rights to everyone. Too many permissions increase the risk of hacking. Use strong passwords for all accounts. Regularly update WordPress and plugins to fix security holes. Monitor user activity for unusual behavior. Remove inactive users to reduce access points.
Maintaining Role Consistency
Keep roles clear and consistent across your site. Use standard role names to avoid confusion. Document what each role can do. Train users on their responsibilities and limits. Update roles carefully when adding new capabilities. Avoid mixing permissions that cause conflicts. Consistency helps manage users easily and prevents errors.

Credit: wedevs.com
Frequently Asked Questions
How Do I Create A New User Role In WordPress?
To create a new user role, use the add_role() function in your theme’s functions. php file or a custom plugin. Define the role name, display name, and capabilities to control user permissions effectively.
Can I Customize Permissions For A New User Role?
Yes, you can customize permissions by assigning specific capabilities when adding a role. This controls what users can access and perform within your WordPress site.
Is It Safe To Add User Roles Via Plugins?
Using trusted plugins like User Role Editor is safe. They simplify role management and reduce errors compared to manual coding in WordPress.
How To Assign A New Role To A User In WordPress?
Go to Users > All Users, select a user, edit their profile, and choose the new role from the Role dropdown menu. Save changes to update their permissions.
Conclusion
Adding a new user role in WordPress helps control site access. It lets you give specific permissions to different users. This keeps your website safe and organized. The process is simple and quick to follow. You can customize roles based on your needs.
Try these steps to manage your site better. Keep your WordPress site running smoothly and securely. Easy to do. Worth the effort.