
Looking to boost your WordPress site’s features but not sure how to start? Adding a new plugin is the easiest way to do it—and you don’t need to be a tech expert.
Whether you want to improve security, speed up your site, or add cool new tools, the right plugin can make it happen fast. In this guide, you’ll discover simple, step-by-step instructions to add a plugin quickly and safely. By the end, you’ll feel confident managing your site like a pro.
Ready to unlock new possibilities for your WordPress site? Let’s dive in.
Credit: accessibility-helper.co.il
Choosing The Right Plugin
Choosing the right plugin is key to improving your WordPress site. A good plugin adds useful features and keeps your site safe. Picking the wrong one may cause problems or slow your site down. Focus on what you need and select plugins that fit well with your site.
Identifying Your Needs
Start by writing down what you want the plugin to do. Are you adding a contact form or improving SEO? Clear needs help narrow down your choices. Avoid plugins that do too much or too little for your goal. Simple and focused plugins work best.
Researching Popular Plugins
Check the WordPress Plugin Directory for top-rated plugins. Read user reviews to learn about their experiences. See how many active installs a plugin has. Popular plugins usually get regular updates and support. Avoid plugins with many negative reviews or no updates.
Checking Compatibility
Make sure the plugin works with your WordPress version. Check if it is compatible with your theme and other plugins. Incompatible plugins can cause errors or crashes. Test new plugins on a staging site before using them live. Keep your site stable and secure.
Credit: www.elegantthemes.com
Preparing Your WordPress Site
Preparing your WordPress site before adding a new plugin is important. This step keeps your site safe and working well. Taking small actions now can save you from big problems later. Let’s look at two key tasks you should do first.
Backing Up Your Website
Backing up your website means saving a copy of all your files and data. This copy helps you restore your site if something goes wrong. Use a plugin or your hosting service to create a backup. Store the backup in a safe place, like your computer or cloud storage. Always back up before installing a new plugin.
Ensuring WordPress Is Updated
Keeping WordPress updated is important for security and performance. Updates fix bugs and add new features. Check your WordPress dashboard for updates. Update WordPress to the latest version before adding any plugin. This step helps the plugin work properly and keeps your site secure.
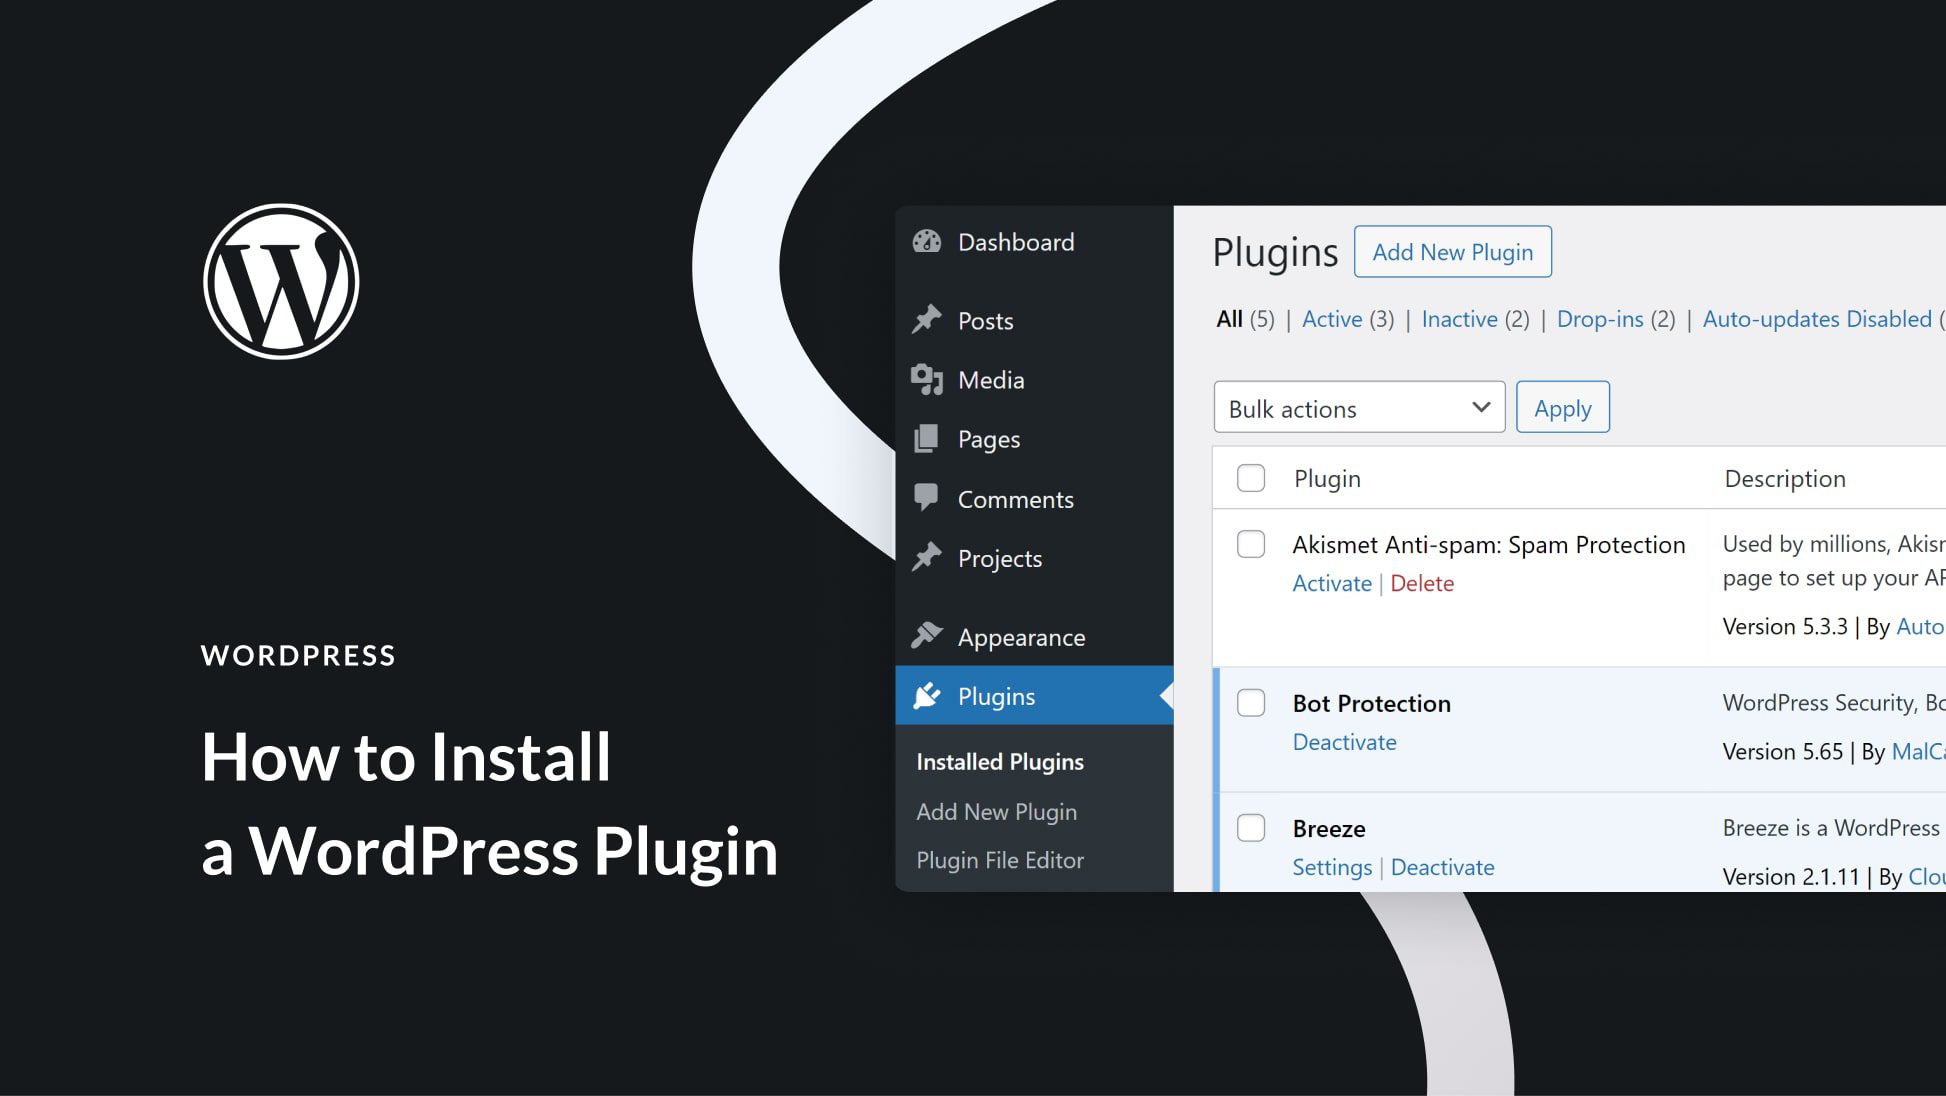
Installing A Plugin From The Dashboard
Installing a plugin from the WordPress dashboard is simple and quick. This method lets you add new features without technical skills. The process involves just a few clicks right inside your admin panel. It keeps your site secure and up to date.
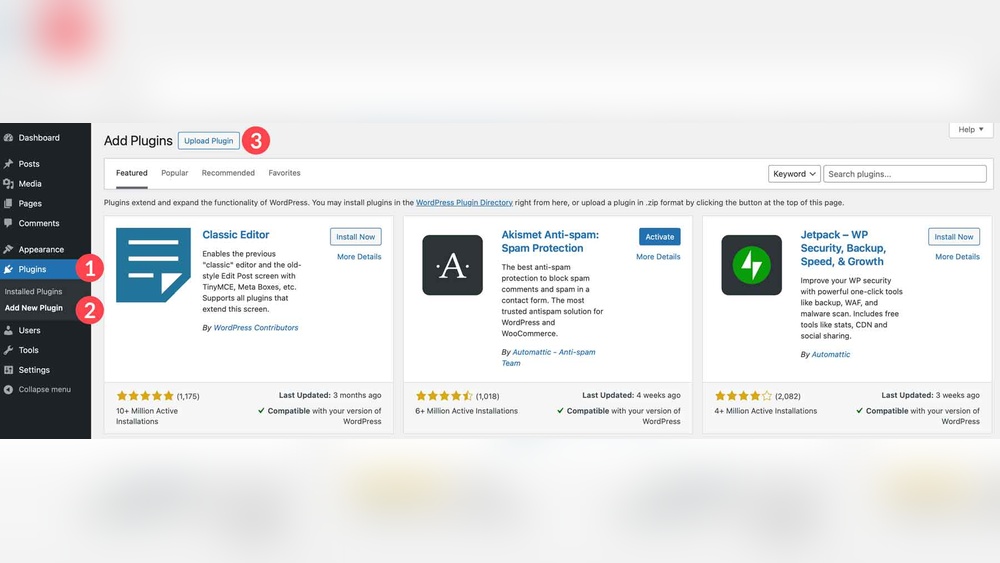
Accessing The Plugin Section
Start by logging into your WordPress dashboard. Look for the menu on the left side. Find and click on “Plugins.” This opens the plugin management area. Here, you see installed plugins and options to add new ones.
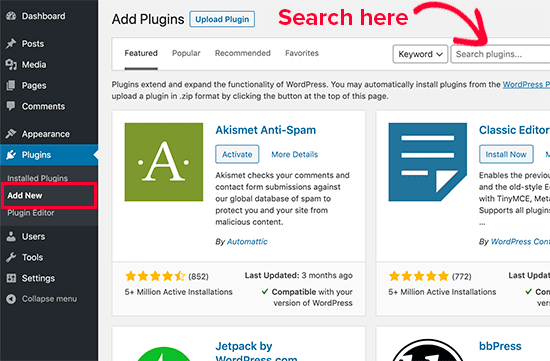
Searching For Plugins
Click the “Add New” button at the top of the Plugins page. Use the search box to type the name or feature you want. WordPress shows a list of plugins that match your keywords. Read the short descriptions to find the best fit.
Installing And Activating
Once you find a plugin, click the “Install Now” button. WordPress downloads and installs the plugin automatically. After installation, the “Activate” button appears. Click it to enable the plugin on your site. The plugin is now ready to use.

Credit: www.omnisend.com
Uploading A Plugin Manually
Uploading a plugin manually lets you add special tools to your WordPress site. This method works well when the plugin is not in the WordPress directory. It also helps if you have a custom plugin or a plugin from another source.
Follow these steps to upload a plugin file and get it working on your site quickly.
Downloading The Plugin File
Start by getting the plugin file. Usually, the plugin comes as a .zip file. Save this file on your computer where you can find it easily. Do not unzip the file. WordPress needs the zipped version to upload properly.
Uploading Via WordPress Dashboard
Log in to your WordPress dashboard. Go to the Plugins menu and click Add New. At the top, find and click the Upload Plugin button. Click Choose File and select the plugin .zip file from your computer. Then click Install Now to start uploading.
Activating The Uploaded Plugin
After installation finishes, you will see an Activate Plugin link. Click this link to turn on the plugin. Once activated, the plugin can start working on your website. Check the plugin settings to adjust it as needed.
Configuring Plugin Settings
Configuring plugin settings is an important step after installing a new plugin. It helps you control how the plugin works on your WordPress site. Proper settings make sure the plugin fits your needs and improves your site’s performance.
Each plugin has different settings. Some have many options, while others have just a few. Taking time to explore these options can improve your website’s functionality and user experience.
Locating Plugin Settings
After installing and activating a plugin, you need to find its settings page. Usually, the plugin adds a menu item in the WordPress dashboard. Check the sidebar for the plugin’s name or a new menu section.
Sometimes, settings appear under the “Settings” menu or inside “Tools.” If you cannot find it, check the plugin’s description or documentation for guidance.
Customizing Options
Open the plugin settings page to see available options. These can include layout changes, feature toggles, or integration settings. Read each option carefully to understand its effect.
Adjust the settings to match your website’s goals. Use the simplest choices that fulfill your needs. Avoid changing settings randomly to prevent errors.
Saving Changes
After customizing, look for the “Save” or “Update” button at the bottom or top of the settings page. Click it to save your changes. Unsaved changes will not take effect.
Once saved, test your website to ensure the plugin behaves as expected. You can always return to tweak the settings later if needed.
Troubleshooting Plugin Issues
Plugins extend the power of WordPress. Yet, sometimes they cause issues. Troubleshooting helps keep your site running smoothly. It narrows down the cause of plugin problems. Follow clear steps to fix conflicts and errors quickly.
Deactivating Conflicting Plugins
Plugins can clash with each other. This causes errors or slowdowns. Start by deactivating all plugins except the new one. Check if the problem goes away. Reactivate plugins one by one. This helps find the conflicting plugin.
Checking For Theme Conflicts
The active theme might conflict with plugins. Switch to a default WordPress theme like Twenty Twenty-Three. Test the plugin again. If the issue clears, the theme is the problem. Consider updating or replacing the theme.
Consulting Plugin Support
Plugin developers offer support for problems. Visit the plugin’s official page or support forum. Read FAQs and common fixes. If needed, post your issue clearly. Include WordPress version, plugin version, and error details.
Keeping Plugins Updated
Keeping plugins updated is essential for WordPress site health. Updates fix bugs and improve security. They also add new features and keep compatibility with WordPress. Without updates, plugins may cause errors or slow down your site. Regular updates help your site run smoothly and safely.
Enabling Automatic Updates
Automatic updates save time and effort. WordPress allows you to enable this feature for each plugin. Go to the Plugins page and find the plugin you want to update automatically. Click “Enable auto-updates” next to it. This way, updates happen in the background without your action.
Manually Updating Plugins
Manual updates give you control over when and what to update. Visit the Plugins page to see available updates. Click “Update Now” under the plugin name to start. Wait a few seconds for the process to finish. Check your site after updating to ensure everything works well.
Importance Of Updates
Updates protect your site from security risks. Outdated plugins are easy targets for hackers. Updates also fix bugs that can cause crashes or errors. They improve plugin performance and add new features. Keeping plugins updated keeps your site fast and safe.
Frequently Asked Questions
How Do I Install A New Plugin In WordPress?
To install a new plugin, go to your WordPress dashboard. Click “Plugins” > “Add New”. Search for the plugin, then click “Install Now” and “Activate”. Your plugin is now ready to use.
Can I Add Plugins Without Coding Knowledge?
Yes, WordPress plugins are designed for easy installation. No coding skills are needed. Just use the dashboard’s plugin installer to add and activate plugins quickly.
How To Upload A Plugin Not In The WordPress Directory?
Download the plugin ZIP file from a trusted source. In your dashboard, go to “Plugins” > “Add New” > “Upload Plugin”. Choose the ZIP file, install, and activate it.
Are All WordPress Plugins Free To Use?
Many plugins are free, but some offer premium versions with extra features. Always check the plugin details for pricing and available options before installing.
Conclusion
Adding a new plugin in WordPress is simple and quick. Just follow the steps carefully. Choose a plugin that fits your needs and install it safely. Always check the plugin’s ratings and reviews before adding it. Keep your plugins updated to ensure your site runs smoothly.
Avoid too many plugins to keep your site fast. Now, you can easily improve your site’s features. Start exploring plugins today and see the difference yourself.


