
Are you struggling to find or manage your images, videos, and files on your WordPress site? Knowing how to access your Media Library quickly can save you tons of time and frustration.
Imagine having all your media organized and ready to use whenever you need it. You’ll discover simple steps to access and make the most of your WordPress Media Library. Keep reading, and you’ll unlock a smoother, more efficient way to handle your website’s content.
Credit: www.wpbeginner.com
Media Library Basics
The Media Library in WordPress is a central place to store and manage all your media files. It helps you keep images, videos, and documents organized. Knowing the basics of the Media Library makes it easier to use WordPress effectively.
What Media Library Contains
The Media Library holds all the files you upload to your website. This includes photos, videos, audio files, and documents. Each file has details like its name, size, and upload date. You can view, edit, or delete files anytime from this library.
Supported File Types
WordPress supports many common file types. For images, it accepts JPEG, PNG, and GIF formats. Videos can be uploaded in MP4 or MOV formats. Audio files like MP3 and WAV are allowed. Documents such as PDF, DOCX, and PPTX also work well in the library.

Credit: www.youtube.com
Accessing Media Library
The Media Library in WordPress stores all your images, videos, and files. It helps you organize and manage your content easily. Accessing the Media Library is simple and fast. You can reach it through different parts of your WordPress site.
Via WordPress Dashboard
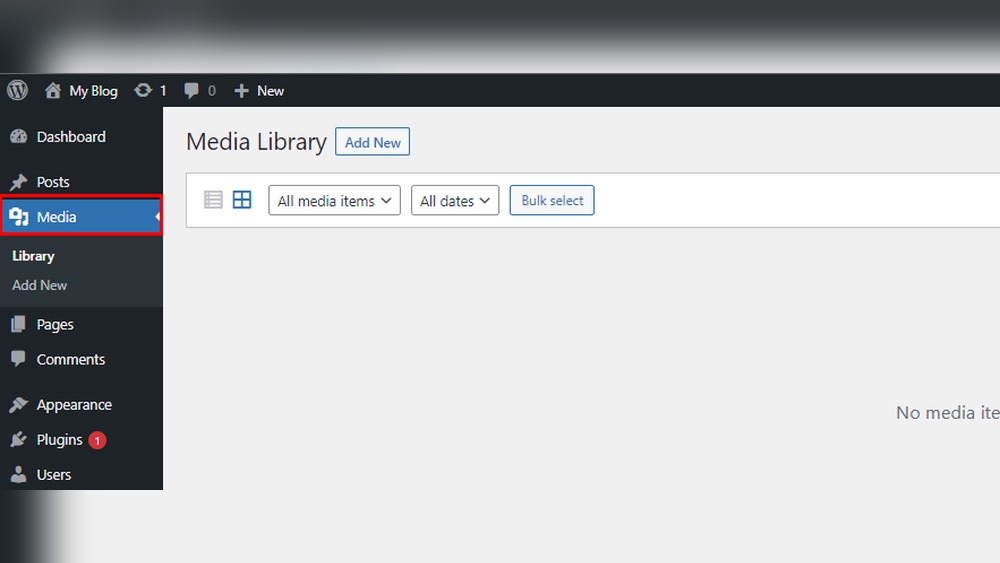
Log into your WordPress admin area. On the left menu, find and click on “Media.” This opens the Media Library page. Here, you see all your uploaded files in one place. You can add new files by clicking the “Add New” button. This view shows thumbnails and file details. It is easy to search or filter files by type or date. You can also delete files you no longer need.
Using Gutenberg Editor
While editing a post or page, open the Gutenberg editor. Click the plus (+) icon to add a new block. Select the “Image” or “Gallery” block to insert media. Then click “Media Library” inside the block. This opens the Media Library popup window. Choose any file you want to add to your content. You can also upload new files here. This method helps you insert images without leaving the editor. It keeps your workflow smooth and fast.
Uploading Files
Uploading files to the WordPress Media Library is simple and fast. You can add images, videos, and documents to use in your posts and pages. WordPress supports many file types and sizes.
There are two main ways to upload files. One is quick and easy. The other gives you more control. Both methods work well for different needs.
Drag And Drop Method
Open the Media Library from your WordPress dashboard. Click the “Add New” button at the top. A box will appear where you can drag your files.
Simply select files on your computer. Drag them into the upload box. WordPress will start uploading immediately. You can add multiple files at once.
This method saves time. It is ideal for quick uploads without extra steps.
Manual Upload Process
Click the “Add New” button in the Media Library. Then click the “Select Files” button inside the upload box. A file browser window will open.
Navigate to the folder with your files. Select the file or files you want to upload. Click “Open” to start the upload.
This method is helpful if you prefer to browse files before uploading. It lets you control exactly which files to add.
Organizing Media Items
Organizing media items in WordPress helps keep your files easy to find. A well-organized media library saves time and reduces frustration. Clear labels and proper grouping make managing images, videos, and documents simple.
You can use categories and tags to sort your media files. Editing media details also improves organization and helps with SEO. These tools make your media library neat and efficient.
Using Categories And Tags
WordPress allows adding categories and tags to media items. Categories group similar files into broad topics. Tags add more specific labels to each item. This system helps locate files quickly in a large library.
Assign categories like “Images,” “Videos,” or “Documents” to your files. Use tags for details like “Product photos,” “Tutorial videos,” or “PDF guides.” This method makes searching easier and faster.
Editing Media Details
Edit media details to improve organization and clarity. Change titles, captions, alt text, and descriptions for each item. Clear titles and descriptions help identify files at a glance.
Good alt text improves accessibility and SEO rankings. Captions provide additional context on your website. Regularly updating these details keeps your library accurate and useful.
Managing Media Settings
Managing media settings in WordPress helps control how images and files behave. It allows you to set sizes and defaults that fit your site’s needs. Good media settings keep your site fast and organized.
Adjusting Image Sizes
WordPress lets you set the size for images automatically. You can change thumbnail, medium, and large sizes here. This helps keep images uniform across your site. Smaller images load faster and save space. Adjusting these sizes saves time when uploading photos.
Setting Default Media Options
You can control where WordPress stores files and how it displays images. For example, choose whether to organize files by date. Set default image alignment and link settings. These defaults apply every time you add media. This keeps your workflow simple and consistent.
Credit: www.greengeeks.com
Troubleshooting Common Issues
Troubleshooting common issues in the WordPress media library helps keep your site running smoothly. Problems like missing files or upload errors can disrupt your workflow. Understanding how to fix these issues saves time and avoids frustration.
Missing Media Files
Missing media files often occur due to incorrect file paths or accidental deletions. Check your uploads folder using an FTP client to confirm if the files exist. If files are missing, try restoring from a backup.
Sometimes, media files appear missing but still exist on the server. This happens when the database and file system are out of sync. Using a plugin like Media Library Folders can help reconnect files to the library.
Clear your browser cache to ensure the latest media library data loads. Also, check user permissions to make sure you have access to view all files.
Upload Errors
Upload errors usually result from file size limits or wrong file types. Verify your PHP settings for max upload size and post max size. Increase these limits if needed in the php.ini file or via your hosting control panel.
Ensure file types are allowed in WordPress settings. Restricted types will cause upload failures. Use only supported formats like JPG, PNG, or PDF.
Check for plugin conflicts by disabling all plugins temporarily. Try uploading again to see if the issue persists. Sometimes, security plugins block uploads for safety reasons.
Using Plugins To Enhance Media Library
Using plugins to enhance the WordPress media library makes managing files easier. The default media library can get cluttered fast. Plugins add tools to organize and find files quickly. This saves time and reduces frustration.
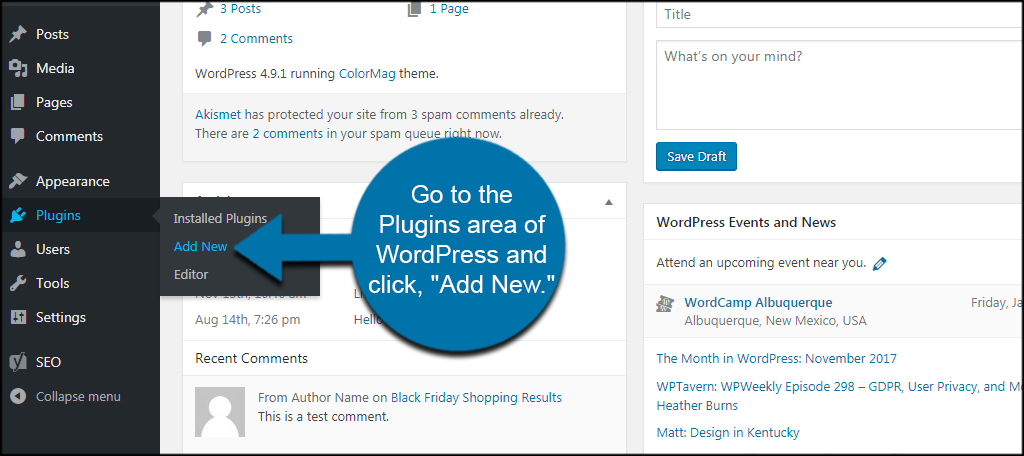
Media Library Folders
Media library folders help group files into categories. Plugins create virtual folders inside the media library. You can drag and drop images, videos, and documents into these folders. This keeps the library neat and easy to browse. Organizing files by folders helps find media faster without scrolling endlessly.
Advanced Search And Filters
Advanced search tools improve how you locate media files. Plugins add filters based on file type, date, or custom tags. You can search by keywords or image size. This narrows down large collections into manageable lists. The filters make it simple to spot the exact file needed, saving time and effort.
Frequently Asked Questions
How Do I Open The Media Library In WordPress?
To open the Media Library, log in to your WordPress dashboard. Click on “Media” in the left sidebar. This will display all your uploaded images, videos, and files in one place.
Can I Organize Files Inside WordPress Media Library?
Yes, you can organize files by using plugins like “Media Library Folders. ” WordPress itself sorts files by date, but plugins add folder-like structures for easier management.
How To Upload New Images To WordPress Media Library?
Go to the Media Library and click the “Add New” button. You can drag and drop files or select them from your computer to upload instantly.
Is It Possible To Edit Images In The Media Library?
Yes, WordPress offers basic editing tools. You can crop, rotate, flip, and resize images directly within the Media Library after selecting an image.
Conclusion
Accessing the WordPress media library is simple and quick. You can easily add, edit, or delete images and files. This tool helps keep your website organized. Spend a little time exploring its features. Managing your media improves your site’s look and feel.
Practice often to become comfortable with it. Your content will look better and load faster. Use the media library regularly for smooth website updates.



