
Are you ready to transform your WordPress site with a powerful, easy-to-use design tool? Installing Divi can unlock endless possibilities for your website’s look and feel, even if you’re not a tech expert.
In this guide, you’ll learn exactly how to install Divi step-by-step, so you can start building a stunning site right away. Keep reading to discover simple tips that will save you time and avoid common mistakes—making your Divi setup smooth and stress-free.
Your dream website is just a few clicks away!

Credit: divitheme.net
Preparing For Divi Installation
Preparing for Divi installation ensures a smooth setup process. Taking steps before installing the theme helps avoid common issues. These preparations keep your website safe and ready for Divi’s features.
Checking WordPress Requirements
Divi works best with certain WordPress versions and settings. Make sure your WordPress is updated to the latest release. Your PHP version should be at least 7.4 for better performance. Check if your hosting supports these requirements too. Meeting these basics prevents errors during installation.
Backing Up Your Website
Always back up your website before installing new themes. A backup saves your content and settings. Use a plugin or your hosting service’s backup tool. This step protects your site in case something goes wrong. Restoring a backup is simple and keeps your data safe.
Purchasing Divi Theme
Buy Divi from the official Elegant Themes website. Avoid third-party sellers to ensure you get authentic files. The purchase gives you access to the theme and updates. After buying, download the Divi theme file to your computer. Keep your license key handy for activation.
Downloading Divi Theme Files
Downloading the Divi theme files is the first step to using Divi on your WordPress site. You need the correct files to install the theme smoothly. These files come in a zip format, ready for upload.
Before downloading, you must have an Elegant Themes account. This account gives access to all Divi theme files and updates. Follow clear steps to get your files quickly.
Accessing Elegant Themes Account
Start by visiting the Elegant Themes website. Enter your username and password to log in. You must have an active subscription to access the theme files. Once logged in, you enter your member dashboard. This area holds all your downloads and purchases.
Locating Divi Theme Zip File
Inside the dashboard, find the “Downloads” section. Look for the Divi theme among the available items. Click the download button to get the zip file. Save it to a location on your computer you will remember. This file contains all the data needed to install Divi.
Installing Divi On WordPress
Installing Divi on WordPress is a simple process. It allows you to use one of the most popular themes for building websites. This guide shows how to upload and activate the Divi theme step-by-step. Follow along to get Divi ready on your WordPress site quickly.
Uploading Theme Via WordPress Dashboard
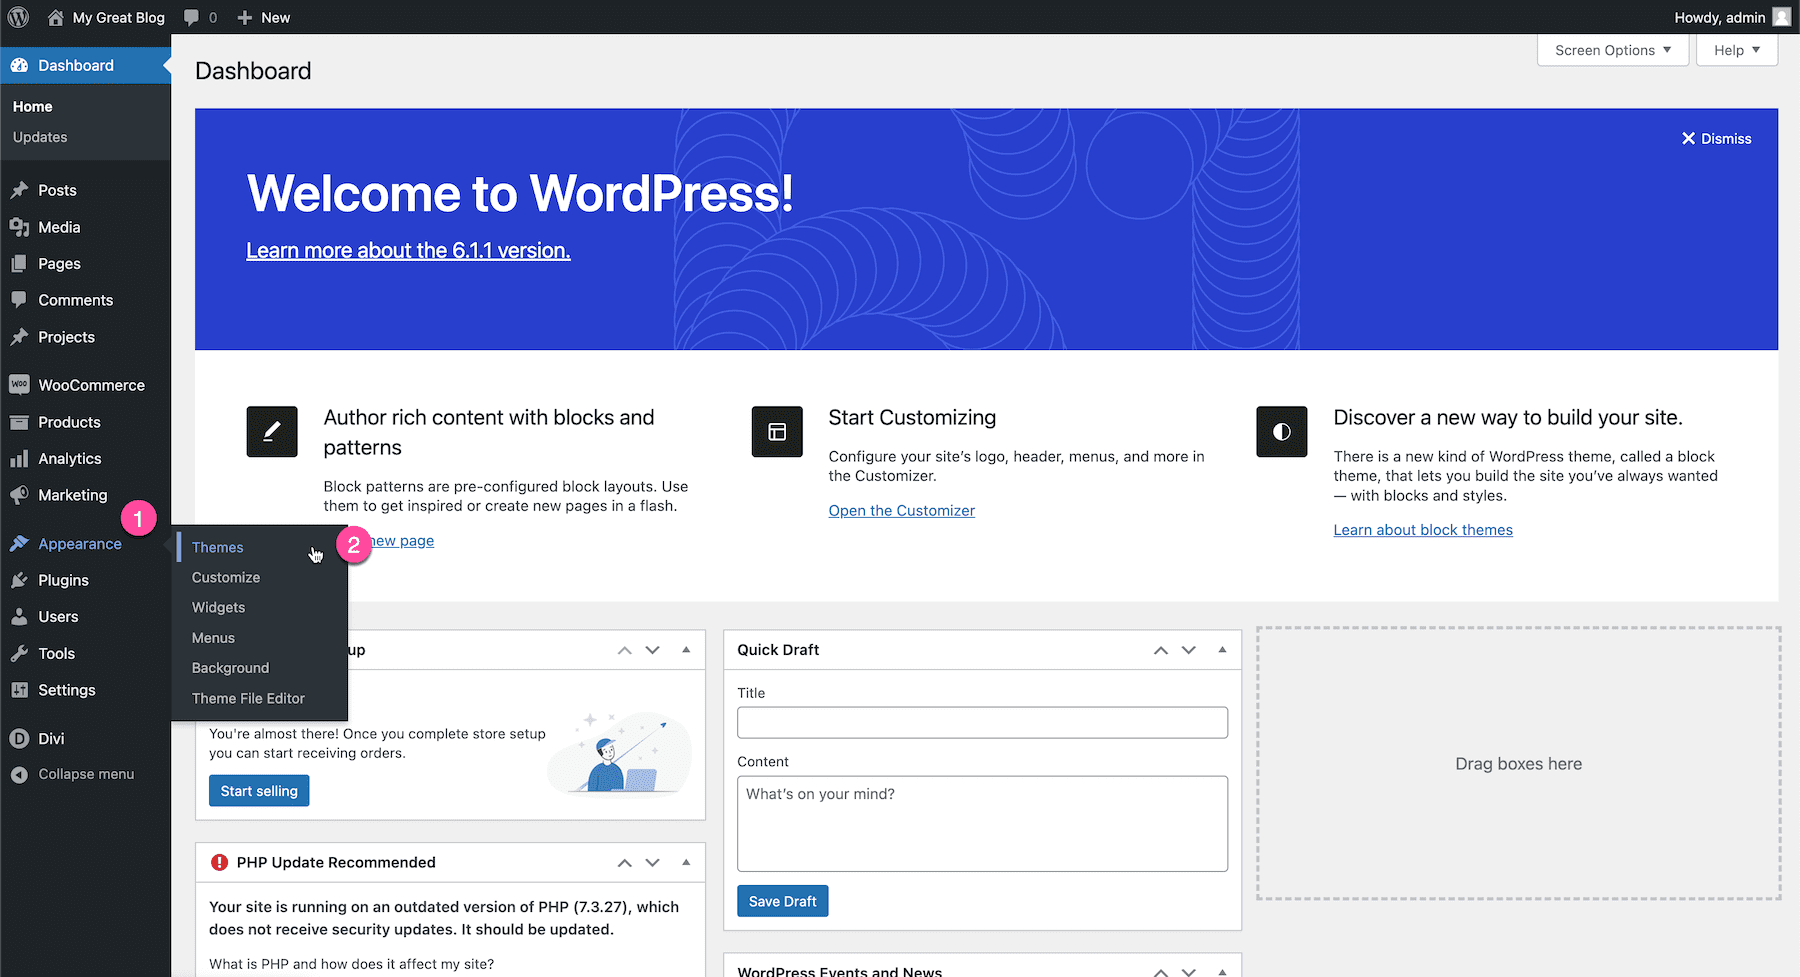
First, download the Divi theme file from the official Elegant Themes website. It comes as a .zip file. Next, log in to your WordPress dashboard. Go to Appearance and then Themes. Click the Add New button at the top of the page.
Choose Upload Theme and select the Divi .zip file from your computer. Click Install Now. WordPress will upload and prepare the theme for activation. This step takes only a few seconds.
Activating Divi Theme
After the upload finishes, you will see an option to activate the theme. Click Activate to set Divi as your current theme. Your website will now use Divi’s design and features. You can start customizing your site with Divi’s tools immediately.
Credit: www.elegantthemes.com
Setting Up Divi Theme
Setting up the Divi theme is the first step to create a beautiful WordPress website. Divi offers many options to customize your site easily. This section guides you through the basic setup process. You will learn how to configure theme settings and import demo content.
Configuring Basic Theme Settings
After activating Divi, go to the WordPress dashboard. Find the “Divi” menu on the left side. Click “Theme Options” to start setting up.
Here, you can add your logo and set your site’s favicon. Customize colors and fonts to match your brand. These settings affect your whole site. Save changes to apply them immediately.
Importing Demo Content
Divi provides pre-built website layouts. Importing demo content helps you start faster. Go to “Divi” > “Library” and click “Import & Export”.
Select the demo file you want to use. Click “Import” and wait a few moments. The demo content will fill your site with pages and images. You can edit everything later to fit your needs.
Installing Divi Builder Plugin
Installing the Divi Builder plugin is the first step to creating beautiful WordPress websites. It lets you design pages easily with drag-and-drop tools. This guide shows how to download and activate the plugin quickly.
Downloading Divi Builder Plugin
Start by logging into your Elegant Themes account. Find the Divi Builder plugin in the downloads section. Click the download button to save the plugin file. The file will be in a .zip format. Keep it handy for the next step.
Activating Divi Builder
Go to your WordPress dashboard and open the Plugins menu. Click on ‘Add New’ and then ‘Upload Plugin.’ Choose the .zip file you downloaded earlier. Click ‘Install Now’ to upload the plugin. Once installed, click ‘Activate Plugin’ to start using Divi Builder. Activation lets you access all the builder’s features.
Customizing Your Website With Divi
Customizing your website with Divi is simple and fun. Divi offers tools that let you design pages easily. You do not need to know coding. You can change how your site looks anytime.
The visual interface helps you see changes in real time. This way, your website will look just how you want. Let’s explore how to use Divi’s features to make your site unique.
Using Divi Visual Builder
Divi Visual Builder lets you design your site directly on the page. You can click on any part of the page to edit it. Changes appear instantly on the screen. This makes editing faster and clearer.
The builder shows a live preview of your design. You can drag and drop elements to arrange them. This tool works on desktop and mobile devices. It helps create a responsive website easily.
Adding And Editing Modules
Modules are blocks of content like text, images, and buttons. You can add modules by clicking the plus icon. Choose the module type that fits your content needs.
Editing a module is simple. Click on the module and open its settings. You can change text, colors, sizes, and more. Save your changes, and see them live on your page.
Troubleshooting Common Issues
Installing Divi on WordPress is usually simple. Still, some common issues may appear. These problems can stop the installation or cause Divi to work badly. Knowing how to fix these issues saves time and frustration. This section helps you solve the most frequent problems fast. Follow the tips below to keep your site running smoothly.
Dealing With Installation Errors
Installation errors can happen for many reasons. Sometimes, the file may be incomplete or corrupted. Try to download the Divi theme again from the official source. Make sure the file is in a .zip format, as WordPress needs this to install themes.
Check your WordPress version. Divi needs the latest or a recent version to work well. Update WordPress if it is outdated. Also, look at your PHP version. Divi requires PHP 7.2 or higher. Contact your hosting provider if you need to upgrade PHP.
If the error says “Upload size exceeds limit,” increase the upload size in your hosting settings or ask your host for help. Clear your browser cache and refresh the page before trying again.
Resolving Plugin Conflicts
Plugin conflicts cause Divi to break or act strangely. Deactivate all plugins except Divi. Check if the problem still exists. If Divi works fine, activate plugins one by one. This way, you find the plugin causing the issue.
Once you find the conflicting plugin, consider replacing it with another plugin with similar features. Keep your plugins updated. Outdated plugins often cause conflicts. Avoid using many plugins as they may slow down your site and cause errors.
Use a staging site to test changes before applying them on your live site. This method keeps your main website safe from issues during troubleshooting.

Credit: www.youtube.com
Frequently Asked Questions
How Do I Upload Divi Theme To WordPress?
To upload Divi, log in to your WordPress dashboard. Go to Appearance > Themes > Add New. Click Upload Theme, select the Divi zip file, and click Install Now. After installation, activate the theme to start using Divi.
What Are The Steps To Activate Divi On WordPress?
After installing Divi, go to Appearance > Themes. Find Divi and click Activate. Next, enter your Elegant Themes API key under Divi > Theme Options to enable updates and support.
Can I Install Divi Without Ftp Access?
Yes, you can install Divi without FTP. Use the WordPress dashboard’s theme upload feature under Appearance > Themes > Add New > Upload Theme. Upload the Divi zip file and activate it.
Do I Need A License Key To Use Divi?
Yes, a valid Elegant Themes license key is required. It unlocks updates, premium support, and full Divi functionality on your WordPress site.
Conclusion
Installing Divi on WordPress is simple and quick. You just need to follow the steps carefully. Upload the Divi theme, activate it, and start customizing your site. Divi’s user-friendly design helps you create beautiful pages easily. Enjoy the flexibility and control it offers for your website.
Keep exploring its features to improve your site over time. This guide makes setting up Divi easy for everyone. Now, your WordPress site looks professional and works well.



