

If you want to give credit where it’s due or showcase multiple voices on your WordPress blog, adding an author is a must. But maybe you’re not sure how to do it the right way.
Don’t worry—you’re in the right place. This guide will walk you through simple, clear steps to add an author to your WordPress blog. By the end, you’ll know exactly how to highlight contributors and make your blog look more professional and trustworthy.
Keep reading, and you’ll have this done in no time!
Set Up User Roles
Setting up user roles is key to managing authors on your WordPress blog. It controls what each user can do. Assigning the right role keeps your site safe and organized.
Choose The Right Role
WordPress has several user roles. Each role has different permissions. For authors, choose the “Author” role. It allows writing and publishing posts. They cannot change site settings or other users.
The “Contributor” role lets users write posts but not publish them. Editors can manage and publish all posts. Admins have full control of the site. Pick roles based on what tasks you want users to do.
Add New Users
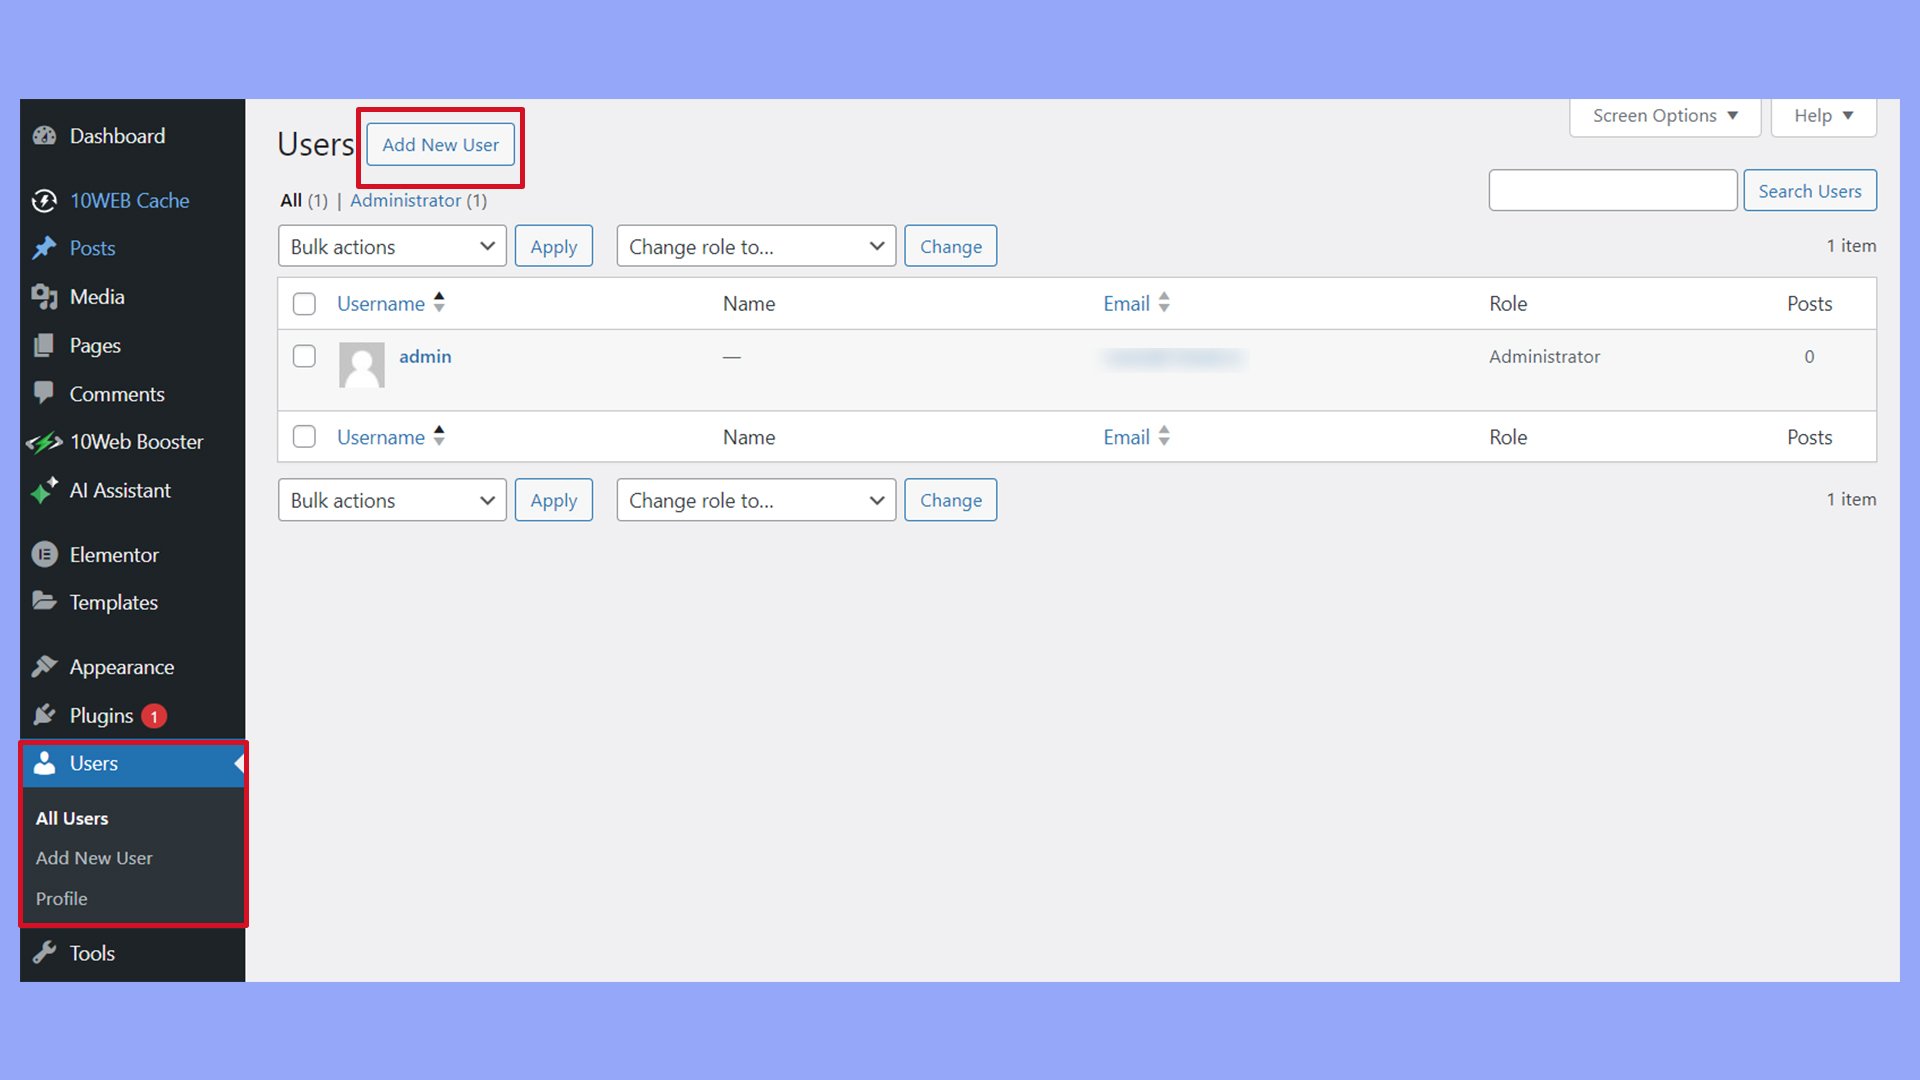
Go to your WordPress dashboard. Click “Users” then “Add New.” Enter the user’s name, email, and username. Set a password or let WordPress create one.
Choose the correct role from the dropdown menu. Click “Add New User” to save. The new author will get an email with login details. They can start writing once they log in.
Credit: 10web.io
Assign Authors To Posts
Assigning authors to posts helps organize your blog and gives credit to contributors. It shows readers who wrote each article and builds trust. WordPress makes this task simple, whether you want to update old posts or create new ones with specific authors.
Edit Existing Posts
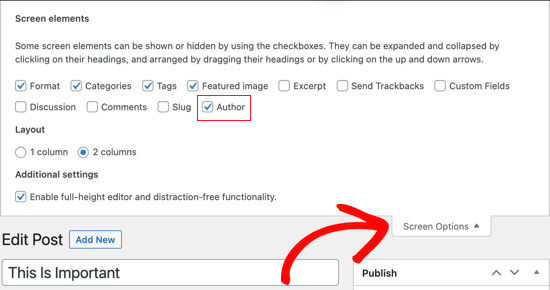
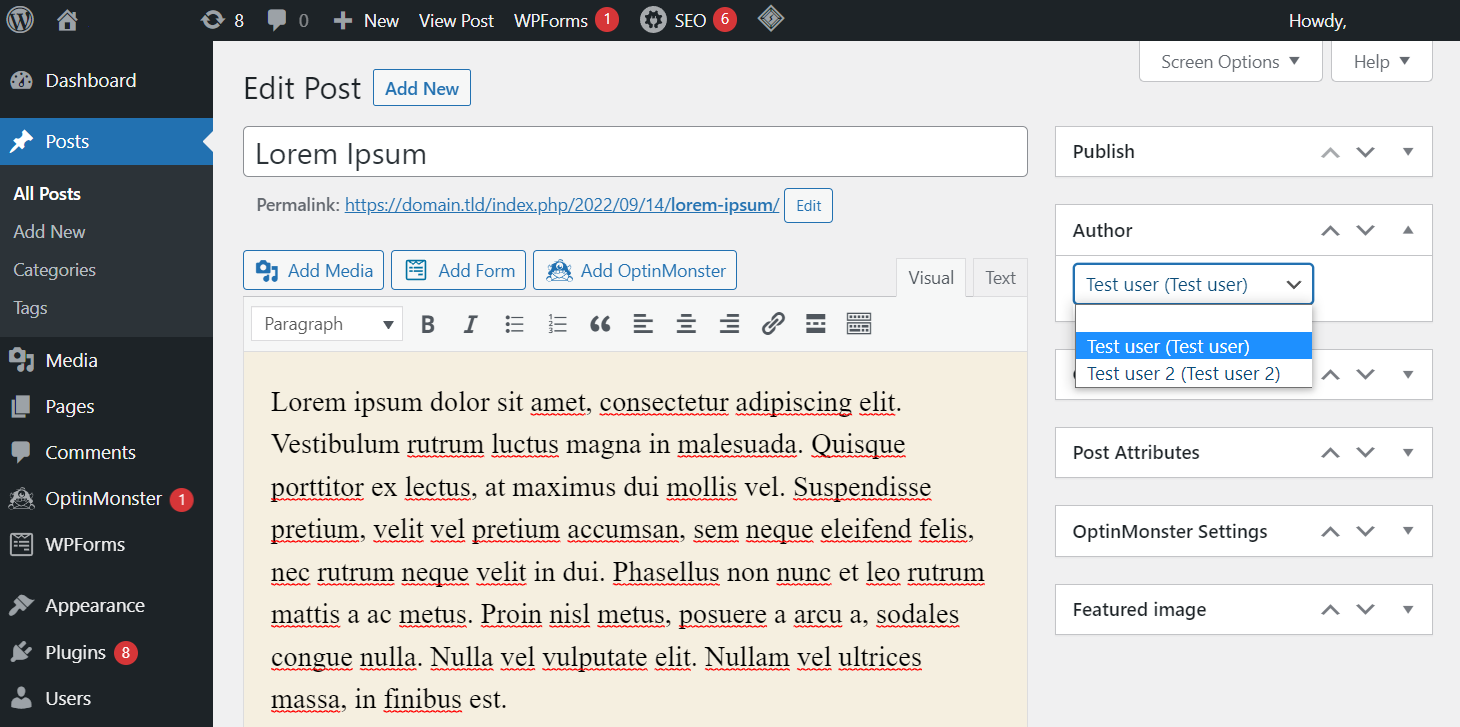
To assign an author to a post already published, open the post in the WordPress editor. Find the “Author” box on the right side or under the “Document” tab. Click the dropdown menu and select the correct author from the list. Save or update the post to apply the change. This process works for both published and draft posts.
Create Posts As Authors
When creating a new post, choose the author before publishing. Start by opening the post editor. Locate the “Author” box, usually on the right or under “Document” settings. Pick the author from the dropdown list. Write your content and publish the post. The selected author will appear as the post’s writer on your blog.
Display Author Info
Showing author information on your WordPress blog helps build trust with readers. It adds a personal touch and lets visitors know who wrote the content. Displaying author info is easy and offers many options. You can use WordPress’s built-in tools or install plugins for more features.
Use Built-in Author Boxes
WordPress themes often include a simple author box below posts. This box shows the author’s name, bio, and sometimes a photo. To use it, fill out your profile in the WordPress dashboard under “Users.” Add your bio and upload a picture. The theme will then display this info automatically. No extra setup is needed. Check if your theme supports author boxes by previewing a post.
Install Author Plugins
Plugins add more style and options for author info. They let you customize the author box layout and add social links. Popular plugins include Simple Author Box and WP Author Bio. Install a plugin from the WordPress plugin directory. Activate it and configure settings to match your blog’s look. Plugins can show multiple authors for guest posts too. They give more control than built-in features.
Credit: www.wpbeginner.com
Manage Multiple Authors
Managing multiple authors on your WordPress blog keeps your content organized. It helps you give credit to all contributors. This section explains easy ways to handle multiple authors effectively.
Enable Guest Authors
Guest authors can write without creating full WordPress accounts. This method keeps your site secure and clean. Use plugins like “Guest Author” to allow guest posts. They let you add author names and bios easily. This way, guest writers get proper recognition on your blog.
Set Up Co-authors
Co-authors share credit for a single post. WordPress plugins like “Co-Authors Plus” make this simple. You can list two or more authors for one article. This feature suits collaborations and group projects. It improves transparency and shows teamwork on your blog.
Troubleshoot Common Issues
Adding an author to your WordPress blog can sometimes cause issues. These problems stop the author name from showing or block access to author settings. Knowing how to fix common problems saves time and keeps your blog professional. Here are simple ways to solve typical author-related issues in WordPress.
Fix Missing Author Names
Sometimes, the author name does not appear on blog posts. This often happens if the author profile is incomplete. Check the user profile in the WordPress dashboard. Make sure the “Display name publicly as” field is filled correctly.
The theme might also hide author names. Switch to a default theme like Twenty Twenty-One to test this. If the author name shows, update or change your theme settings. Check the post’s author box settings in the theme options.
Plugins can also block author names. Deactivate plugins one by one to find the cause. Clear your site cache after changes. This ensures updates show on your blog.
Resolve Permission Errors
Permission errors occur when users lack rights to add or edit authors. Make sure the user role is set to “Author” or higher. Administrators can change roles in the Users section of WordPress.
Sometimes, security plugins limit permissions. Review plugin settings to allow author management. Avoid giving full admin rights unless necessary. Keep roles simple and secure.
File permissions on your server can also cause errors. Use an FTP client to check file permissions. Set them to 644 for files and 755 for folders. Incorrect permissions block WordPress from saving changes.
Credit: www.hostinger.com
Frequently Asked Questions
How Do I Add A New Author In WordPress?
To add a new author, go to WordPress Dashboard > Users > Add New. Fill in the user details, assign the “Author” role, and save. The new author can now create and manage their posts.
Can I Assign Multiple Authors To One WordPress Post?
By default, WordPress supports only one author per post. To assign multiple authors, install a plugin like “Co-Authors Plus. ” This plugin allows you to add and display multiple authors on a single post easily.
How To Change The Author Of An Existing WordPress Post?
Edit the post in WordPress Dashboard, locate the “Author” box on the right sidebar, select the new author from the dropdown, and update the post. The post author will be updated immediately.
What User Roles Can Publish Posts In WordPress?
Authors and Editors can publish posts in WordPress. Authors can publish and manage their own posts. Editors can publish and manage posts created by any user.
Conclusion
Adding an author to your WordPress blog is simple and quick. It helps readers know who writes each post. You can give credit to different writers easily. This also makes your blog more trustworthy. Just follow the steps carefully, and you will have multiple authors in no time.
Keep your blog organized and clear for your audience. Start adding authors today to improve your blog’s look and feel.



