
Are you struggling to make your WordPress posts stand out? Adding a featured image is one of the easiest ways to grab attention and make your content more appealing.
But if you’re not sure how to add a featured image, you might be missing out on a powerful tool to boost your blog’s look and engagement. You’ll learn simple, step-by-step methods to add featured images quickly and effectively. By the end, you’ll know exactly how to make your posts more eye-catching and inviting—ready to attract more readers every time you publish.
Keep reading to unlock this essential WordPress skill!
Why Use Featured Images
Featured images play a key role in WordPress posts. They give your content a visual identity. A good image grabs attention quickly. It makes readers want to explore your post. Let’s explore why using featured images matters.
Boosting Post Appeal
Images make your posts look inviting. A bright, clear photo draws the eye. It breaks up text and adds color. Posts with images feel more lively. Readers often click on posts with pictures first.
Improving Seo
Search engines like posts with images. Properly named images help your SEO score. They make your site easier to find. Alt text on images boosts keyword relevance. This helps your post rank higher on Google.
Enhancing Social Sharing
Featured images improve how posts appear on social media. They create a strong first impression. Posts with images get more shares and clicks. Social platforms display the image alongside your text. This encourages more interaction and traffic.

Credit: ostraining.com
Preparing Your Image
Preparing your image is an important step before setting it as a featured image on WordPress. A well-prepared image looks professional and loads quickly. It also helps your website rank better on search engines. This section explains how to choose the right size, optimize quality, and select file formats for your image.
Choosing The Right Size
Select an image size that fits your website design. Too large images slow down your site. Too small images appear blurry or pixelated. A good size for most featured images is 1200 pixels wide. Keep the height proportional to avoid stretching. Check your theme’s recommended image size and follow it.
Optimizing Image Quality
Balance quality and file size. High-quality images look clear but can be large in size. Large files increase page loading time. Use tools to compress images without losing quality. Save images with a resolution of 72 dpi for web use. This keeps images sharp and fast to load.
Selecting File Formats
Choose the best file format for your image type. JPEG works well for photos with many colors. PNG is better for images with transparent backgrounds or sharp edges. WebP offers good compression and quality but may not be supported by all browsers. Use common formats to ensure your image displays correctly.
Adding Featured Image In Classic Editor
Adding a featured image in the Classic Editor is simple. It helps your posts look attractive and professional. The featured image appears on your blog homepage and social media shares. This guide shows the easy steps to add or change a featured image.
Locating The Featured Image Box
Open the post in the Classic Editor. Look at the right side of the screen. Scroll down if needed. Find the box labeled “Featured Image.” This box may be hidden if your screen is small. Click “Screen Options” at the top right and check “Featured Image” to show it.
Uploading Or Selecting An Image
Click the “Set featured image” link inside the box. The WordPress media library opens. Choose an image already uploaded or click “Upload Files” to add a new one. Select the image you want. Make sure it fits your post theme and size needs.
Setting And Updating
After selecting the image, click the “Set featured image” button. The image now shows in the Featured Image box. Save your post by clicking “Update” or “Publish.” Your featured image is ready and will display with your post.
Credit: www.hostinger.com
Adding Featured Image In Gutenberg Editor
Adding a featured image in the Gutenberg editor is simple and quick. This image helps catch readers’ attention and shows what your post is about. You can set a featured image while creating or editing a post. The Gutenberg editor makes this process clear and easy for everyone.
Accessing The Featured Image Panel
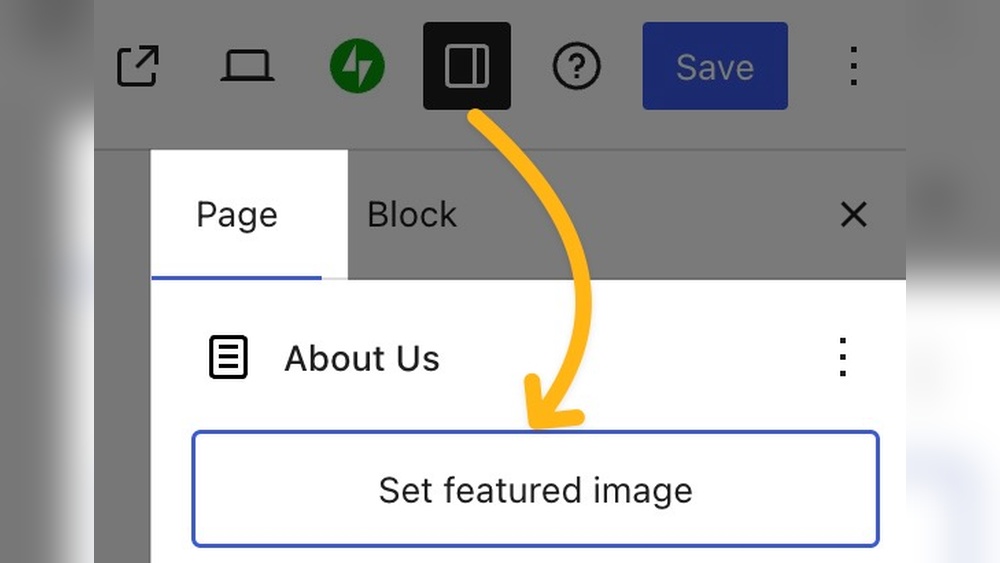
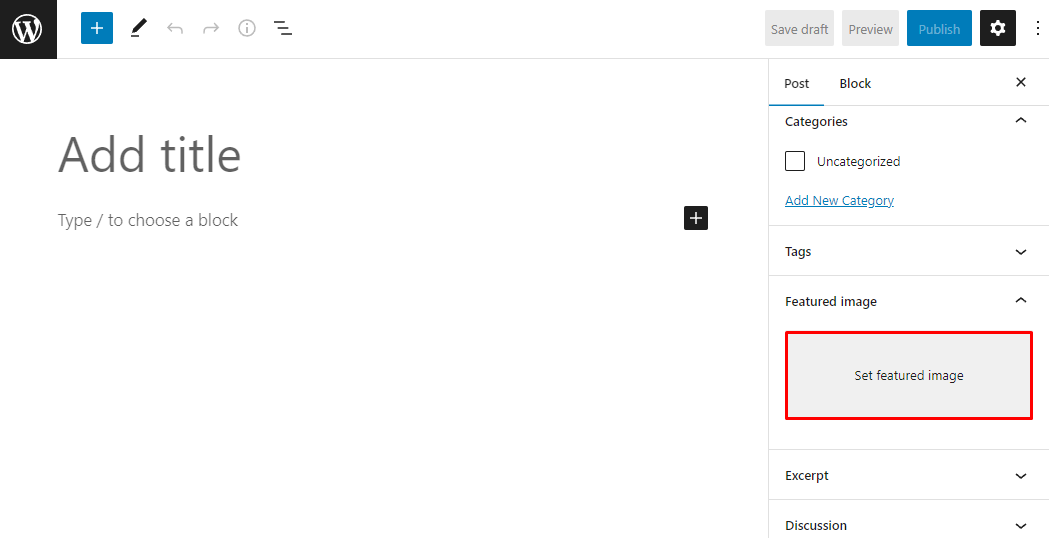
Open your post in the Gutenberg editor. Look on the right side of the screen. Find the panel labeled “Featured Image.” If you do not see it, click the gear icon at the top right to open the settings. Scroll down to find the panel.
Uploading Or Choosing Image
Click the “Set featured image” button inside the panel. You can upload a new image from your computer. Or select an existing image from the media library. Choose a clear, relevant image that fits your post topic well. Then click the “Set featured image” button at the bottom right.
Previewing The Featured Image
Once set, the image appears in the Featured Image panel. You can see how it looks before publishing. To check how it looks on your site, use the “Preview” button at the top. Make sure the image fits and looks good with your post layout.
Troubleshooting Common Issues
Troubleshooting common issues with featured images helps keep your WordPress site looking great. Sometimes, images do not show or appear wrong. These problems can confuse many users. Identifying the cause quickly helps fix the issue fast.
Featured Image Not Showing
Check if the featured image is set correctly in the post editor. Sometimes, the image is missing because it was not selected. Clear your browser cache and reload the page. Sometimes, the image appears after a refresh. Also, check your theme settings. Some themes hide featured images by default.
Image Size Problems
Images that are too large or too small can look odd. WordPress resizes images but sometimes the size settings cause problems. Use images that match your theme’s recommended size. You can resize images with simple tools before uploading. Avoid very large files to keep your site fast.
Plugin Conflicts
Plugins can interfere with how featured images display. Disable all plugins and check if the image appears. If it works, enable plugins one by one to find the problem. Update all plugins and WordPress to the latest versions. Sometimes, outdated plugins cause conflicts with images.
Tips For Stunning Featured Images
Creating stunning featured images can boost your blog’s appeal. They catch the reader’s eye and make your content stand out. Use simple tips to make your images look professional and inviting.
Good featured images help visitors understand your post quickly. They also improve your website’s look and feel. Follow these tips for better images on your WordPress site.
Using High-quality Photos
Choose clear and sharp photos. Blurry or pixelated images look unprofessional. High-quality photos create trust and interest. Use images with good lighting and focus. Avoid low-resolution pictures that can distract readers.
Consistent Style And Branding
Keep the style similar across all images. Use the same color tones and filters. This creates a uniform look for your blog. Add your logo or watermark subtly. Consistency builds recognition and trust with readers.
Incorporating Text Or Graphics
Add simple text to highlight the post’s topic. Use clear fonts and easy-to-read sizes. Graphics can make images more informative and fun. Avoid cluttering the image with too many elements. Keep it clean and focused on the main message.

Credit: www.hostinger.com
Frequently Asked Questions
How Do I Set A Featured Image In WordPress?
To set a featured image, open your post editor. Look for the “Featured Image” box on the right. Click “Set Featured Image,” upload or choose an image, then click “Set Featured Image. ” Finally, update or publish your post.
Why Is A Featured Image Important In WordPress?
A featured image enhances post visibility and attracts clicks. It appears in archives, social shares, and search results. It helps readers identify content and improves your site’s visual appeal and SEO performance.
Can I Change The Featured Image After Publishing?
Yes, you can change it anytime. Edit your post, click the “Featured Image” box, select a new image, and save the changes. The new image will replace the old one on your site.
What Image Size Works Best For WordPress Featured Images?
Use images at least 1200×628 pixels for best display. This size works well on most themes and social media platforms. Always check your theme’s recommended dimensions for optimal results.
Conclusion
Adding a featured image on WordPress is simple and quick. It helps your posts look more attractive and catch readers’ attention. Just follow the steps, and your blog will stand out. Keep practicing to get comfortable with the process. This small change can make your site more engaging and professional.
Try adding images to different posts and see the difference yourself. It’s a useful skill that anyone can learn easily.


