Are you looking to make your WordPress site more user-friendly and professional? Adding a footer menu is one of the simplest ways to improve navigation and keep visitors engaged.
Imagine giving your readers easy access to important links no matter where they are on your site. This small change can boost your site’s usability and help guide visitors exactly where you want them to go. You’ll learn step-by-step how to add a footer menu in WordPress quickly and without any hassle.
Let’s get started and make your website even better for your audience!
Choose The Right Theme
Choosing the right theme is key for adding a footer menu in WordPress. The theme controls how your footer looks and works. Some themes offer built-in support for footer menus. Others need extra steps to add one. Picking a theme with good footer options saves time. It also makes your site look professional.
Focus on themes designed for customization. These themes let you easily change the footer layout. They often include footer widgets or menu areas. This flexibility helps you create a footer menu that fits your site’s style.
Check Footer Menu Support
Not all themes support footer menus. Check if the theme has a footer menu area. You can find this in the theme description or documentation. Some themes list supported menu locations. Others show footer menu options in the customizer. A theme with footer menu support lets you assign menus easily. This makes adding links to the footer simple and fast.
Explore Theme Options
The theme options panel often controls footer settings. Look for features like footer layout and menu style. Some themes allow multiple footer menus or widget areas. Others offer simple footer menus with basic design. Pick a theme that matches your needs. Test how the footer looks on different devices. A flexible theme ensures your footer menu works well everywhere.

Credit: www.youtube.com
Create A New Menu
Creating a new footer menu in WordPress is simple and quick. A custom menu helps visitors find important links easily. Follow these steps to build a menu tailored to your site’s needs.
Access WordPress Menus
Start by logging into your WordPress dashboard. On the left side, find the “Appearance” section. Click on “Menus” to open the menu editor. This area controls all your site’s navigation menus.
Add Menu Items
Next, choose the pages, posts, or custom links to include. Use the checkboxes to select items. Click “Add to Menu” to move them into your new menu. Arrange the order by dragging items up or down.
Save Your Menu
After adding and arranging items, name your menu clearly. Click the “Save Menu” button at the top right. Your new menu is ready to assign to the footer area in the next step.
Assign Menu To Footer
Assigning a menu to the footer is a key step in customizing your WordPress site. It ensures visitors can easily find important links at the bottom of every page. This process is simple and takes only a few clicks.
Follow the steps below to assign your menu to the footer area of your website.
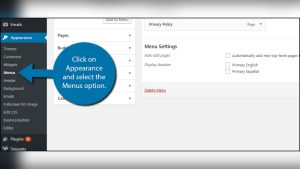
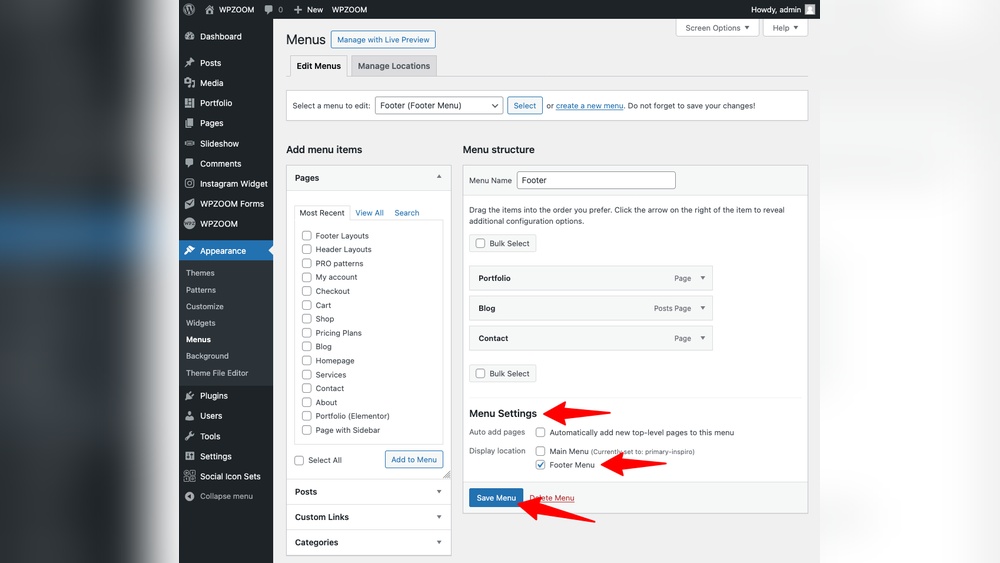
Locate Footer Menu Location
Start by logging into your WordPress dashboard. Go to Appearance and then Menus. Look for the Menu Settings section at the bottom.
Here, you will find various display locations. Find the option labeled Footer Menu or similar, depending on your theme. This is where you assign your menu to the footer area.
Set Your Menu
Choose the menu you want to show in the footer from the dropdown list. If you do not have a menu yet, create one by clicking Create a new menu.
After selecting your menu, check the box next to the footer menu location. Click Save Menu to apply changes. Your footer menu will now appear on the site’s footer section.
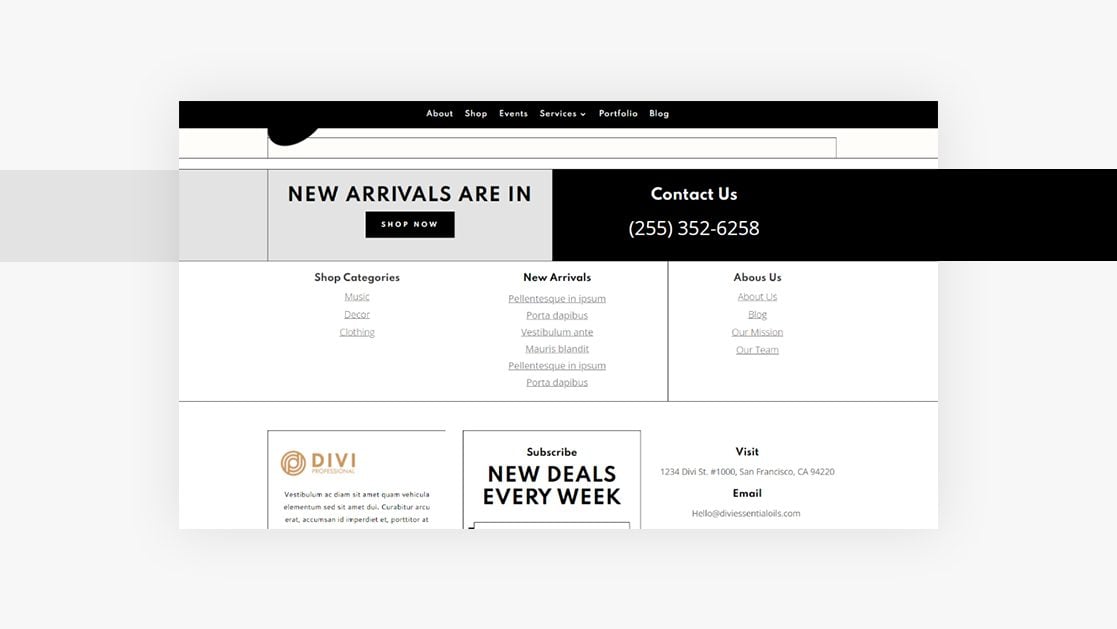
Customize Footer Menu Appearance
Customizing the footer menu appearance helps make your website look professional. It also improves user experience by making navigation easier. You can change colors, fonts, and layout to match your brand style. WordPress offers simple tools to do this without coding skills.
Use Customizer Settings
The WordPress Customizer lets you change the footer menu look quickly. Go to Appearance > Customize in your dashboard. Find the Footer or Menu section to see available options. You can adjust colors, font size, and spacing here. Changes show live, so you see updates instantly. This method suits beginners who want fast results without editing code.
Add Custom Css
Custom CSS gives you more control over the footer menu style. Use it to change styles not available in the Customizer. Go to Appearance > Customize > Additional CSS. Write CSS code targeting the footer menu classes. For example, change link colors or add hover effects. Save changes and refresh your site to see updates. This option is ideal if you know basic CSS or want unique designs.
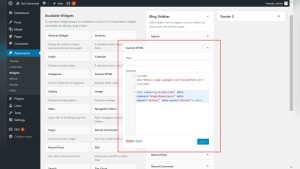
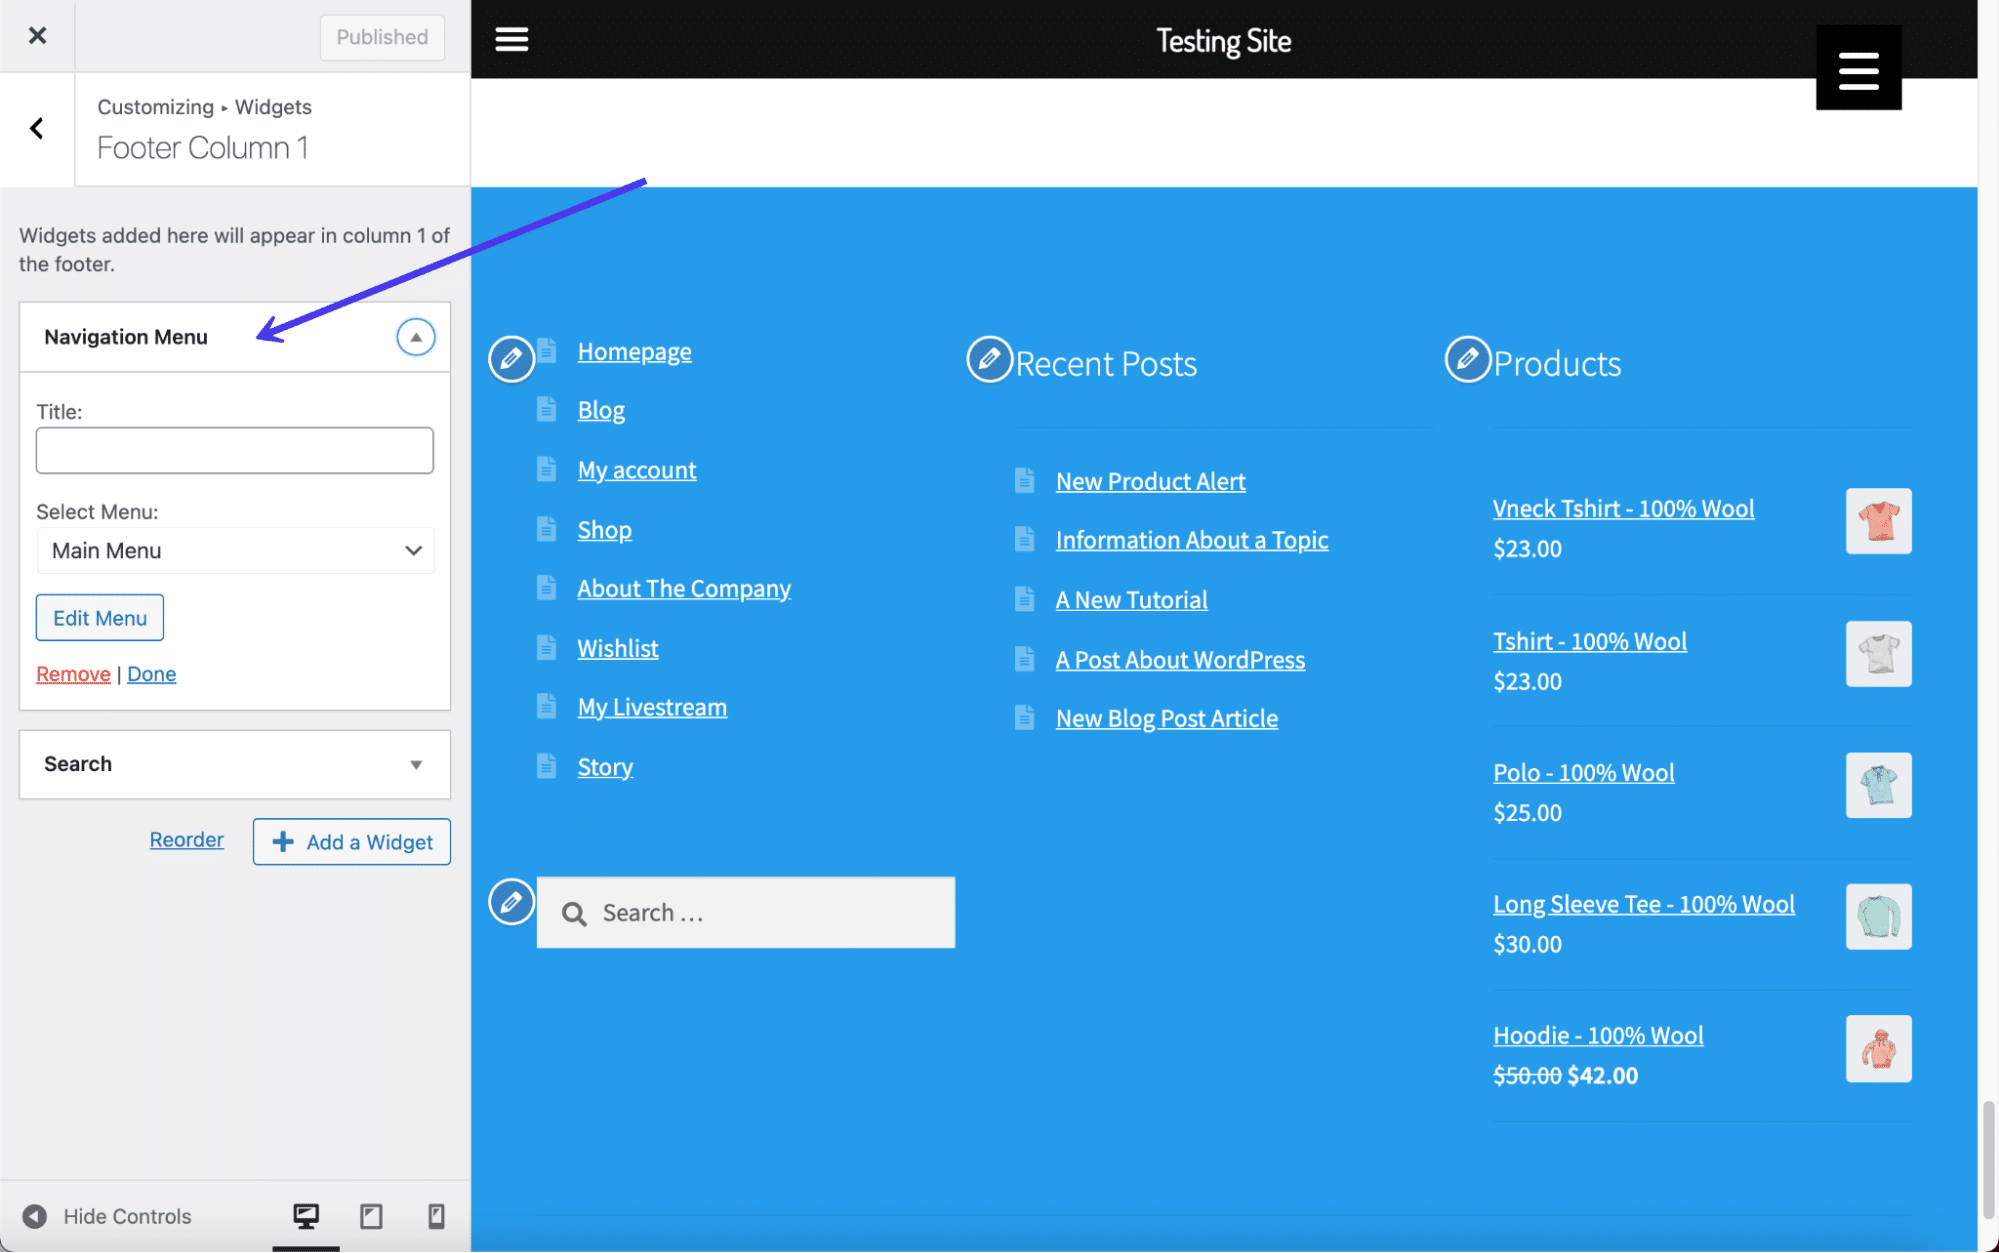
Add Widgets To Footer Area
Adding widgets to the footer area helps enhance your website’s navigation and design. Widgets let you place menus, text, images, and other elements in the footer. This makes your site more user-friendly and organized.
WordPress makes it easy to add widgets to the footer. You just need to find the right widget areas and select the widgets you want. Let’s explore the steps to add navigation widgets in your footer.
Find Footer Widget Areas
First, go to your WordPress dashboard. Navigate to Appearance > Widgets. Here, you will see available widget areas.
Look for the footer widget areas. They might be named Footer 1, Footer 2, or something similar. Each theme can have different footer widget sections.
Choose the footer widget area where you want to add content. This is where your new widgets will appear on the site.
Add Navigation Widgets
Next, find the Navigation Menu widget in the list of available widgets. Drag and drop it into the chosen footer widget area.
Once placed, select the menu you want to show in the footer. You can create a new menu by going to Appearance > Menus.
Customize the widget title if needed. This title appears above the menu in the footer.
Save your changes. Check your website to see the footer menu live and working.
Credit: www.elegantthemes.com
Test Footer Menu On Devices
Testing the footer menu on different devices is crucial for a smooth user experience. It helps ensure that your menu looks good and works well on all screen sizes. This step avoids user frustration and keeps visitors engaged. Testing is not just a quick glance but a detailed check on various devices.
Check Responsiveness
Open your website on desktop, tablet, and smartphone screens. Notice how the footer menu adjusts to each size. The menu should be easy to read and navigate. Links must be clickable without zooming in. Use browser tools like Chrome DevTools to simulate different devices quickly. Test landscape and portrait modes on mobile devices as well.
Fix Common Issues
Look for problems like overlapping text or hidden menu items. Check if the font size is too small or too large on certain screens. If links are too close, adjust spacing to avoid accidental clicks. Fix alignment issues to keep the menu tidy. Use CSS media queries to customize styles for different devices. Clear cache after changes to see updates immediately.
Use Plugins For Advanced Menus
Using plugins for advanced footer menus in WordPress makes customization easier. Plugins offer extra features not found in the basic menu options. They help create stylish, functional, and user-friendly footer menus.
Plugins allow you to add icons, multiple columns, and custom styles. You can control menu behavior on different devices. This flexibility improves site navigation and user experience.
Choose Suitable Plugins
Start by finding plugins that focus on menu enhancements. Check their ratings and reviews to ensure reliability. Look for plugins updated recently to match the latest WordPress version. Popular options include “Max Mega Menu” and “WP Mega Menu”. Pick one that fits your needs and skill level.
Configure Plugin Settings
After installing, activate the plugin from your dashboard. Open the plugin’s settings panel to customize the menu appearance. Set layout options like columns, colors, and fonts. Add icons or images if the plugin supports them. Test the menu on desktop and mobile to check responsiveness. Save changes and clear cache to see updates live.
Credit: kinsta.com
Frequently Asked Questions
How Do I Create A Footer Menu In WordPress?
Go to Appearance > Menus in your dashboard. Click “Create a new menu,” name it, and add desired pages. Assign the menu to the footer location and save changes.
Can I Customize Footer Menu Links In WordPress?
Yes, you can add, remove, or reorder links in the footer menu. Use the drag-and-drop feature within the Menus section to customize your links easily.
What Themes Support Footer Menu Placement?
Most modern WordPress themes support footer menus. Check your theme’s documentation or Appearance > Menus to confirm if a footer menu location exists.
How To Style A Footer Menu In WordPress?
Use the Customizer or add custom CSS to style your footer menu. Many themes offer built-in options for colors, fonts, and layout adjustments.
Conclusion
Adding a footer menu in WordPress helps users find important links easily. It improves site navigation and looks professional. You can create and customize menus quickly from your dashboard. Choose the best pages or categories to include. Remember to check how the footer looks on mobile devices too.
A clear footer menu makes your website friendlier and more organized. Start adding your footer menu today and make your site better for visitors.