
Are you looking for a safe space to test changes on your WordPress website without risking your live site? Accessing a WordPress staging site is the perfect solution.
It lets you try new designs, plugins, or updates without affecting your visitors. But how do you get there? In this guide, you’ll learn exactly how to access your WordPress staging site quickly and easily. Keep reading to unlock the simple steps that will give you full control over your site’s testing environment.
Your website’s future updates depend on it!
Benefits Of A Staging Site
A staging site is a copy of your live WordPress website. It lets you test changes without affecting real users. This setup helps maintain your site’s quality and performance. Using a staging site reduces risks and improves your workflow. Here are some key benefits of having a staging site.
Safe Testing Environment
A staging site creates a safe space for experiments. You can try new plugins, themes, or updates. Any mistakes happen only on the staging site, not the live one. This safety ensures your visitors always see a smooth website. It protects your site’s reputation and keeps users happy.
Preventing Live Site Errors
Making changes directly on a live site can cause errors. These errors may break the site or make it slow. A staging site helps catch problems before they reach your visitors. You can fix bugs and test features carefully. This process keeps your live site stable and reliable.
Streamlining Development Workflow
Staging sites improve teamwork and speed up development. Developers and designers can work without interrupting the live site. They test ideas and share feedback easily. This approach saves time and avoids confusion. It leads to faster, better updates for your website.
Creating A WordPress Staging Site
Creating a WordPress staging site lets you test changes safely. It is a copy of your live website where you can try new features. This helps avoid breaking your live site. Setting up a staging site can be simple or a bit technical. Choose the method that fits your skills and resources.
Using Hosting Provider Tools
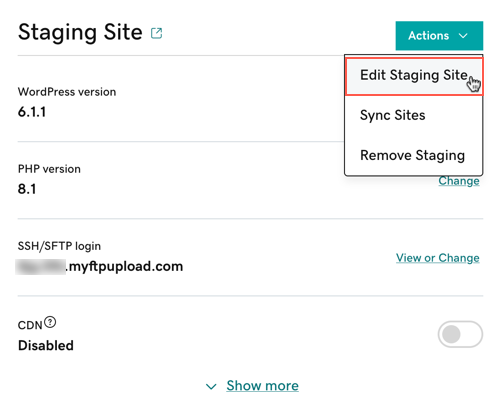
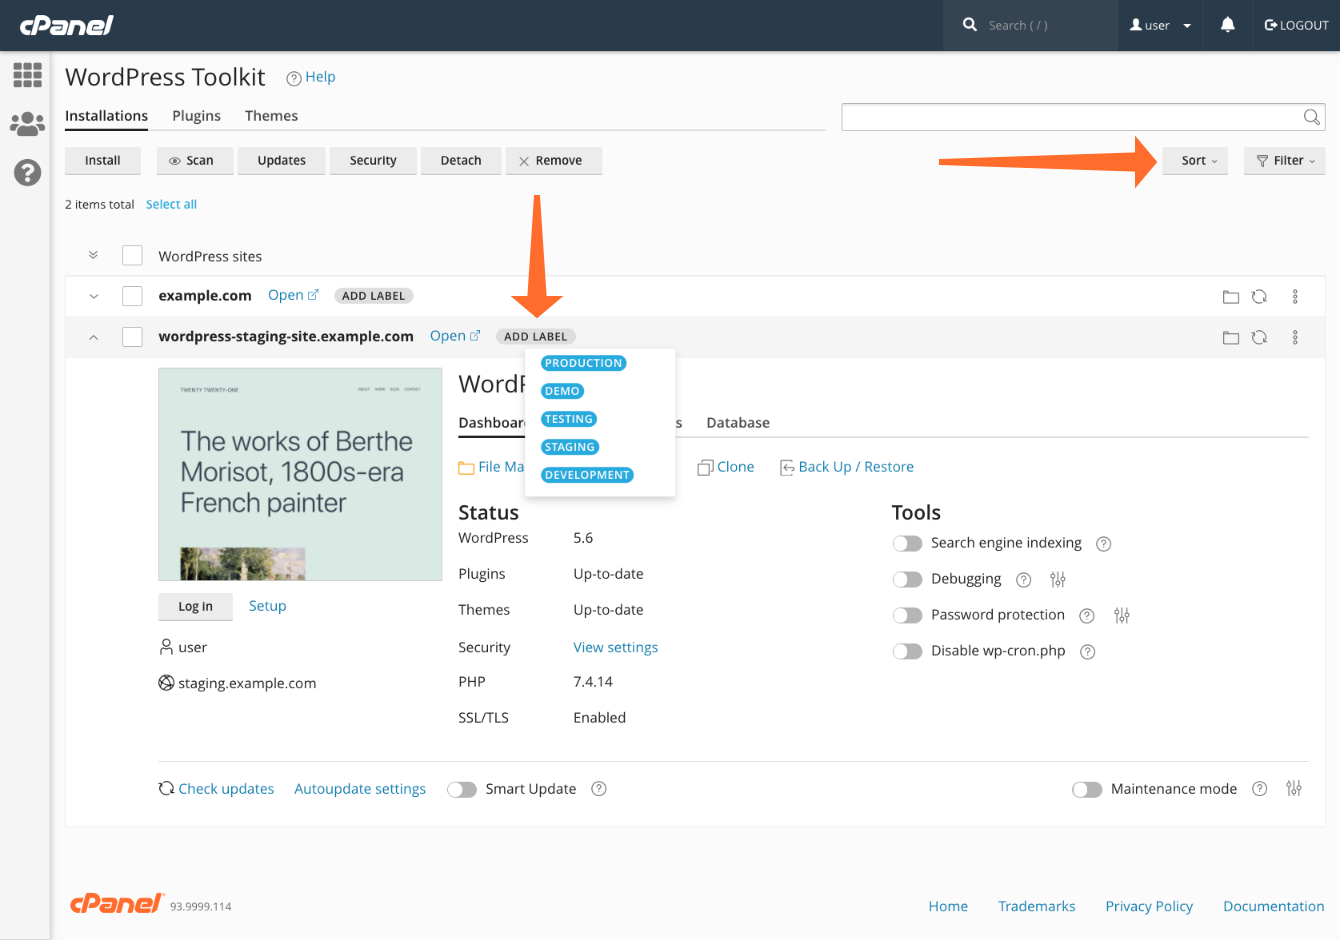
Many hosting providers offer built-in tools for staging sites. These tools create a copy of your site with a few clicks. They handle the setup and configuration automatically. You can access the staging site through your hosting dashboard. This method is fast and easy for beginners. No coding or manual steps are needed.
Manual Setup Via Subdomain
Manual setup requires creating a subdomain for your staging site. For example, staging.yoursite.com can host the test version. You need access to your hosting control panel. Copy your live site files and database to the subdomain. Adjust the configuration files to point to the new database. This method offers more control but needs technical skills.
Plugins For Staging Sites
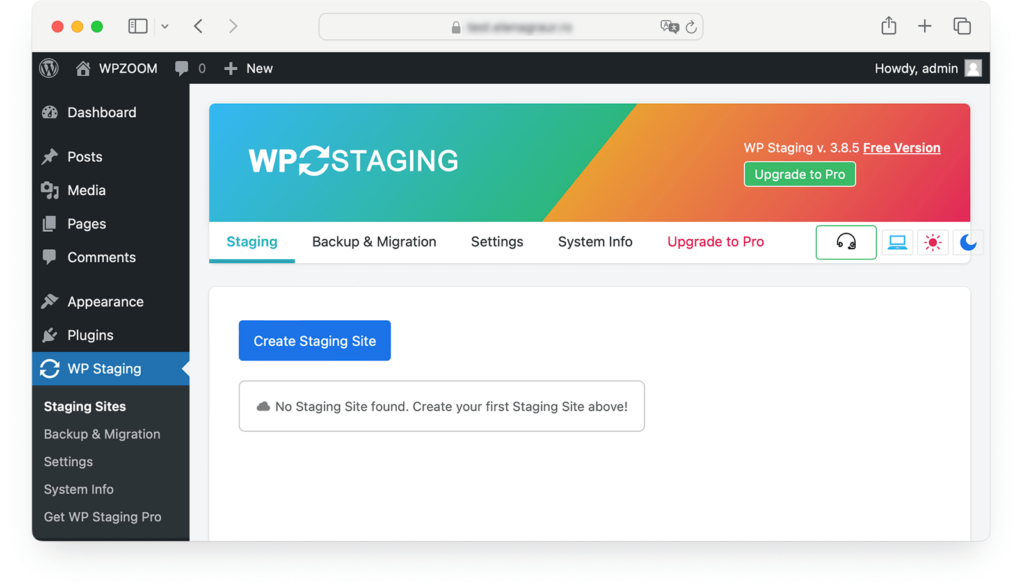
WordPress has plugins designed specifically for staging. These plugins clone your site inside the WordPress dashboard. They simplify copying, syncing, and pushing changes live. Popular plugins include WP Staging and Duplicator. Using plugins is easier than manual setup but slower than host tools. Choose a plugin that matches your needs and budget.
Accessing The Staging Site
Accessing your WordPress staging site lets you test changes safely. It creates a copy of your live site for experiments. This way, your real visitors see only finished updates. Knowing how to reach the staging site is essential for smooth work.
Locating The Staging Url
Your staging site usually has a special URL. It looks like your main site address but with extra words. Common additions include “staging” or “dev” before the domain name. Check your hosting provider’s dashboard or email for this URL. Save it for quick access later.
Login Credentials And Permissions
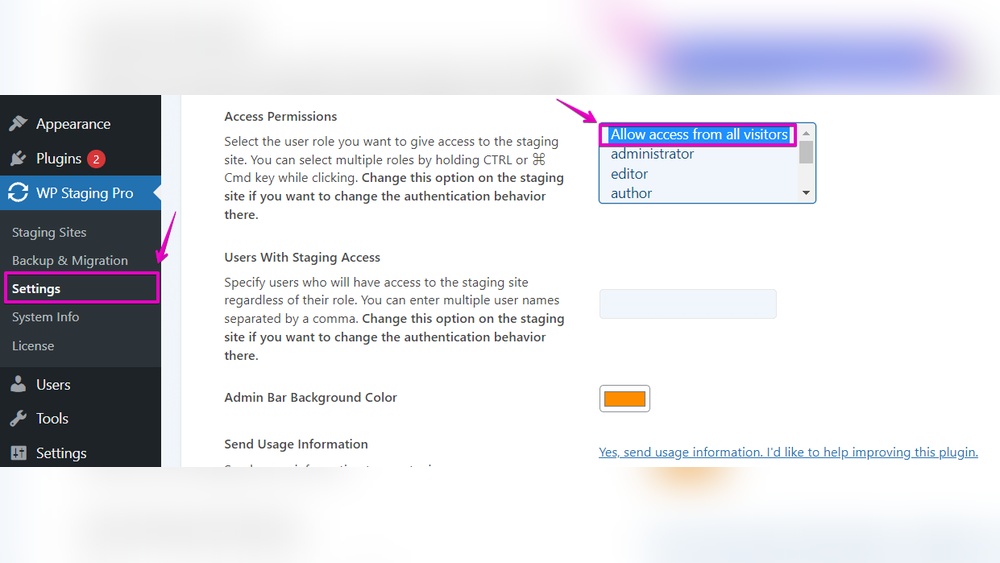
Use the same username and password as your live site unless told otherwise. Sometimes, hosts create new login details for staging sites. Confirm these details from your hosting support or setup guide. Ensure your user role allows editing to test changes fully.
Troubleshooting Access Issues
Access problems can happen. Clear your browser cache and try again. Check if your internet connection is stable. Some staging sites restrict access by IP address. Contact your host to whitelist your IP if needed. Reset passwords if login fails repeatedly.
Credit: www.godaddy.com
Testing Changes On Staging
Testing changes on a WordPress staging site is a safe way to update your website. It lets you try new things without affecting your live site. This process helps avoid errors and downtime.
Using a staging site, you can explore updates and fixes. It gives you a clear view of how changes work. You can be sure that everything runs smoothly before going live.
Theme And Plugin Updates
Update themes and plugins on the staging site first. This prevents breaking your live site. Check if the new versions work well with your setup. Look for any visual or functional issues. Fix problems before applying changes to your main site.
Content Modifications
Make content changes on the staging site. Edit pages, posts, or media without risk. Preview how the changes appear to visitors. Ensure formatting and links work correctly. Confirm that content fits your website style.
Performance And Compatibility Checks
Test site speed and loading times on staging. Check if new updates affect performance. Verify compatibility with browsers and devices. Identify any slowdowns or errors. Optimize your site before updating the live version.
Pushing Changes Live
Pushing changes live means moving your updates from the staging site to the main website. This step makes your new content and features visible to visitors. It requires care to avoid errors or data loss. Follow a clear process to ensure smooth deployment and keep your site running well.
Backup Before Deployment
Create a full backup of your live site first. This includes files and databases. Backups protect your data if something goes wrong during deployment. Use reliable backup plugins or your hosting control panel. Save the backup in a safe location. This step gives you a way to restore the site quickly.
Merging Staging To Production
Transfer your changes from staging to the live site carefully. Use tools like WordPress plugins or your hosting panel. Check that all files, themes, and plugins are updated. Avoid overwriting important data accidentally. Keep the site in maintenance mode during the merge. This prevents visitors from seeing incomplete updates.
Post-deployment Testing
After pushing changes live, test your website thoroughly. Check all pages, forms, and links for errors. Look for layout or loading issues. Test on different devices and browsers. Fix any problems immediately to avoid a bad user experience. Regular testing keeps your site healthy and user-friendly.
Credit: www.cpanel.net
Best Practices For Staging Sites
Maintaining a WordPress staging site requires careful attention to ensure smooth development and testing. Best practices help keep the site safe, fast, and organized. Following these guidelines improves your workflow and protects your live website.
Regular Updates
Keep your staging site updated with the latest WordPress version. Update all themes and plugins regularly. This prevents bugs and security issues. Test updates first on the staging site before applying them to the live site.
Security Measures
Protect your staging site with strong passwords and limited access. Use HTTPS to secure data transfer. Disable search engines from indexing the staging environment to avoid duplicate content problems.
Storage And Cleanup
Monitor storage space to avoid slowdowns. Remove old backups and unused files regularly. Clean up test data after completing your development tasks. This keeps the staging site efficient and easy to manage.
Credit: www.wpzoom.com
Frequently Asked Questions
What Is A WordPress Staging Site?
A WordPress staging site is a clone of your live website. It lets you test changes safely before going live. This prevents errors and downtime. It’s useful for updates, design tweaks, and plugin testing.
How Do I Access My WordPress Staging Site?
Access your staging site via your hosting control panel or a staging plugin. Login credentials are similar to your live site. Use the staging URL provided by your host or plugin.
Can I Push Changes From Staging To Live Site?
Yes, most staging tools allow pushing changes live. This process updates your live site with tested modifications. Always backup your live site before pushing to avoid data loss.
Is A WordPress Staging Site Secure?
Yes, a staging site is usually password-protected. It’s isolated from your live site to prevent unauthorized access. Hosting providers add extra security measures for staging environments.
Conclusion
Accessing a WordPress staging site is simple and useful. It helps you test changes without risk. You can check new features or updates safely. Keep your main site safe from errors. Always use a secure method to log in. Remember, staging sites are for testing only.
Make sure to delete or update the staging site after use. This keeps your website clean and secure. Start using a staging site for better website management today.



