

Are you ready to start accepting payments on your WordPress WooCommerce store but don’t know where to begin? Adding a payment method might seem tricky at first, but it’s simpler than you think.
In this guide, you’ll learn step-by-step how to set up payment options that work best for your customers and boost your sales. By the end, you’ll have a smooth, secure checkout process that keeps buyers coming back. Let’s dive in and make your online store payment-ready!
Credit: www.tmdhosting.com
Choose A Payment Gateway
Choosing the right payment gateway is key to a smooth checkout process. It affects how customers pay and how you get paid. A good gateway keeps payments secure and easy for buyers. It also fits well with your WooCommerce store. Take time to pick one that matches your needs and budget.
Popular Payment Gateways
PayPal is a common choice. It works worldwide and is easy to set up. Stripe is also popular for its simple design and fast payments. Square offers good options for online and physical stores. Authorize.Net is trusted by many businesses for security. Each gateway has features suited to different stores.
Factors To Consider
Check transaction fees. Lower fees save money in the long run. Look for security features like fraud protection. Make sure the gateway supports your country and currency. Consider how easy it is to use for customers. Also, think about how well it integrates with WooCommerce. Customer support is important too. Choose a gateway that helps quickly when issues arise.
Install Payment Gateway Plugin
Installing a payment gateway plugin is a key step to accept payments on your WooCommerce store. This plugin connects your site to payment services like PayPal, Stripe, or others. It helps process payments safely and smoothly. Let’s explore how to find and install the right plugin for your store.
Finding The Plugin
Start by visiting the WordPress plugin directory. Use the search bar and type the name of the payment gateway you want. For example, type “Stripe” or “PayPal.” Look for plugins that have good reviews and many active installations. Check the last update date to ensure the plugin is current. Read the plugin description to confirm it fits your needs.
Plugin Installation Steps
After choosing a plugin, click the “Install Now” button. WordPress will download and prepare it for use. Once installed, click “Activate” to enable the plugin on your site. Next, go to WooCommerce settings and find the payment tab. Locate the new payment gateway and click to configure it. Enter your account details and save the settings. Your payment method is now ready to use on your store.
Configure Payment Settings
Configuring payment settings is a key step in setting up WooCommerce. This process ensures your customers can pay smoothly. Proper setup helps avoid payment errors and boosts trust.
Start by accessing the payment settings in WooCommerce. Then, enter your payment gateway details. Finally, enable the payment methods you want to offer.
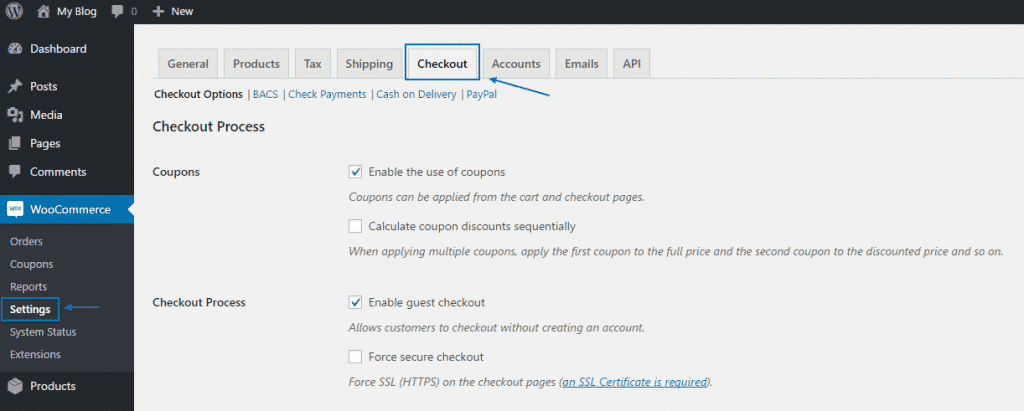
Accessing Woocommerce Settings
Log in to your WordPress dashboard. From the sidebar, click on WooCommerce. Then select Settings. Navigate to the Payments tab. This section shows all available payment options.
Entering Api Credentials
Each payment gateway requires API credentials. These include keys or tokens from your payment provider. Find these details in your payment account dashboard. Enter them carefully in the corresponding fields. Double-check for typos to avoid connection errors.
Enabling Payment Methods
In the Payments tab, toggle the payment methods on. Choose options like PayPal, Stripe, or bank transfer. Click Save changes at the bottom. Your site will now accept payments through the enabled methods.

Credit: woocommerce.com
Test The Payment Method
Testing the payment method is a key step after adding it to WooCommerce. It helps ensure the payment process works smoothly for your customers. Testing avoids issues that may stop sales or cause confusion.
Testing also confirms that payments go through securely. It protects both you and your buyers from errors or fraud. This step gives you confidence before going live with real transactions.
Using Sandbox Mode
Sandbox mode lets you test payments without using real money. Many payment gateways offer this feature. It creates a safe environment to try payments and check how they work.
Enable sandbox mode in your payment gateway settings. Use test account details or cards provided by the gateway. This helps simulate transactions without any risk.
Watch for errors or unexpected results. Fix any problems before switching off sandbox mode. This step saves time and prevents customer complaints later.
Placing A Test Order
Place a test order on your WooCommerce store. Choose the new payment method during checkout. Complete the order to see if the payment processes correctly.
Check if order status updates properly after payment. Confirm emails are sent to both you and the buyer. This confirms the entire system works as expected.
Try different payment scenarios, such as successful and failed payments. This ensures your store handles all cases smoothly. Testing builds trust in your online store’s payment system.
Troubleshoot Common Issues
Adding a payment method in WooCommerce can sometimes bring up issues. These problems can stop your customers from paying easily. Troubleshooting these common issues helps keep your store running smoothly. This section explains how to fix some typical errors.
Plugin Conflicts
Plugins can clash with each other. This causes payment options to fail. Disable other plugins one by one to find the problem. Check if the payment method works after each disable. Updating all plugins also helps. Always keep WooCommerce and payment plugins updated.
Api Errors
API errors happen when WooCommerce cannot connect to the payment gateway. Check your API keys in WooCommerce settings. Make sure they match the keys from your payment provider. Also, check for any IP restrictions set by the payment gateway. Test the connection to confirm it works.
Payment Failures
Payments can fail for many reasons. Incorrect card details, expired cards, or insufficient funds are common causes. Ask customers to double-check their information. Review your payment gateway logs to identify errors. Clear cache and cookies from the browser as well. Always keep your SSL certificate valid for secure payments.

Credit: themegrill.com
Frequently Asked Questions
How Do I Add A Payment Method In Woocommerce?
To add a payment method, go to WooCommerce > Settings > Payments. Enable your preferred gateway and configure its settings. Save changes to activate it on your store.
Which Payment Gateways Are Supported By Woocommerce?
WooCommerce supports PayPal, Stripe, Square, bank transfers, and many others. You can also add custom gateways via plugins for more options.
Can I Accept Multiple Payment Methods In Woocommerce?
Yes, WooCommerce allows multiple payment methods. Enable and configure each desired gateway in the Payments tab to offer customers various options.
Is It Necessary To Install Plugins For Payment Gateways?
Some gateways like PayPal are built-in, but others require plugins. Install the relevant plugin to add and configure new payment methods easily.
Conclusion
Adding a payment method in WooCommerce is simple and fast. Just follow the steps carefully to avoid errors. Choose the payment option that suits your store and customers best. Test the method to ensure it works before going live. Keep your payment methods updated for smooth transactions.
This helps build trust and improves sales. A well-set payment system makes shopping easy and secure. Start today to offer better payment choices in your WooCommerce store.


