

Want to make your WordPress site more interactive and collect valuable information from your visitors? Adding a form to your WordPress page is one of the easiest and most effective ways to do that.
Whether you need a contact form, survey, or subscription signup, the right form can boost engagement and help you connect with your audience. You’ll learn simple, step-by-step instructions to add a form to your WordPress page—no technical skills needed. Keep reading, and by the end, you’ll have a fully functional form ready to capture the information that matters most to you.
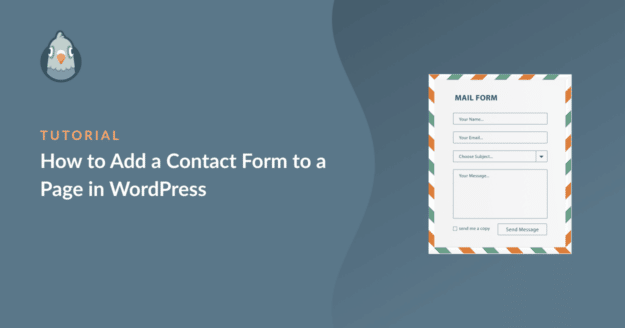
Credit: wpmailsmtp.com
Choosing The Right Form Plugin
Choosing the right form plugin is key to creating a smooth user experience. The plugin should fit your needs and be easy to use. It affects how visitors interact with your site. A good plugin saves time and reduces frustration.
Finding the right plugin means knowing what features matter most. Some plugins are simple, while others offer many options. Consider your site’s goals and the type of forms you want to create.
Popular Form Plugins For WordPress
Contact Form 7 is simple and free. It suits basic contact forms. WPForms offers a drag-and-drop builder. It works well for beginners. Gravity Forms is powerful with many features. It fits larger websites or complex forms. Ninja Forms lets you build forms easily. It has both free and paid versions.
Factors To Consider When Selecting A Plugin
Check ease of use first. You want a plugin that is simple to set up. Look at the available templates to save time. Consider how well the plugin works on mobile devices. Mobile-friendly forms reach more users. Think about integration with other tools you use. Email marketing and payment gateways are common examples. Look for good support and regular updates. This keeps your plugin secure and functional.
Installing And Activating The Plugin
Installing and activating a plugin is the first step to add a form on your WordPress page. Plugins bring extra features to your website without coding. The process is simple and fast. Follow these steps to get started.
Accessing The WordPress Plugin Directory
Log in to your WordPress dashboard. Find the menu on the left side. Click on “Plugins” to open the plugins page. Next, click “Add New” at the top. You will see the WordPress Plugin Directory. This directory holds thousands of free plugins. Use the search bar to find the form plugin you want. Type the plugin name or “form builder”.
Step-by-step Installation Guide
After finding the plugin, check its details. Look for ratings and reviews. Click the “Install Now” button next to the plugin. WordPress will download and install it automatically. Wait a few seconds. The button will change to “Activate”.
Activating The Plugin
Click the “Activate” button to enable the plugin. Your plugin is now ready to use. You can access its settings from the dashboard menu. Start building your form and add it to your page. The plugin will guide you through the next steps.
Creating A New Form
Creating a new form on your WordPress page is simple and quick. This step lets you collect information from visitors easily. You can design the form to fit your needs. Start by building a basic structure, then adjust the fields and settings.
Navigating To The Form Builder
First, log in to your WordPress dashboard. Find the plugin you use for forms, like Contact Form 7 or WPForms. Click on its menu item. Look for the option to create a new form. This action opens the form builder interface where you start designing.
Adding Form Fields
Inside the builder, you see a list of available fields. Click on any field to add it to your form. Common fields include text boxes, checkboxes, and dropdown menus. Add as many fields as you need for your form’s purpose. Arrange them by dragging up or down.
Customizing Field Settings
Each field can be customized to collect specific data. Click on a field to open its settings. Change the label, placeholder text, and make it required if needed. Some fields allow setting validation rules to ensure correct input. Save your changes before moving to the next field.
Configuring Form Settings
Configuring form settings is a key step after creating your form. These settings control how your form behaves and interacts with users. Adjusting them helps improve user experience and manage submissions effectively.
Each setting serves a different purpose. Notifications keep you updated. Confirmation messages guide users after submission. Spam protection keeps your form secure. Let’s explore these settings in detail.
Setting Up Notifications
Notifications alert you when someone submits the form. You can enter the email address where notifications should go. Some plugins allow multiple addresses for team members.
Customize the email subject and message. Include important information like form name and user details. This helps you quickly understand the submission without opening the full form.
Adjusting Confirmation Messages
Confirmation messages show after users submit the form. They let users know their message was received. You can write a simple thank you or provide next steps.
Choose between showing a message or redirecting users to a thank-you page. Personalize the message to match your website’s tone. Clear feedback keeps users confident and engaged.
Enabling Spam Protection
Spam protection stops fake or unwanted form submissions. Many form plugins include built-in options like CAPTCHA or honeypot fields. Enable these to reduce spam without annoying real users.
CAPTCHA asks users to prove they are human. Honeypot adds hidden fields that bots fill but humans do not. Activate one or both methods for better security.
Embedding The Form On A Page
Embedding a form on a WordPress page makes it easy for visitors to contact you. It also helps collect information directly on your site. You can place forms in several ways. Each way fits different needs and skill levels. This section explains three popular methods to add forms on your pages.
Using Shortcodes
Shortcodes are simple codes that insert forms anywhere on a page. Most form plugins generate a shortcode after you create a form. Copy this shortcode from the plugin’s dashboard.
Go to the page where you want the form. Paste the shortcode into the WordPress editor. When you publish or update the page, the form appears in that spot. Shortcodes work well in classic editors or text blocks.
Adding Forms Via Gutenberg Blocks
The Gutenberg editor offers special blocks for many plugins. Find the form block by clicking the plus icon. Search for the name of your form plugin.
Select the form block and choose your form from a dropdown list. The block shows a preview of the form inside the editor. You can move the block anywhere on the page. This method is quick and visual, ideal for beginners.
Placing Forms In Widgets
Widgets let you add forms to sidebars or footers. Go to Appearance > Widgets in your WordPress dashboard. Find the widget area where you want the form.
Add a text or shortcode widget. Paste the form’s shortcode inside it. Save the widget settings. Your form will now show in the chosen sidebar or footer on all pages using that widget area.
Testing Your Form
Testing your form is a key step after adding it to your WordPress page. It makes sure everything works smoothly for your visitors. Proper testing helps catch mistakes early. This saves time and avoids user frustration.
Test each part of the form carefully. Verify that data sends correctly and notifications reach your email. Check the form’s appearance on different devices. This ensures a good user experience everywhere.
Submitting Test Entries
Start by filling out the form like a visitor. Use different types of data to test all fields. Submit the form and watch for confirmation messages. Make sure the form accepts valid entries and rejects wrong ones. Test empty fields if they are required. Repeat this step several times to ensure reliability.
Checking Email Notifications
After submitting, check your email inbox for notifications. Ensure the email contains the correct form data. Verify the sender address and subject line. Look for any formatting problems or missing information. Test email delivery on multiple devices. This helps confirm that your notifications work well.
Troubleshooting Common Issues
If the form does not submit, check plugin conflicts first. Disable other plugins and try again. Clear your browser cache to fix display problems. Verify your email settings if notifications fail. Use a spam folder check to avoid missing emails. Look at form plugin support forums for specific errors. Fixing small issues improves user trust and form performance.
Enhancing Form Functionality
Adding a form to your WordPress page is just the start. Enhancing its functionality makes your form work better for your needs. It improves user experience and can help you gather more useful information. You can expand what your form does with a few smart features.
Integrating Payment Options
Payment integration lets users pay directly through your form. This is useful for orders, bookings, or donations. Plugins like WooCommerce or Stripe help add secure payment fields. You can set up multiple payment methods for flexibility. This saves users time and makes your form more effective.
Connecting To Email Marketing Tools
Connecting your form to email marketing tools helps grow your contact list. Tools like Mailchimp or Constant Contact work well with WordPress forms. This setup automatically adds users to your mailing list. It helps you send newsletters or promotions easily. You keep your audience engaged and informed.
Using Conditional Logic
Conditional logic shows or hides fields based on user answers. It makes forms shorter and easier to complete. Users only see questions relevant to them. This reduces confusion and increases form completion rates. Many form plugins support this feature for better customization.

Credit: www.monsterinsights.com
Credit: wpforms.com
Frequently Asked Questions
How Do I Add A Form To A WordPress Page?
To add a form, install a form plugin like WPForms. Create your form using the plugin’s builder. Copy the form shortcode and paste it into your WordPress page editor. Publish the page to display the form.
Which WordPress Form Plugins Are Best For Beginners?
WPForms, Ninja Forms, and Contact Form 7 are beginner-friendly. They offer easy drag-and-drop builders and pre-built templates. These plugins are lightweight, SEO-friendly, and compatible with most themes.
Can I Customize The Form Fields In WordPress?
Yes, form plugins let you add, remove, or edit fields. You can choose from text boxes, dropdowns, checkboxes, and more. Customizing fields helps capture the exact information you need.
Is It Possible To Embed Forms Without Plugins?
Yes, you can embed forms using HTML code or third-party services. However, plugins offer better features like spam protection and analytics. Plugins make form management easier and more secure.
Conclusion
Adding a form to your WordPress page is simple and helpful. It lets visitors contact you or give feedback easily. Choose a plugin, create your form, and place it on your page. Test the form to make sure it works well.
Keep your form clear and easy to use. This small step can improve your website’s interaction and user experience. Now, your site can connect better with visitors. Try it today and see the difference yourself.


