If you’ve bought a domain from GoDaddy but want to use it with a different VPS hosting provider, you might feel a bit lost. Don’t worry—connecting your GoDaddy domain to another VPS hosting service is easier than you think.
In this guide, you’ll learn simple, step-by-step instructions that save you time and avoid common mistakes. By the end, you’ll have full control over your domain and hosting, making your website run smoothly and professionally. Ready to take charge of your online presence?
Keep reading to find out exactly how to make this work for you.
Choosing Your Vps Hosting
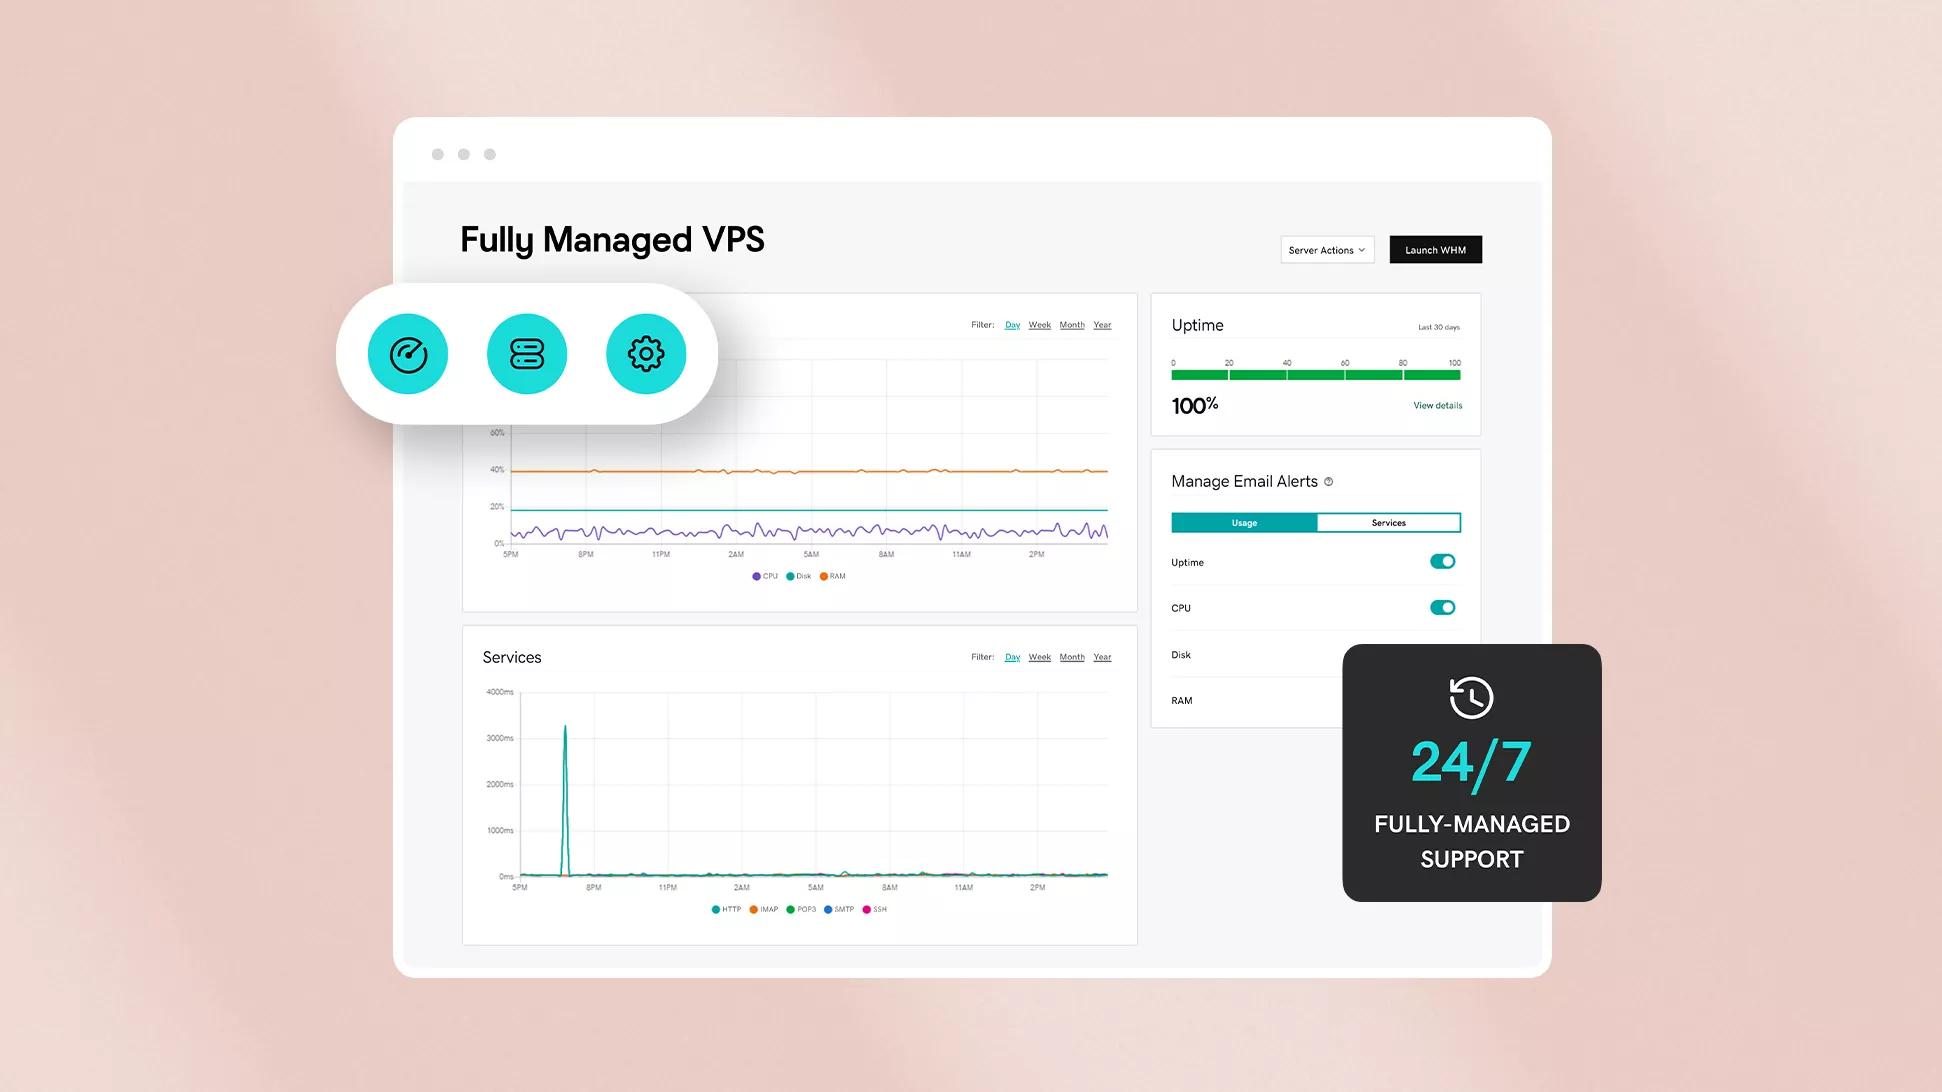
Selecting the right VPS hosting is key for your website’s performance. It affects speed, security, and control. Understanding your needs helps you pick the best option. Think about your website type, traffic, and budget. This guide breaks down important points for choosing VPS hosting.
Types Of Vps Hosting
There are mainly three types of VPS hosting. Managed VPS means the provider handles server tasks. You get support and updates. Unmanaged VPS means you manage everything. It gives more control but needs technical skills. Cloud VPS uses cloud servers. It offers flexibility and easy scaling.
Factors To Consider
Check server resources like CPU, RAM, and storage size. These affect your website speed. Look for good uptime guarantees to keep your site online. Security features like firewalls and backups protect your data. Think about customer support quality and availability. Pricing must fit your budget without losing quality.
Popular Vps Providers
Many providers offer reliable VPS hosting. DigitalOcean is known for simplicity and cloud VPS. Vultr provides many server locations worldwide. Linode offers strong performance and good support. Amazon Lightsail is great for easy cloud VPS. Choose a provider that matches your needs and budget.
Credit: www.godaddy.com
Preparing Your Godaddy Domain
Preparing your GoDaddy domain is the first step before using it with another VPS hosting service. This process ensures your domain points correctly to your new hosting provider. It also helps avoid downtime or connection issues with your website. Taking the time to understand domain settings is important. Simple steps can make the transition smooth and hassle-free.
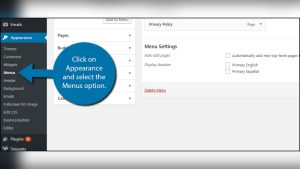
Accessing Domain Settings
Start by logging into your GoDaddy account. Go to the “My Products” section. Find your domain name listed there. Click on it to open the domain details page. This page shows all your domain options and settings. You can manage your domain from this area. Make sure you are in the right domain panel before making changes.
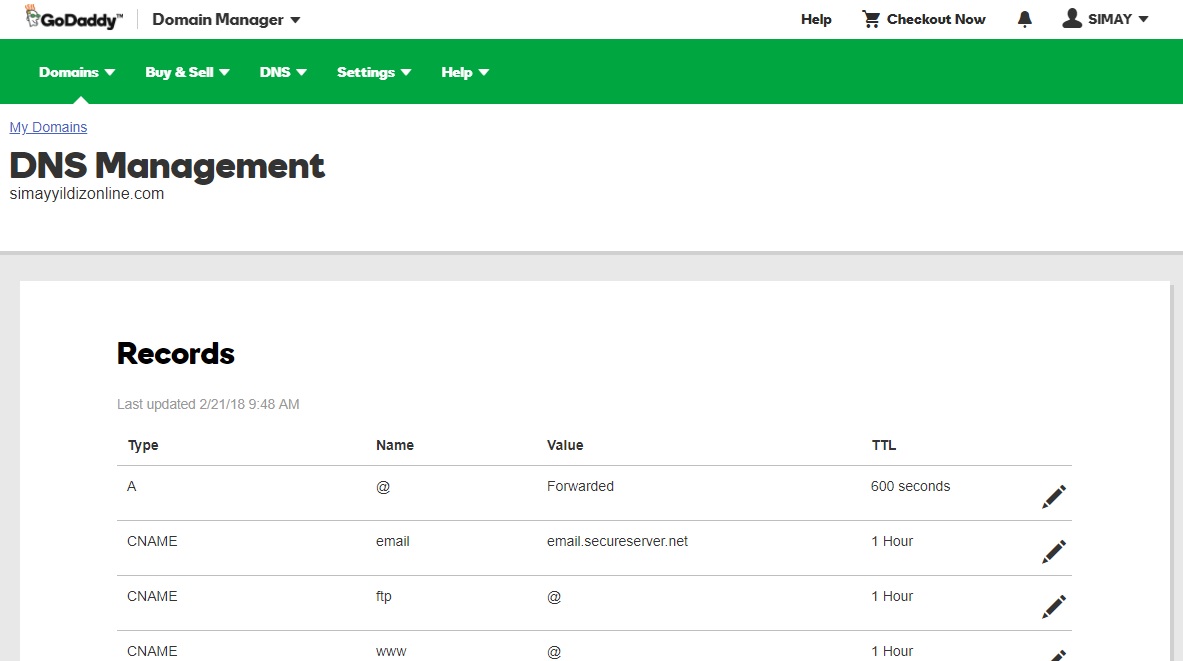
Locating Dns Management
In the domain settings, look for “DNS” or “Manage DNS.” This section controls where your domain points. You can add, edit, or delete DNS records here. DNS records tell the internet where to find your website or email server. Having access to DNS management is crucial for connecting your domain to a different VPS host.
Backing Up Current Settings
Before changing anything, save your current DNS records. Write down or take screenshots of all existing entries. This backup helps if you need to revert changes. It prevents accidental loss of important settings. Always keep a copy of your original DNS setup before editing.
Configuring Dns Records
Configuring DNS records is a key step in using your GoDaddy domain with another VPS hosting. DNS records tell the internet where to find your website and services. Setting these records correctly makes sure visitors reach your site without issues.
This process involves changing nameservers and adding different record types. Each record has a specific role in directing traffic. Simple steps can connect your domain to your VPS smoothly.
Updating Nameservers
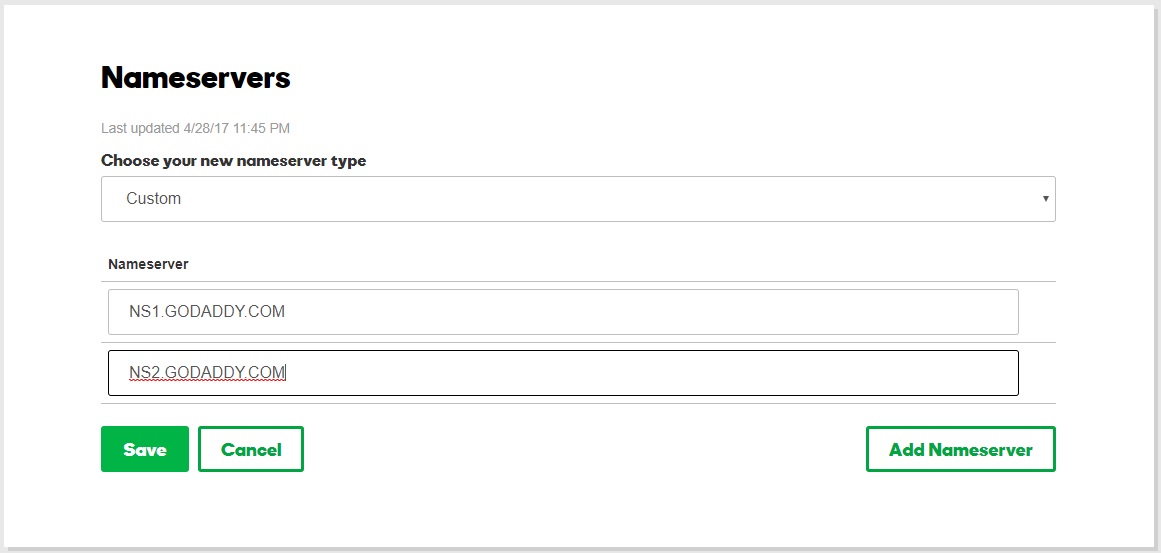
Nameservers control where your domain points. To use your VPS, change GoDaddy nameservers to those from your VPS provider. Log into your GoDaddy account. Find your domain and select the option to manage DNS.
Replace the current nameservers with the new ones given by your VPS host. Save changes and wait for them to update. This can take up to 48 hours. After updating, your domain starts directing visitors to your VPS.
Adding A Records
A records link your domain to an IP address. Get your VPS IP address from your hosting provider. In GoDaddy’s DNS management, find the section to add new records.
Create a new A record. Enter “@” for the host to point the root domain. Paste your VPS IP address into the points-to field. Save the record. This connects your domain to your VPS IP.
Setting Up Cname Records
CNAME records alias one domain name to another. Use CNAME for subdomains like www. In GoDaddy DNS settings, add a CNAME record.
For the host, enter the subdomain name like “www”. In the points-to field, add your root domain or VPS hostname. Save this record. Visitors typing “www” will reach your VPS-hosted site.
Credit: www.godaddy.com
Connecting Domain To Vps
Connecting your GoDaddy domain to a VPS hosting service allows your website to be accessible through a custom web address. This process involves linking the domain name with the VPS server where your website files are stored. The connection ensures visitors can reach your site by typing your domain name.
Follow these simple steps to connect your GoDaddy domain to your VPS hosting efficiently. This guide covers how to find your VPS IP address, link your domain, and verify the connection.
Finding Vps Ip Address
Start by logging into your VPS hosting control panel. Look for the server details or network section. Here, you will find the public IP address assigned to your VPS. This IP address is needed to point your domain to the right server.
Linking Domain With Vps
Log in to your GoDaddy account and open the Domain Manager. Select the domain you want to connect. Find the DNS settings or manage DNS option. Add an A record with the VPS IP address as the value. Save the changes to update your domain’s DNS records.
Verifying Connection
After updating DNS, wait for propagation, which can take a few minutes to hours. Use online tools like DNS checkers to confirm your domain points to the VPS IP address. Finally, open your domain in a browser to see if your website loads correctly.
Securing Your Domain And Vps
Securing your domain and VPS is key to protecting your website and data. A safe setup stops hackers and keeps your visitors’ information private. This section covers simple steps to improve your security.
Enabling Ssl Certificates
SSL certificates protect data sent between your visitors and your server. They show a padlock icon in browsers, which builds trust. Many VPS hosts offer free SSL certificates through services like Let’s Encrypt. You can also buy SSL certificates from providers like GoDaddy. Enable SSL by installing the certificate on your VPS and updating your site to use HTTPS. This change keeps your site secure and improves search engine ranking.
Setting Up Firewalls
Firewalls act as a barrier between your VPS and the internet. They block unwanted traffic and stop attacks. Most VPS providers include basic firewall tools. You can customize rules to allow only trusted IPs and close unused ports. Use a firewall to protect your server from common threats like brute force and DDoS attacks. Keep the firewall active and review rules often for best results.
Regular Security Checks
Regular checks find vulnerabilities before they cause harm. Scan your VPS for malware and outdated software. Update your operating system and applications frequently. Use security tools to monitor unusual activity. Check your domain’s DNS settings to avoid hijacking. Keep backups of your website and server data. Frequent checks help maintain a strong, safe hosting environment.
Credit: www.godaddy.com
Troubleshooting Common Issues
Troubleshooting common issues is key to using a GoDaddy domain with other VPS hosting smoothly. Problems can arise from DNS settings, server connections, or domain resolution. Understanding these issues helps fix them faster. This section covers the most frequent problems and how to address them.
Dns Propagation Delays
DNS changes take time to update across the internet. This delay is called DNS propagation. It can last from a few minutes to 48 hours. During this time, your domain might not point to your VPS correctly. Patience is important here. Avoid making repeated DNS changes too quickly. Check propagation status with online tools to see if updates are complete.
Connection Errors
Connection errors happen when your domain cannot reach your VPS server. This can be due to wrong IP addresses in DNS settings. Confirm your VPS IP matches the A record in your GoDaddy DNS panel. Also, check firewall settings on your VPS. Firewalls might block incoming requests. Open the right ports to allow traffic. Restart your VPS if needed to refresh network settings.
Domain Not Resolving
When a domain does not resolve, browsers cannot find your website. This issue often stems from incorrect nameserver settings. Ensure your GoDaddy domain uses the correct nameservers provided by your VPS hosting. Double-check your DNS records for typos or missing entries. Clear your browser cache or try another device. Sometimes, local DNS caching can cause resolution problems.
Tips For Smooth Management
Managing a GoDaddy domain with a different VPS hosting requires careful attention. Smooth management keeps your website stable and secure. Follow simple tips to avoid common problems. Stay ahead with regular maintenance and monitoring.
Regular Backups
Backups protect your data from loss or damage. Schedule automatic backups of your website files and databases. Store copies in a safe place outside your VPS. Test backups to ensure they work properly. This step saves time and stress during emergencies.
Monitoring Domain Status
Check your domain status often to avoid downtime. Confirm your domain registration is active and not expired. Verify DNS settings match your VPS IP address. Use online tools to track domain health and alerts. Quick action on issues keeps your site accessible to visitors.
Updating Vps Software
Keep your VPS software updated for better security and performance. Install security patches and system updates regularly. Update your web server, control panel, and other tools. Outdated software can cause vulnerabilities and slowdowns. A well-maintained VPS ensures smooth website operation.
Frequently Asked Questions
How Do I Connect Godaddy Domain To Vps Hosting?
To connect a GoDaddy domain to VPS, update the domain’s DNS settings. Point the A record to your VPS IP address. This links your domain to the VPS server, allowing visitors to access your hosted site through the domain name.
Can I Use Godaddy Domain With Any Vps Provider?
Yes, GoDaddy domains work with most VPS providers. You only need to change DNS records to your VPS IP. This process is standard and supported by almost all VPS hosting services.
What Dns Records Are Needed For Godaddy And Vps?
Primarily, update the A record to point to your VPS IP. You may also configure CNAME or MX records if needed for subdomains or email. Proper DNS setup ensures your domain correctly routes to your VPS server.
How Long Does Dns Propagation Take For Godaddy Domains?
DNS propagation typically takes 24 to 48 hours. Sometimes it completes faster, within a few hours. During this period, your domain may not immediately resolve to the new VPS IP address.
Conclusion
Using a GoDaddy domain with other VPS hosting is simple and effective. Just update your domain’s DNS settings to point to your VPS. This lets you control your website and hosting separately. It also gives more flexibility to grow your site.
Take your time to follow each step carefully. Soon, your site will run smoothly with your chosen VPS. This setup helps you manage your online presence better and saves costs. Try it and see the difference yourself.