
Are you struggling with removing WordPress from your Namecheap cPanel? You’re definitely not alone.
The process might seem daunting at first, but it’s more straightforward than you think. Imagine the relief you’ll feel once you’ve successfully uninstalled WordPress, freeing up your resources and paving the way for new projects. In this guide, we’ll walk you through each step, ensuring a smooth and stress-free experience.
Whether you’re trying to clean up your online space or start fresh with a new installation, we’ve got you covered. Stick with us, and you’ll have WordPress uninstalled in no time. Ready to regain control of your cPanel? Let’s dive in!

Credit: www.youtube.com
Accessing Namecheap Cpanel
Accessing Namecheap cPanel is the first step to uninstall WordPress. It is a web-based control panel. This panel helps manage your hosting account. You can handle files, databases, and software from here. It’s the key to removing WordPress efficiently. Let’s dive into the process step by step.
Logging Into Cpanel
First, go to the Namecheap website. Look for the “Account” button. It’s usually at the top right corner. Click it. Enter your username and password. Once logged in, find the cPanel link. It should be on your dashboard. Click the link to access cPanel.
You’ll see a new page. This is the cPanel interface. It might seem complex at first. Don’t worry. Each section has icons. These icons represent different tools and functions. You will use them to manage WordPress.
Locating WordPress Installations
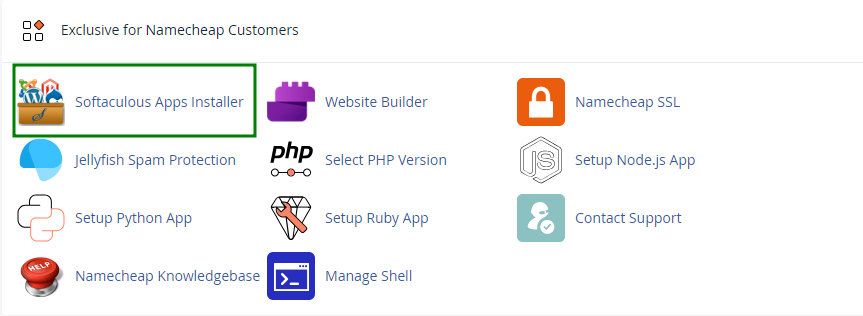
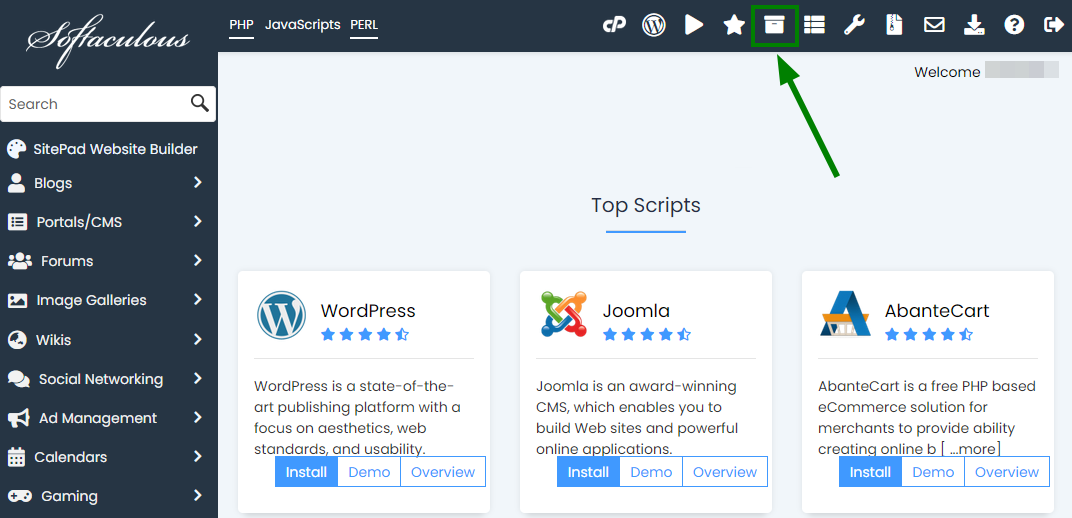
In cPanel, find the “Softaculous Apps Installer.” It is a popular tool. It helps manage software installations. Click the icon to open it. You will see a list of installed apps.
Look for WordPress in this list. It might be under a section called “All Installations.” This section shows all software installed via Softaculous. Click the WordPress installation you want to remove. This will open up more options.
Once you locate WordPress, you are ready for the next steps. Removing it is straightforward from here. Follow the prompts to uninstall. Soon, WordPress will no longer be on your cPanel.
Credit: www.namecheap.com
Using Softaculous App Installer
Removing WordPress from Namecheap’s cPanel becomes simple with Softaculous. Begin by accessing the Softaculous dashboard in cPanel. Locate WordPress, click uninstall, and follow the prompts to complete the process swiftly.
Uninstalling WordPress from Namecheap’s cPanel can seem daunting, but using the Softaculous App Installer makes it a breeze. Softaculous is a handy tool designed to simplify the management of web applications, including installation and uninstallation. If you’ve decided it’s time for a fresh start or need to remove WordPress for any reason, Softaculous offers a straightforward path to achieving this. Let’s dive into how you can navigate through Softaculous and select WordPress for uninstallation in a few simple steps. ###Navigating To Softaculous
First, log into your Namecheap cPanel account. You’re greeted with a myriad of options, but don’t worry—your focus is on finding Softaculous. Look for the “Software” section within cPanel. It usually houses Softaculous among its tools. Click on it, and you’ll enter a realm of web applications waiting to be installed or managed. Once inside, you’ll see a user-friendly interface. The icons are clear and easy to understand. Have you ever felt overwhelmed by too many options? Softaculous keeps it simple, showcasing only what’s necessary. You’ll find WordPress listed among the available apps—your next stop in this journey. ###Selecting WordPress For Uninstallation
Now that you’re in Softaculous, it’s time to zero in on WordPress. Do you see a list of installed scripts on your dashboard? WordPress should be there, assuming you’ve previously installed it through Softaculous. Click on the “All Installations” button to see the full list. Here, you’ll find WordPress ready for uninstallation. Select it, and look for the option to remove or uninstall. Isn’t it satisfying to have things just a click away? Confirm your choice, and Softaculous handles the rest, removing WordPress smoothly without leaving a trace behind. The process is quick, freeing up space and resources on your server. Have you ever wondered how much simpler things could be with the right tools? Softaculous answers that question, offering efficiency and ease in managing your web applications. Uninstalling WordPress doesn’t have to be a complex task. With Softaculous, you’ve got a reliable ally to guide you through, ensuring your web environment remains tidy and under control.Manual Uninstallation Steps
Uninstall WordPress from Namecheap cPanel by deleting files and database. Access File Manager to remove WordPress files. Then, use phpMyAdmin to drop the WordPress database. Ensure all related files are cleared for complete removal.
Manually uninstalling WordPress from your Namecheap cPanel can seem daunting, but it’s easier than you might think. By breaking it down into manageable steps, you can ensure a clean and complete removal. Let’s dive into the process and see how you can do it yourself with confidence. ###Removing WordPress Files
Start by accessing your cPanel account. Once you’re in, navigate to the File Manager. This is where all your website files are stored. Locate the directory where your WordPress installation resides. It’s usually in the public_html folder, but it might vary if you installed WordPress in a subdirectory. Once you find the folder, select it and click on Delete to remove all WordPress files. Don’t forget to empty the Trash to make sure everything is gone for good. A while back, I accidentally deleted the wrong directory. It taught me to double-check before hitting delete. Make sure you’re cautious too! ###Dropping WordPress Database
Next, you need to get rid of the WordPress database. Head back to your cPanel and click on phpMyAdmin. This is where all your database actions will take place. Find the database associated with your WordPress installation. You might have to refer to your wp-config.php file to confirm the database name if you’re unsure. Once located, select the database and click on Drop. This will permanently delete all the tables and data related to your WordPress site. It’s a powerful step, so take a deep breath and ensure you’re deleting the correct database. Consider this: what’s the worst that could happen if you delete the wrong one? Always double-check to avoid potential mishaps. Uninstalling WordPress manually provides a sense of accomplishment. It’s empowering to know you have control over your site’s backend. Have you tried these steps before, or are you considering them now? Your feedback can guide others in their journey.Cleaning Up Leftover Files
Removing WordPress from Namecheap Cpanel involves several steps. Start by accessing your Cpanel and locating the software removal option. Select WordPress and follow the prompts to uninstall, ensuring leftover files are cleaned up for a smooth operation.
Cleaning up leftover files after uninstalling WordPress from Namecheap cPanel is crucial. These residual files can occupy unnecessary space on your server. They might even interfere with other applications. Clearing them ensures your hosting environment remains tidy and efficient.Checking For Residual Files
Begin by accessing your cPanel file manager. Look for any folders or files related to your WordPress installation. These often include wp-content, wp-admin, and wp-includes. Have you checked your database for leftover tables? Sometimes WordPress leaves behind tables that need manual deletion. Don’t forget to explore the public_html directory; it might contain residual WordPress files. If you had plugins installed, check for any leftover data. Isn’t it surprising how much clutter a single installation can leave behind?Deleting Unused Folders
Once you’ve identified the leftover files, it’s time to delete them. Right-click on the folder or file and choose ‘Delete’. Did you know that unused folders can affect server performance? If you’re unsure about a file, back it up before deleting. Deleting these folders will free up space and enhance your server’s efficiency. Wouldn’t you prefer a faster, cleaner server environment? Ensure you empty the trash bin in cPanel after deletion. It’s like clearing the dust off a shelf; you’ll notice the difference immediately.Cleaning up leftover files might seem tedious, but it’s essential for maintaining a healthy server environment. Are you ready to experience a clutter-free server space? It’s worth the effort!
Troubleshooting Uninstallation Issues
Removing WordPress from Namecheap Cpanel can sometimes be tricky. Users often face issues during the uninstallation process. These can stall your progress and become frustrating. Knowing how to troubleshoot these issues is essential.
Here, we address common problems and their solutions. We also guide you on when to seek help. Let’s ensure a smooth uninstallation journey.
Common Problems And Solutions
Some users find files remain after uninstalling WordPress. This issue occurs when the system fails to delete all data. Manually delete any leftover files in the file manager.
Another issue is database remnants. Sometimes, the database doesn’t get removed. Navigate to MySQL Databases in Cpanel. Delete the associated database manually.
Occasionally, users can’t access the uninstallation script. This may happen due to permissions. Check your permissions and adjust them in the file manager.
Contacting Support
If problems persist, contact Namecheap support. They offer 24/7 assistance. Use the live chat feature for quick responses.
Before contacting support, gather all necessary information. This includes error messages and steps you’ve taken. It helps in diagnosing your issue faster.
Support can guide you through complex issues. They ensure your WordPress uninstallation is successful.
Credit: www.namecheap.com
Frequently Asked Questions
How Do I Uninstall WordPress In Namecheap?
Log into your Namecheap account, access cPanel, and locate the “Softaculous Apps Installer. ” Click on “WordPress,” then select “Remove” to uninstall. Confirm the deletion to complete the process.
How Do I Remove WordPress From My Cpanel?
Access cPanel and navigate to the ‘File Manager’. Find the WordPress directory, select it, and delete. Next, go to ‘MySQL Databases’ and remove the WordPress database. Finally, clear any associated email accounts or subdomains in cPanel. Ensure all WordPress files and data are removed.
How Do I Completely Uninstall WordPress?
Uninstall WordPress by deleting files from the server and removing the database. Backup data before proceeding. Use FTP to delete WordPress folders. Access your hosting’s database manager and delete the WordPress database. Check your domain configuration to ensure no WordPress-related settings remain.
This removes WordPress completely from your server.
How Do I Remove A WordPress Site From My Domain?
To remove a WordPress site, log into your hosting account. Delete the WordPress files and database. Update DNS settings to detach the domain. Ensure backups are saved before deletion. Contact hosting support if needed for assistance.
Conclusion
Uninstalling WordPress from Namecheap cPanel is straightforward. Follow the steps outlined above. Your website will be clean and ready for new projects. Remember to back up important data first. This prevents accidental data loss. A clear plan ensures a smooth process.
Now, you can manage your web space effectively. Use these steps whenever needed. Troubleshoot any issues you encounter with patience. Keep this guide handy for future reference. Enjoy your hassle-free web management experience.


