
Are you planning to move your domain from Namecheap to a new registrar but not sure how to begin? You’ve landed in the right place.
Transferring a domain can seem daunting, but with the right steps, it’s a smooth process. Imagine the ease of managing all your domains under one roof, or accessing better features that fit your needs perfectly. That’s the freedom a successful domain transfer promises.
In this guide, we will walk you through each step, ensuring you have a hassle-free experience. Your digital assets deserve the best, and with our help, you’ll master the transfer process in no time. Let’s dive in and unlock the potential of your domain.
Domain Transfer Basics
Transferring a domain on Namecheap involves a few straightforward steps. First, unlock your domain and obtain the transfer code. Then, initiate the transfer process by entering the code on Namecheap’s platform, ensuring your domain moves smoothly to its new home.
Transferring a domain can seem like a daunting task, especially if you’re new to the process. Understanding the basics is crucial to ensure a smooth transition from one registrar to another. This section will break down the fundamental steps involved in transferring a domain from Namecheap, making it easy for anyone to follow. Whether you’re switching registrars for better features, pricing, or support, knowing the essentials can save you time and hassle.Understanding The Transfer Process
The transfer process begins with unlocking your domain. You need to log into your Namecheap account and locate your domain settings. Unlocking your domain is a critical first step. Without it, the transfer cannot proceed. It’s like opening a door before you step through; necessary but straightforward.Getting The Authorization Code
Next, obtain the authorization code, also known as the EPP code. This unique code acts as a key, allowing you to move your domain to a new registrar. Think of it as the combination to a safe; without it, the transfer won’t happen. Namecheap makes this easy by providing the code directly in your account settings.Initiating The Transfer
With your domain unlocked and authorization code in hand, initiate the transfer at your new registrar. Most registrars have a simple process to start this. Follow the prompts to enter your domain and authorization code. This step is like handing over the keys to your new home; it officially starts the moving process.Confirming The Transfer
After initiating the transfer, you’ll receive an email to confirm it. This email is a crucial checkpoint. Confirming the transfer ensures that you are indeed the one requesting it. Check your spam folder if you don’t see it, as missing this email can delay the process.Monitoring The Transfer
Finally, monitor the progress of your transfer. Transfers usually take 5 to 7 days to complete. Keep an eye on any emails or notifications from either registrar. It’s like watching your luggage on the airport carousel; you want to make sure everything arrives safely. Have you ever found yourself stuck halfway through a process without knowing the next step? Keeping these basics in mind can prevent that frustration. By understanding each stage, you’ll empower yourself to manage your domain effectively. What’s the most challenging step you’ve encountered in transferring a domain? Share your experiences and insights below.Preparing For Transfer
Transferring a domain from Namecheap involves a few essential steps. Preparing for transfer ensures a smooth process. This preparation requires unlocking your domain and obtaining an authorization code. Both are crucial for a successful transfer. Follow these steps for a seamless experience.
Unlock Domain
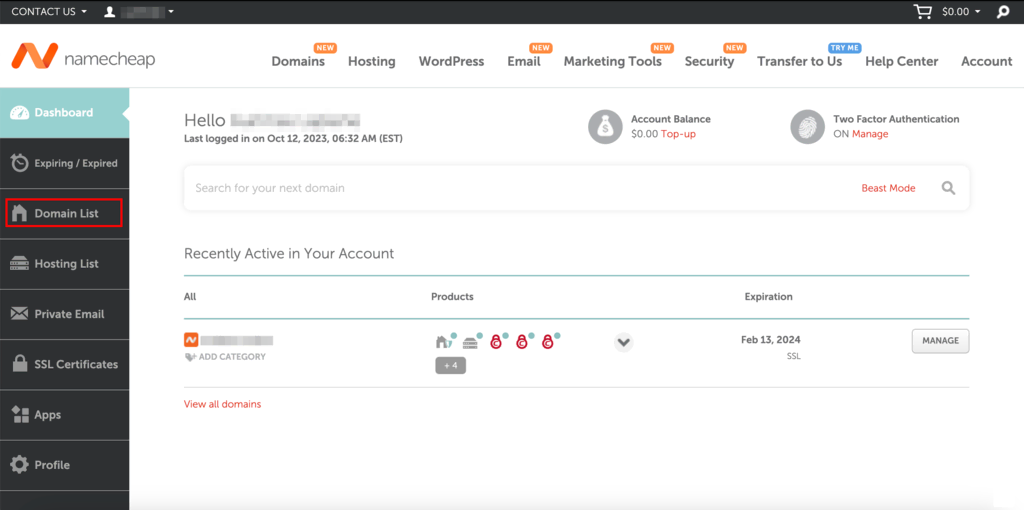
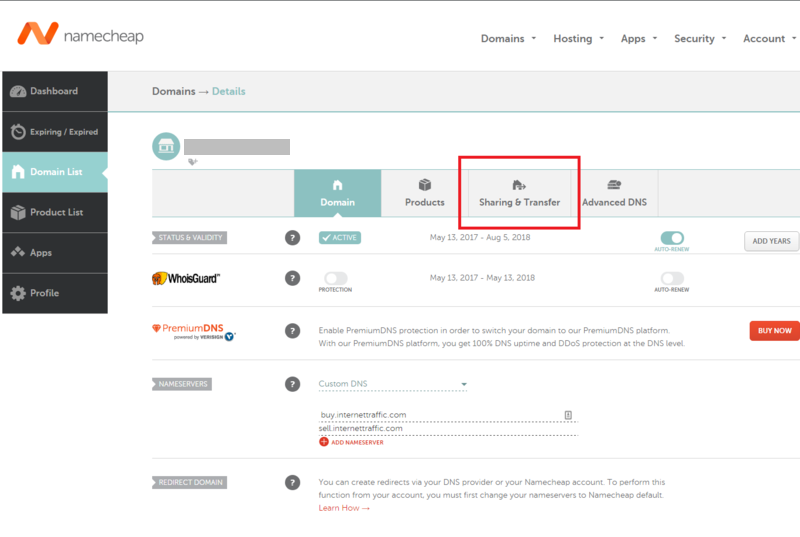
First, log in to your Namecheap account. Go to the Domain List section. Find the domain you wish to transfer. Click on Manage to access the domain settings. Check the Domain Lock setting. If it’s locked, toggle it to unlock. This step is necessary to allow the transfer. Once unlocked, you can proceed to the next step.
Get Authorization Code
After unlocking, request your authorization code. This code is also known as an EPP code. In your Namecheap account, navigate to the domain settings page. Look for the section labeled Authorization Code. Click on it to request the code. Namecheap will send it to your registered email. Keep this code safe. You will need it for the transfer process.
Initiating Transfer Process
Transferring your domain from Namecheap is a straightforward process. It involves a few steps to ensure your domain moves safely. This guide will help you initiate the transfer process with ease.
Log Into Namecheap Account
First, access your Namecheap account using your credentials. Navigate to the login page and enter your username and password. Once logged in, you will see your account dashboard. Familiarize yourself with the layout and features. Locate the section where your domains are listed. This is where you will manage your domain transfer.
Select Transfer Option
Next, find the transfer option within your dashboard. Look for a tab or link labeled “Transfer.” Click on it to begin the transfer process. This will guide you through the steps needed. The system will ask for the domain you wish to transfer. Provide accurate information to avoid delays. Follow the on-screen prompts to complete the transfer initiation.
Credit: www.hostinger.com
Completing Transfer Steps
Transferring a domain with Namecheap involves a few key steps. These steps ensure a smooth transition of your domain. Completing these steps is crucial for a successful transfer.
Enter Authorization Code
The authorization code is essential for transferring your domain. Obtain this code from your current registrar. Once you have it, log into your Namecheap account. Navigate to the domain transfer section. Enter the authorization code carefully. Double-check for accuracy. An incorrect code can delay the process.
Verify Email Confirmation
After entering the code, check your email. You’ll receive a confirmation email from Namecheap. Open the email and follow the instructions provided. Click the confirmation link to verify your request. This step confirms your identity and intention. Ensure you complete this step promptly. Delays in email confirmation can stall your transfer.
Post-transfer Checks
Domain transfer at Namecheap involves a few essential steps. After transfer, ensure settings are updated and functioning correctly. Verify domain information, DNS settings, and email forwarding to avoid service disruptions.
After successfully transferring your domain to Namecheap, it’s crucial to perform a series of post-transfer checks. These checks ensure that your domain is set up correctly and ready to function smoothly. Skipping these steps could lead to unexpected issues, so it’s worth taking the time to verify everything is in order. ###Domain Status Verification
Once the transfer is complete, verify the domain status. You want to ensure it is active and not in a pending or locked state. Log in to your Namecheap account and navigate to the domain list. Check if the status is marked as “active” next to your domain name. An active status indicates that your domain is successfully transferred and ready for use. If it’s not, consider reaching out to Namecheap support for assistance. ###Check Domain Settings
After confirming the domain status, inspect your domain settings. Make sure that all previous settings, like DNS records, are correct and match what you had before the transfer. Look into the DNS settings under the domain management section. Ensure that your website’s nameservers point to the correct hosting provider. This step is vital for maintaining website accessibility and email functionality. Adjust any settings that might have reverted to default during the transfer. This includes checking the WHOIS information to make sure your contact details are accurate and up-to-date. Keeping your information current is crucial for notifications and domain renewals. Have you noticed any changes in your domain’s performance or functionality after the transfer? Addressing these issues promptly can save you from potential downtime. Remember, these post-transfer checks are not just a formality but a necessary step to ensure your domain runs smoothly and efficiently on its new platform.Troubleshooting Common Issues
Transferring a domain on Namecheap can encounter common issues. Ensure your domain is unlocked and obtain the authorization code. Double-check the contact information is updated.
Transferring a domain with Namecheap can be a straightforward process, but like any technical task, it can sometimes hit a few snags. Understanding common issues can save you both time and frustration. Let’s tackle some of these challenges head-on and make your transfer journey smoother.Transfer Delays
One of the most frequent issues users face is transfer delays. This often happens if your domain is locked. Make sure to unlock it in your Namecheap dashboard. Transfers can also be delayed due to recent changes in your domain contact information. Confirm that your WHOIS details have been updated for at least 60 days. Patience is key, but if delays extend beyond seven days, it might be time to contact Namecheap support for assistance. Have you ever waited days only to realize you missed a step? Double-checking each requirement can save you from such stress.Authorization Problems
Authorization issues can be particularly frustrating. Ensure you have the correct authorization code, as a wrong code will halt the process. This code should be requested from your current registrar. If your code isn’t working, check if it’s expired or if there’s a typo. Sometimes, it might be as simple as an extra space at the end of the code. Ever found yourself stuck because of a tiny error? It’s a reminder of how small details can have a big impact. Always verify your information twice before proceeding. By addressing these common problems, your domain transfer can be much less of a headache. Have you encountered any of these issues before? Share your experience in the comments and help others avoid similar pitfalls.Tips For A Smooth Transfer
Transferring a domain with Namecheap involves a few straightforward steps. Ensure your domain is unlocked and obtain an authorization code. Then, initiate the transfer process on the new registrar’s website.
Transferring your domain from Namecheap can be a straightforward process if approached with the right strategies. Whether you’re moving to a new hosting provider or consolidating your domains, a smooth transfer is crucial. Here are some practical tips to ensure your transfer goes off without a hitch.Timing Considerations
Timing is everything when transferring a domain. Ensure your domain is at least 60 days old, as registrars typically have a mandatory holding period before allowing transfers. Check your domain’s expiration date. Transferring close to the expiration might lead to service interruptions. Another timing tip: Start your transfer process well in advance. Last-minute transfers can be stressful and may result in downtime or loss of service. Schedule your transfer during a low-traffic period for your website to minimize potential disruptions.Customer Support
Leverage Namecheap’s customer support to your advantage. They can provide detailed guidance tailored to your specific situation. Don’t hesitate to reach out if you encounter any roadblocks. Consider this: How often do we overlook reaching out for help, thinking we can handle everything ourselves? A quick chat or email can save you from hours of frustration. Use their live chat feature for immediate assistance, especially if you’re unsure about any step in the process. Remember, transferring a domain doesn’t have to be a daunting task. With careful planning and utilizing available resources, you can ensure a seamless transition. Have you ever faced challenges during a domain transfer? What steps did you take to overcome them? Your insights could be invaluable to others in similar situations.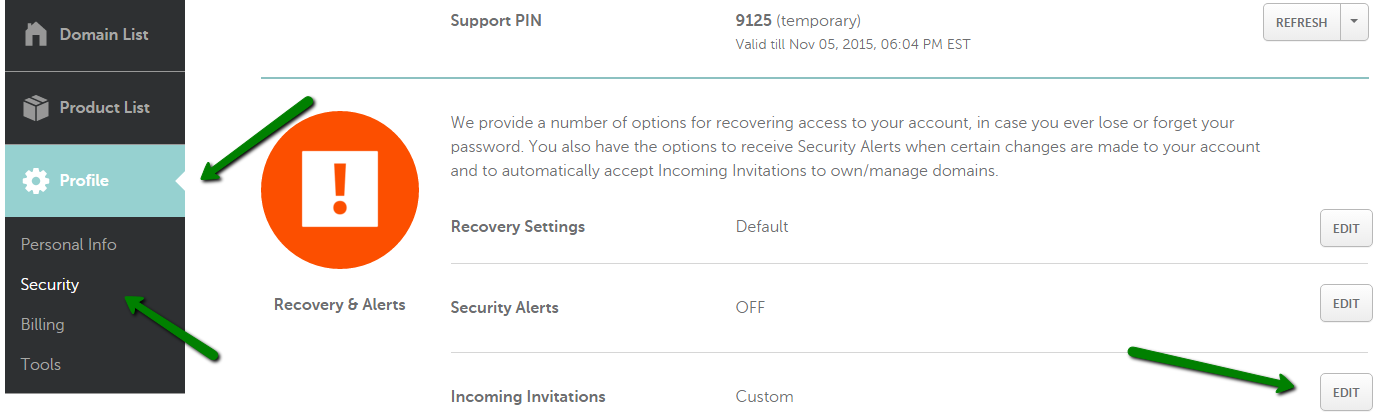
Credit: www.namecheap.com
Credit: www.escrow.com
Frequently Asked Questions
Can You Transfer Domains On Namecheap?
Yes, you can transfer domains on Namecheap. Initiate the transfer process from your Namecheap account. Ensure your domain is unlocked and obtain the authorization code. Follow Namecheap’s instructions to complete the transfer seamlessly. Contact Namecheap support for assistance if needed.
How Do I Transfer An Existing Domain?
To transfer an existing domain, unlock it and obtain the authorization code. Initiate the transfer with your new registrar. Confirm the transfer via email. Wait for the process to complete, which usually takes a few days. Ensure your domain is renewed and DNS settings are updated.
Why Does It Take 5 To 7 Days To Transfer A Domain?
Domain transfers take 5 to 7 days due to registry processing, verification, and security measures. Each step ensures legitimacy and protects ownership, adhering to regulations. This timeframe allows both registrars to complete necessary checks and updates, ensuring a smooth transition.
Patience is key for a secure domain transfer process.
How Can I Transfer My Domain From Namecheap To Godaddy?
Unlock your domain at Namecheap. Obtain an authorization code. Log into GoDaddy. Enter the code and initiate transfer. Confirm via email.
Conclusion
Transferring a domain on Namecheap is simple with these steps. First, ensure your domain is unlocked. Update your contact info, then get the transfer code. Start the transfer on the new registrar’s site. Confirm the transfer through your email. It’s that easy.
Keep track of all emails for updates. Transfers usually finish in a few days. Need help? Namecheap’s support is there for you. Stay patient and follow instructions. Soon, your domain will be with its new registrar. Happy transferring!


