
Imagine transforming your ideas into a captivating website without any hassle. Sounds exciting, right?
If you’ve chosen Namecheap as your domain host and are eager to install WordPress, you’re on the right path. This process might seem daunting at first, but don’t worry! With a few simple steps, you’ll be ready to share your thoughts, showcase your work, or even start your online business.
By the end of this article, you’ll know exactly how to install WordPress on Namecheap effortlessly. You’ll gain confidence in setting up your site and discover tips that can make your online presence shine. Ready to dive in? Let’s get started!
Credit: www.namecheap.com
Preparing Your Namecheap Account
Setting up WordPress on Namecheap is simple. First, log into your account and find the hosting section. Then, use the Softaculous Apps Installer to easily install WordPress. Follow the prompts, and your WordPress site will be ready in no time.
Getting started with WordPress on Namecheap is an exciting journey, but before diving into the installation process, it’s crucial to prepare your Namecheap account. This preparation ensures a smooth setup, reduces potential hiccups, and sets a strong foundation for your website. Let’s walk through the essentials to get your Namecheap account ready for WordPress installation.Accessing Your Account
First things first, log into your Namecheap account. Head to the Namecheap website and click on the “Sign In” button. Enter your username and password. If you’ve forgotten your password, use the “Forgot Password?” link to reset it. Once logged in, familiarize yourself with the dashboard. This is where you’ll manage your domains, hosting, and other settings. Consider bookmarking the Namecheap login page. This saves time, especially if you plan to make frequent updates to your website.Ensuring Domain Availability
Next, ensure you have a domain ready for your WordPress site. If you haven’t registered one yet, now is the time to do so. Go to the “Domains” section in your Namecheap dashboard and search for your desired domain name. Make sure it’s available and aligns with your brand or website purpose. Once you’ve found the right domain, add it to your cart and proceed to checkout. It’s a good practice to register your domain for several years to avoid the hassle of annual renewals. Now, here’s a thought: Have you considered potential future expansions of your site? Securing variations of your domain name, such as different extensions (.com, .net, .org), can be a strategic move to protect your brand. Preparing your Namecheap account is more than just ticking boxes. It’s about setting the stage for a successful WordPress journey. Are you ready to take the next step and bring your website vision to life?
Credit: www.youtube.com
Setting Up Hosting
Setting up hosting is crucial for your WordPress site. Namecheap offers reliable hosting services that suit various needs. It’s important to choose the right plan and activate it properly. This ensures your website runs smoothly.
Choosing The Right Hosting Plan
Begin by selecting a hosting plan that matches your site requirements. Namecheap provides several options. Shared hosting is affordable and ideal for small sites. VPS hosting offers more resources for growing websites. Dedicated hosting is for large sites needing high performance. Review each plan’s features carefully.
Consider storage space and bandwidth. Make sure they meet your site’s needs. Check if the plan supports WordPress installations. Look for options that include free SSL certificates. This enhances your site’s security.
Activating Your Hosting Service
Once you’ve chosen a plan, proceed to activation. Login to your Namecheap account. Navigate to the ‘Dashboard’. Find your purchased hosting plan. Click on ‘Activate’. Follow the on-screen instructions.
You’ll receive an email with your hosting details. These include login credentials and server information. Save this email for future reference. Use the credentials to access your hosting control panel.
Access the control panel to configure your server settings. Set up your domain name. Ensure it’s connected to your hosting account. Verify that DNS settings are correct. This ensures your site is accessible to visitors.
Installing WordPress Via Cpanel
To install WordPress in Namecheap via cPanel, first log in to your cPanel account. Navigate to the “Softaculous Apps Installer” and select WordPress. Follow the prompts to set up, choose your domain, and finish the installation.
Installing WordPress via cPanel is a straightforward process that can be accomplished with a few clicks. If you’re hosting your website on Namecheap, you have access to cPanel, a powerful tool that simplifies the setup of your WordPress site. With cPanel, you don’t need to dive into complex coding or technical details; the interface provides intuitive navigation and tools to get your site up and running smoothly. ###Navigating To Cpanel
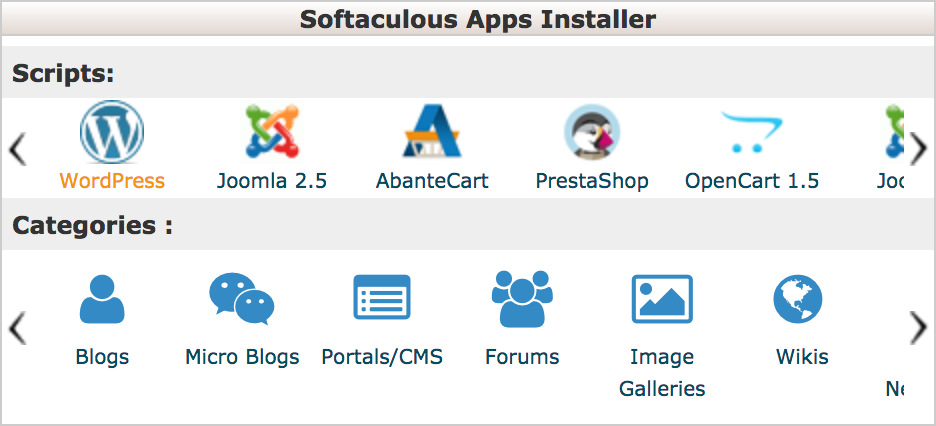
To start, log into your Namecheap account and head to your hosting dashboard. Here, you’ll find a button or link labeled ‘cPanel.’ Click it to open the cPanel interface. Once inside, you’ll be greeted by a variety of icons and options. Don’t let this overwhelm you. Your focus should be on locating the ‘Softaculous Apps Installer’ or simply ‘Softaculous,’ as this is where the magic happens. ###Using The Softaculous App Installer
The Softaculous App Installer is your best friend for installing WordPress. It’s an application within cPanel designed specifically for easy installation of web applications. Find the Softaculous icon and click it. You’ll be directed to a list of applications that can be installed. Look for WordPress—it’s usually right at the top or listed among popular apps. Click on WordPress, and you’ll be prompted to fill in some basic information like your site name, admin username, and password. Choose a domain if you have multiple options, and select your preferred language. The installation process is swift. Within minutes, WordPress will be installed on your domain, ready for customization. How easy was that? You’re just a few clicks away from sharing your ideas, business, or hobby with the world. Have you ever thought about the potential of reaching an audience globally with just a few simple steps? With WordPress installed, you can start exploring themes, plugins, and settings to make your website unique. Always remember, the initial setup is just the beginning. Your journey with WordPress is about creating and evolving your site to reflect your vision. What will your next steps be?Configuring WordPress Settings
Installing WordPress on Namecheap involves accessing your hosting account, navigating to the Softaculous Apps Installer, and selecting WordPress. Follow the prompts to complete the installation, ensuring your site is set up smoothly. Adjust settings as needed for optimal performance and security.
Configuring WordPress settings is like giving your website its own personality. Once you’ve installed WordPress on Namecheap, you’re ready to tweak the settings to suit your needs. This is where you can make your website stand out and ensure it communicates your message effectively. Let’s dive into two key settings: your site’s title and tagline, and the theme that will define your site’s appearance. ###Setting Up Site Title And Tagline
Your site’s title and tagline are the first things visitors see. These elements are crucial because they tell people what your site is about in just a few words. Head over to your WordPress dashboard, and under the “Settings” menu, click on “General.” Enter a title that reflects your site’s purpose. If you’re starting a blog about travel, your title could be as simple as “John’s Travel Diaries.” Your tagline should be a short, catchy phrase that complements the title. Think of it as a mini mission statement. For John’s blog, a tagline like “Exploring the world, one country at a time” could work wonders. ###Choosing A Theme
Your WordPress theme is the visual backbone of your site. It determines how your content is displayed and affects the overall user experience. To choose a theme, navigate to “Appearance” in your dashboard and click “Themes.” Browse through the available themes, or use the search bar to find one that resonates with your brand. Consider functionality and aesthetics. A theme like “Twenty Twenty-One” offers a modern look with great customization options. Once you find a theme you like, click “Activate” to apply it. You might be tempted to go for a flashy design, but simplicity often works best. Ask yourself, does this theme make my content shine? Remember, the right theme can make a significant difference in how your audience perceives your site.Customizing Your WordPress Site
Easily install WordPress on Namecheap by accessing the cPanel and navigating to the Softaculous app installer. Select WordPress, fill in the required details, and click install. In minutes, your WordPress site will be ready for customization.
Customizing Your WordPress Site can be the most exciting part of setting up your online presence. After installing WordPress on Namecheap, you have a blank canvas ready for your creativity. Imagine your site as a digital hub where visitors come to learn, explore, and engage with your content. Personalize it to reflect your brand’s unique identity and make it user-friendly. Let’s dive into some practical ways you can enhance your WordPress site.Adding Plugins
Plugins are the secret sauce to extending your site’s functionality. Think of them as apps for your website. They help you add features without touching a single line of code. From contact forms to SEO tools, there’s a plugin for almost everything. Start by going to the WordPress dashboard and clicking on “Plugins.” Browse through thousands of options or search for specific ones. Choose plugins that suit your site’s goals. A personal story: I once used a plugin to create a photo gallery on my site, which dramatically improved visitor engagement. It was simple to install and made my site visually appealing. Remember, too many plugins can slow down your site. Keep it streamlined by only adding what’s necessary. Which plugins will transform your site?Creating Pages And Posts
Pages and posts are the backbone of your site’s content. Pages are static and ideal for essential information like your About or Contact page. Posts, on the other hand, are dynamic and used for blog entries or news updates. To create a page, navigate to “Pages” in the dashboard, then “Add New.” Give it a catchy title and fill it with engaging content. Format it with headings, images, and links to make it interesting. Posts are just as easy. Click “Posts” followed by “Add New.” Share your thoughts, stories, or tips to keep your audience coming back for more. When I started, I shared a personal journey about building my site, which resonated with many readers. Consistency in posting can establish you as a reliable source of information. What stories or insights will you share to connect with your audience?Troubleshooting Common Issues
Installing WordPress in Namecheap can be simple. Start by accessing your Namecheap account and locate the cPanel. Use the Softaculous App Installer for a smooth WordPress setup. Ensure database configuration matches correctly to avoid common errors during installation.
Installing WordPress on Namecheap should be a smooth process, but sometimes hiccups happen. You might encounter issues that can feel frustrating, especially if you’re new to website building. Don’t worry—many people face these same challenges. Let’s talk about how you can troubleshoot common issues effectively. ###Resolving Installation Errors
Installation errors can occur for various reasons. One common issue is incorrect database credentials. Double-check your database name, username, and password in the wp-config.php file. Another frequent problem is file permission errors. Ensure your WordPress files are set to the right permissions, typically 755 for directories and 644 for files. If you’re unsure how to check this, Namecheap’s customer support can guide you. Sometimes, your PHP version might be outdated. Make sure you’re running at least PHP 7.4. You can update this in your Namecheap cPanel by navigating to the “Select PHP Version” tool. ###Fixing Theme And Plugin Conflicts
Themes and plugins can clash, causing your site to malfunction. If your site crashes after activating a new theme or plugin, deactivate it immediately. You can do this through the WordPress dashboard or by renaming the theme or plugin folder via FTP. Check if the theme or plugin is compatible with your WordPress version. Developers often list compatibility details in the theme/plugin description. If not, consider reaching out to the developer for clarification. If you suspect a plugin conflict, deactivate all plugins and then reactivate them one by one. This will help you identify the culprit. Once you find the conflicting plugin, consider looking for an alternative that offers similar functionality. Have you ever faced these issues? How did you resolve them? Engaging with the community or seeking support can provide additional insights and solutions. Remember, every problem has a solution, and troubleshooting is just part of the learning process.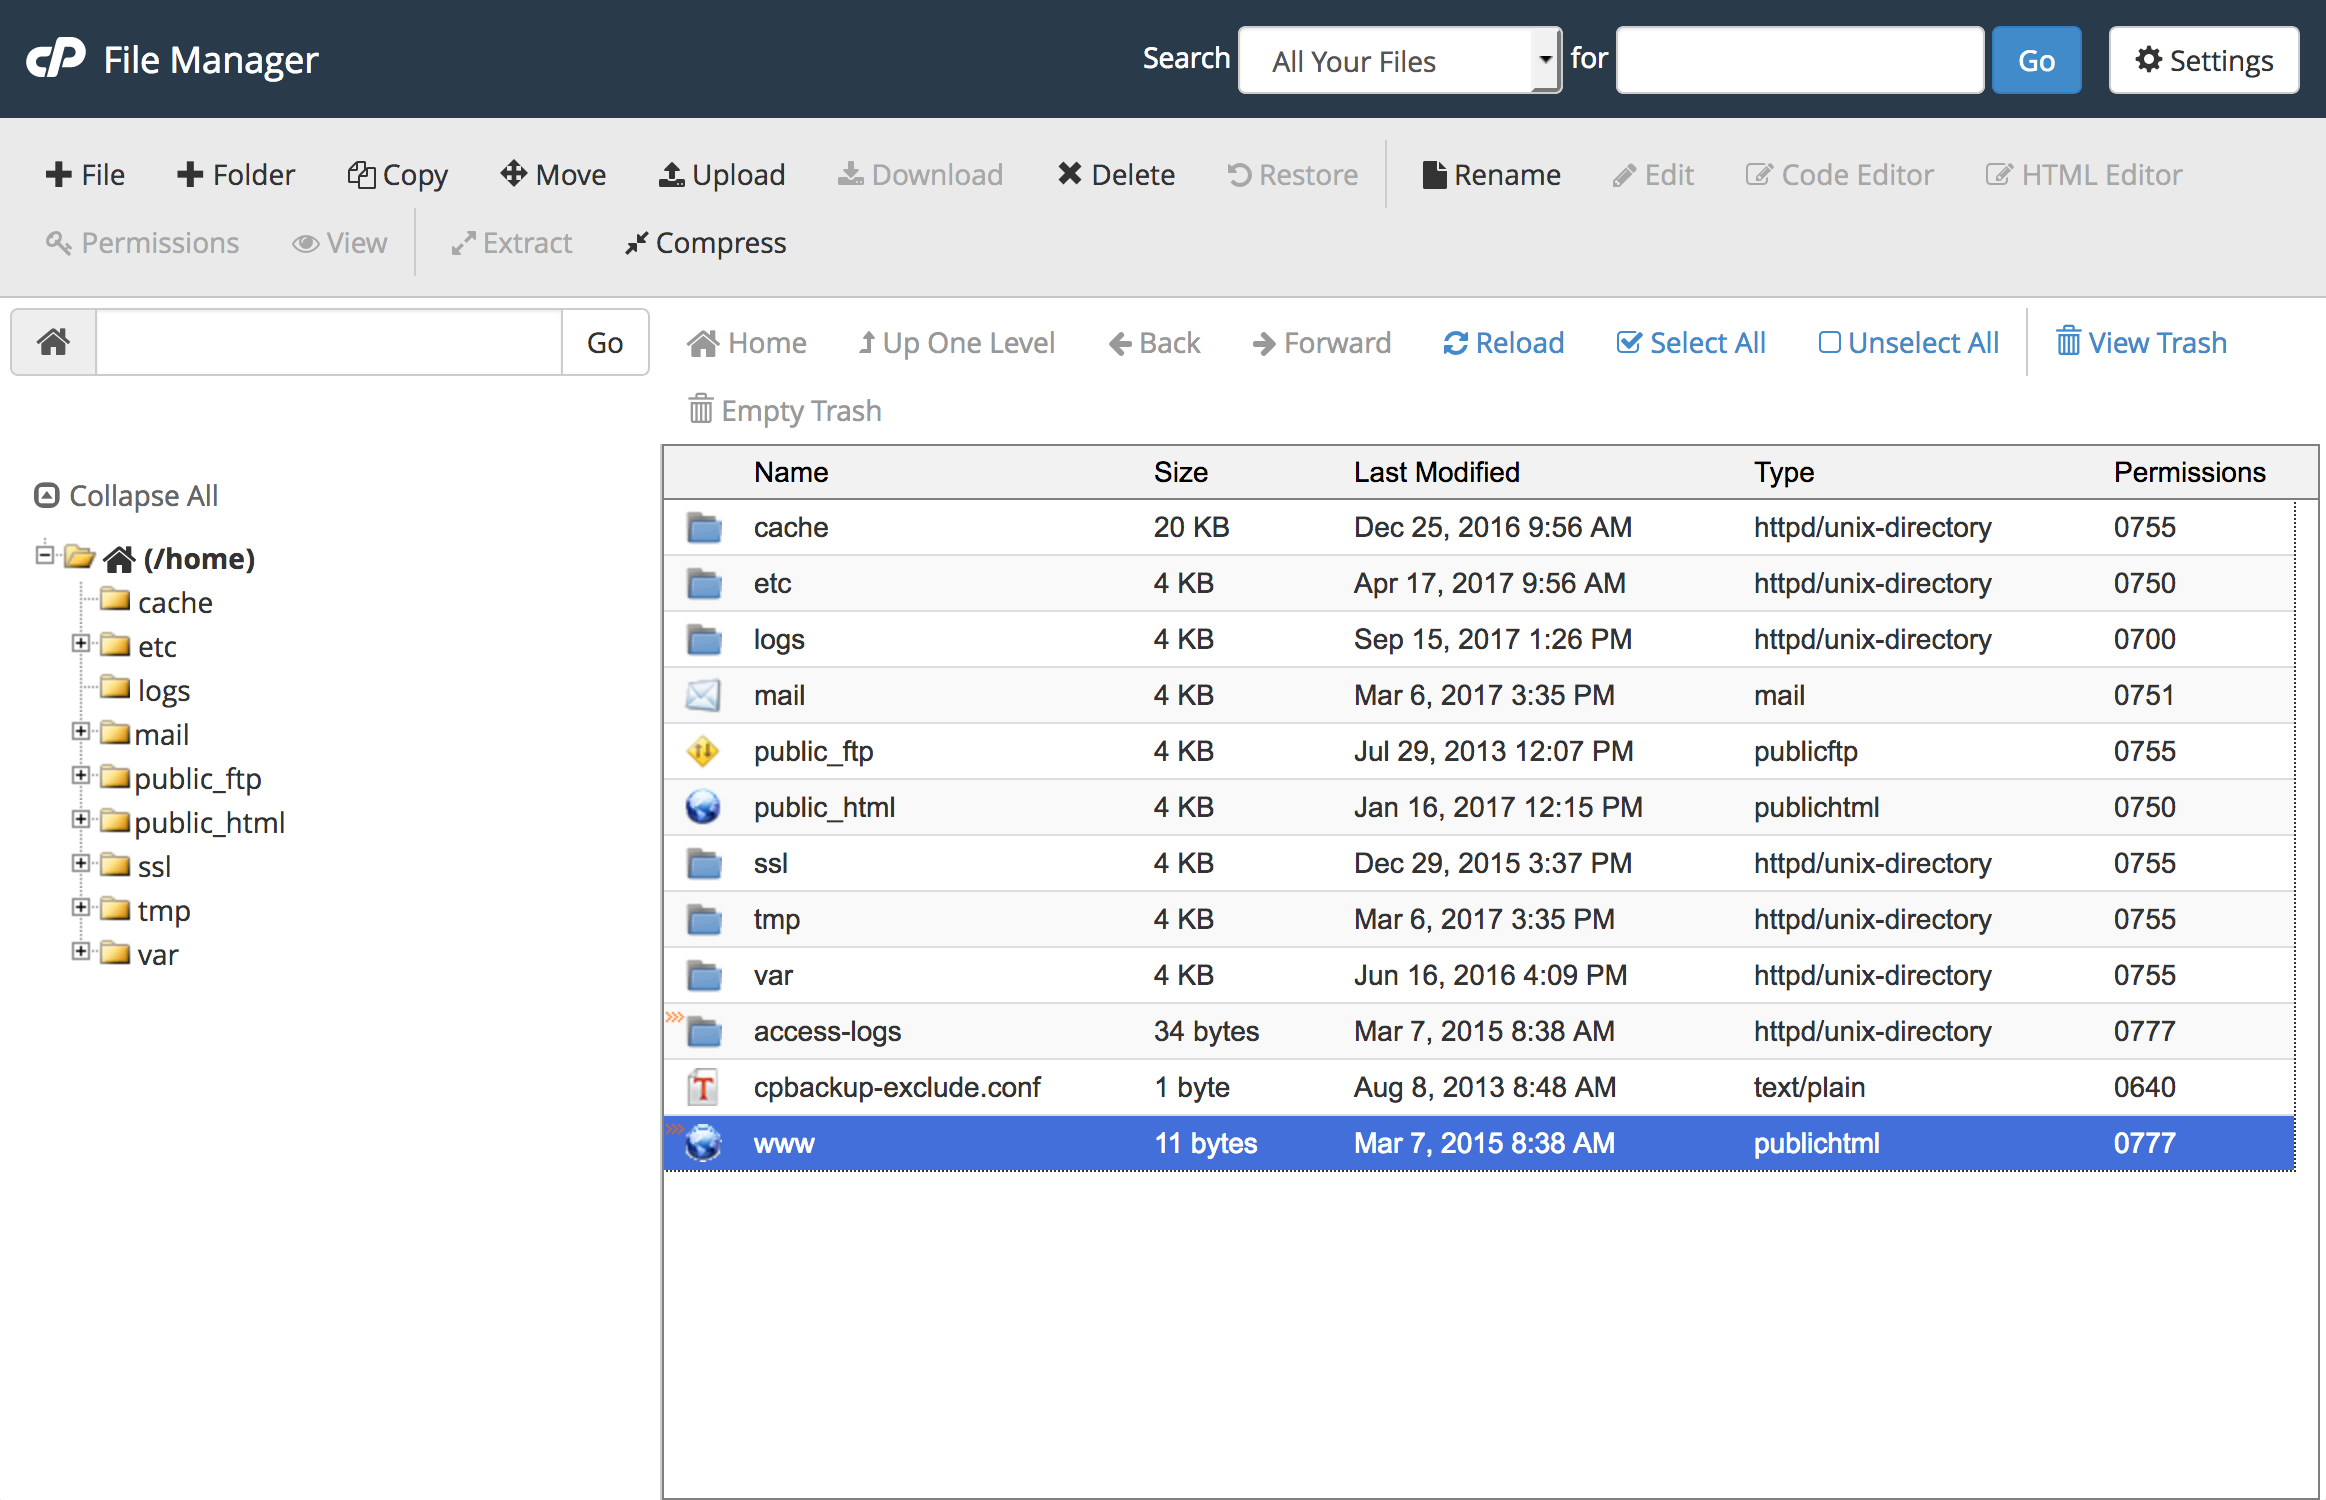
Credit: www.namecheap.com
Frequently Asked Questions
How Do I Add WordPress To Namecheap?
Log into your Namecheap account. Navigate to the “Hosting” section. Click on “Softaculous Apps Installer. ” Choose WordPress and click “Install. ” Follow the prompts to complete the installation. Ensure your domain is correctly pointed to Namecheap hosting servers for seamless setup.
Does Namecheap Support WordPress?
Yes, Namecheap supports WordPress hosting. They offer managed WordPress plans with easy installation. Users can choose from various packages tailored for WordPress, ensuring optimal performance and security. Namecheap also provides 24/7 customer support to assist with any WordPress-related queries or issues.
How To Install WordPress Step By Step?
Download WordPress from wordpress. org. Upload files to your web server. Create a MySQL database. Run the WordPress installation script by accessing your domain. Follow on-screen instructions to complete setup.
How Do I Install WordPress On My Hosting Server?
Start by downloading WordPress from wordpress. org. Upload the files to your server using FTP. Create a MySQL database and user. Configure wp-config. php with database details. Run the installation script by accessing your domain. Follow the on-screen instructions to complete the setup.
Conclusion
Installing WordPress on Namecheap is simple and efficient. Follow the steps, and your website will be ready. Choose a reliable hosting plan. Access the cPanel for easy installation. Use Softaculous for a quick setup. Customize your site to fit your needs.
Update regularly to keep it secure. Explore themes and plugins for better functionality. Enjoy building your online presence. With practice, managing WordPress becomes easier. Engage your audience with quality content. Keep learning, and improve your skills. Your WordPress journey begins here.
Happy blogging!


