
Imagine having complete control over your website’s structure, optimizing its performance, and enhancing its user experience. Sounds appealing, right?
If you’re managing a website, you might find yourself needing to change the main domain’s document root at some point. This task, while sounding technical, is a crucial skill that can empower you to customize your website’s layout and improve its functionality.
In this guide, you’ll discover the step-by-step process to change your main domain’s document root in standard web hosting environments. Whether you’re looking to enhance security, organize your files better, or simply experiment with different setups, mastering this will give you the flexibility you need. Dive in, and unlock the potential to transform your website with ease and confidence.
Credit: helpcenter.netcup.com
Understanding Document Root
The Document Root is the main folder for a website. It holds all the site’s files. This is the starting point for your web pages. When people visit your site, their browsers go to this folder. Every file in this folder can be seen online. It’s like the front door to your website. Changing this folder changes where your site’s files are found. This is vital for web hosting. It controls how your site works. It also affects where your site’s content is stored.
Web hosting uses the Document Root to show your website. It helps organize site files neatly. This makes it easier to manage. Without it, the site would not work right. It helps web servers know where to find content. It is important for site updates. It ensures files are in the correct place. This keeps your site running smoothly. It is like the heart of web hosting.
Credit: www.hostgator.com
Reasons To Change Document Root
Changing the document root can boost website security. It hides sensitive files from direct access. This makes it harder for hackers to find them. Keeping files safe is crucial. Protecting your website is important. A new root can also limit exposure. This helps in blocking attacks.
A new document root helps in better file organization. It allows for a cleaner structure. You can arrange files logically. This makes it easier to manage. Finding files becomes simple. It saves time for web developers. Efficiency increases when files are well-organized. Websites run smoother, too.
Preparing For Changes
Always make a backup of your website. This keeps your data safe. Use a simple tool to copy all files. Save them on your computer. Check everything is copied. This step is very important. If something goes wrong, your data is safe. Backups prevent data loss.
Check your hosting provider’s policies before making changes. Some providers have strict rules. These rules may affect your website. Understand what you can and cannot do. This helps avoid problems later. Look for information on their website. Contact their support if needed.
Accessing Control Panel
Open your browser. Type the control panel link in the address bar. Press enter. A login page will appear. Enter your username and password. Click the login button. Now, you are inside the control panel. You can see many options here. Control panel helps manage your website. It is like a toolbox for your site.
Find the domain settings section. Look for a tab or icon. It might say “Domains” or “Domain Management”. Click on it. A list of domains will appear. Choose the domain you want. Look for the document root option. You can change it here. This tells where your main files live. It is important for your website’s structure.
Changing Document Root
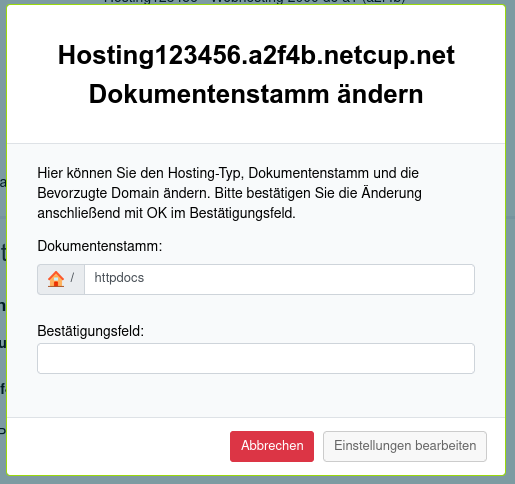
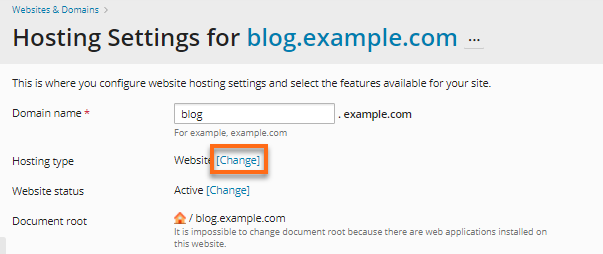
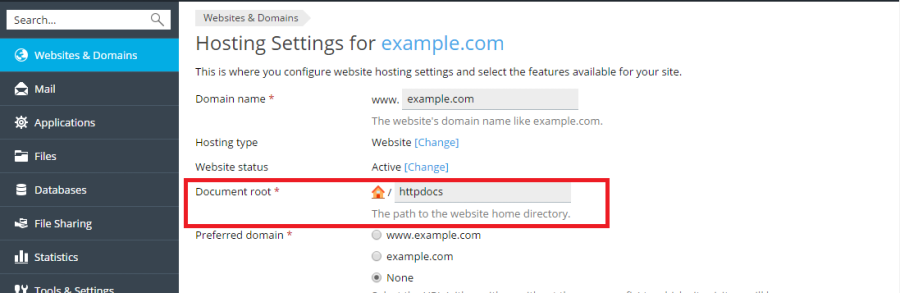
Begin by accessing your hosting account. Find the control panel. Look for the domain you want to change. Click on the domain name. You will see the current document root. Click edit or change. Enter the new folder name. Click save to apply changes. You have changed the document root!
Sometimes, changes don’t show up. Check the folder permissions. They should be set correctly. Ensure the folder exists. Also, check the server settings. They may need a refresh. If the website is not loading, verify the DNS settings. Sometimes, a cache clear helps. Restart the browser or computer. Contact support if issues persist. They can assist further.
Verifying Changes
Testing your website is very important. First, visit your site. Check if the homepage loads correctly. Navigate through different pages. Make sure all links work. Images should display properly. Ensure that all the buttons are clickable. This ensures the website is functioning smoothly.
Testing Website Functionality
Open various browsers. Check your website in each one. Look for differences. The website should appear the same. Try using a mobile phone. Make sure the website is mobile-friendly. Test the site speed. It should load quickly. If not, it might need fixing.
Checking For Errors
Look for error messages. They might pop up during testing. Fix any errors you find. Sometimes, plugins can cause issues. Deactivate them one by one. See if the problem disappears. Check your error logs. They can provide helpful details. If you need help, contact technical support.
Post-change Adjustments
After changing the domain document root, it’s important to update links and paths. Check your website for broken links. Fix any incorrect paths right away. Use a tool to scan your website. This helps find any broken links quickly. Adjust all paths in your code. Make sure they point to the new root. This keeps your site working smoothly. Double-check every link. Test them to ensure they work. Correcting these ensures visitors have a good experience.
Keep an eye on your website performance after changes. Performance might change after a new root setup. Use tools to monitor speed and uptime. Look for slow loading pages. Fix any issues you find. Good performance keeps users happy. Regular checks can prevent problems. Make sure your site runs fast. Fast sites keep visitors interested. A slow site can lose visitors.
Credit: docs.plesk.com
Frequently Asked Questions
How Do I Change The Document Root Of The Primary Domain?
To change the document root of the primary domain, access your hosting control panel. Locate the “File Manager” or “Domain Settings” section. Modify the document root path to the desired folder. Save changes and verify by visiting your domain. Ensure backup of important files before making any changes.
How Do I Change My Main Domain In Hosting?
Log in to your hosting account and navigate to the domain settings. Select the option to change the main domain. Enter your new domain name and save changes. Update any necessary DNS settings. Contact your hosting provider’s support if you encounter issues.
How To Change Domain Root Directory In Cpanel?
Log in to cPanel, click on “Domains,” select “Modify” next to the domain, and update the document root. Save changes to apply the new directory. Ensure files are correctly moved to the new location for proper functionality. Check website operation after changes.
How Do I Change The Document Root To Public_html?
Change the document root to public_html by editing the ‘DocumentRoot’ directive in your server’s configuration file. Restart the server to apply changes. Ensure public_html folder permissions are set correctly. Consult your hosting provider’s documentation for specific instructions.
Conclusion
Changing your main domain’s document root is simple. Follow the steps outlined. First, access your hosting control panel. Then, locate the document root settings. Adjust as needed. This ensures your files load correctly. It’s important for your website’s performance. Make sure to save changes.
Check your website after updating. Ensure everything functions smoothly. Regularly review your hosting settings. This helps maintain optimal site health. Understanding these basics can boost your site’s efficiency. Keep learning. Stay informed about web hosting best practices. It benefits your online presence greatly.


