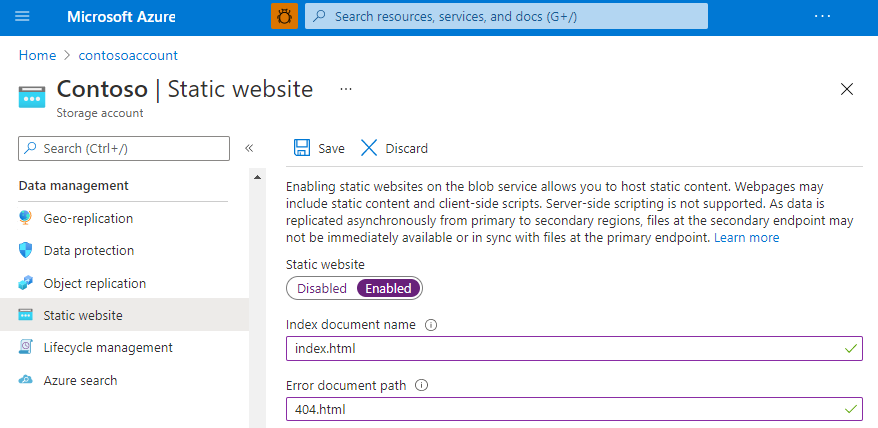
Are you ready to take your website from your computer screen to the vast expanse of the internet? Serving HTML to a web host is a crucial step in making your website accessible to the world.
It might sound technical, but don’t worry. By the end of this guide, you’ll have the confidence and knowledge to get your website up and running. Imagine the satisfaction of seeing your creation live online, reaching audiences you never thought possible.
Whether you’re a budding web developer or a small business owner eager to establish an online presence, this article will walk you through the process with clear and simple steps. Let’s make your website dreams a reality together. Dive in, and discover how easy it can be to serve HTML to a web host.

Credit: learn.microsoft.com
Web Hosting Basics
Web hosting comes in different types. Shared hosting is popular and affordable. Many websites share one server. VPS hosting offers more resources and control. It is like renting a small part of a big server. Dedicated hosting gives you the whole server. It is more expensive but offers the most control. Cloud hosting uses many servers. It is flexible and can handle a lot of traffic. Each type has its own benefits and drawbacks.
Picking the right host is important. Think about your website needs. If your site is small, shared hosting might be enough. Larger sites may need VPS or dedicated hosting. Consider your budget. Some hosts offer extra features like security or backups. Read reviews and compare different hosts. A good host makes your website fast and reliable.

Credit: themeforest.net
Preparing Html Files
Keep files in a neat order. Use a main folder for your project. Inside, create folders for images, styles, and scripts. Name files clearly. Avoid spaces in file names. Use underscores or dashes instead. This makes things easy to find. Neat folders help with quick updates.
Make sure your HTML code is right. Use an online validator. It finds errors in your code. Fix errors to make your site work better. A clean code helps your site load faster. Errors can break your site. Fix them before uploading. A valid code is important.
Using Ftp For File Transfer
Transferring HTML files to a web host is simple using FTP. This tool efficiently uploads and manages files, ensuring your website runs smoothly. Establish a connection, choose files, and upload to your server with ease.
Setting Up Ftp Client
First, you need to install an FTP client. A popular choice is FileZilla. Open the client after installation. You will need your FTP credentials. These include the host, username, and password. Input these details into the FTP client. Click connect to access the server. Once connected, you will see your local and server files.
Uploading Files To Server
Locate your HTML files on the local side. Drag them to the server side to upload. Ensure you place them in the correct directory. This is usually called public_html. Wait for the upload to complete. Your files are now on the server. Check your website to see the changes.
Control Panel Management
cPanel is like a control room for your website. It helps you manage files, databases, and emails. Many web hosts use cPanel because it is user-friendly. You can see all the tools on the main screen. Icons help you find what you need quickly.
Categories like files, databases, and domains make it easy to navigate. Exploring each category helps you understand your hosting environment. Clicking on an icon opens more tools. It’s a straightforward way to manage your website.
File Manager is a tool for uploading and organizing files. It’s like the file explorer on your computer. You can see all your website files in one place. Uploading files is simple; just click and drag them.
You can create new folders and organize files. Editing files is possible right in the browser. It is important to keep everything tidy. This makes it easier to find files later. Remember to save changes before closing.
Configuring Domain Settings
DNS stands for Domain Name System. It connects your domain to the internet. Set up DNS records to link domain to server. Use A record for IP address. Use CNAME for aliases.
Choose a DNS provider wisely. It must be reliable. Check if the provider offers support. Make sure to update records when needed. Regular checks are important.
Redirects send users from one URL to another. 301 Redirect is permanent. Use it for old links. 302 Redirect is temporary. Use it for short-term changes.
Redirects improve user experience. They keep users on the right page. Help search engines find your site. Make sure redirects are set correctly. Errors can confuse visitors.
Testing Website Functionality
It’s important to ensure all links and forms work correctly. Click every link on your site. They must lead to the correct pages. Try filling out all forms. Make sure they send information properly. If links or forms fail, fix them. Users will not like a site with broken parts.
Websites must work on different browsers. Test your site on Chrome, Firefox, and Safari. Each browser might show your site differently. Check for any issues in layout or design. Fix any problems you find. This ensures everyone sees your site as you want.
Troubleshooting Common Issues
Files need correct permissions to work. Without them, errors happen. Check permissions on files and folders. They should be readable and writable. Use CHMOD commands for fixing. Set permissions to 644 for files. Set 755 for folders. This helps in fixing errors. Ensure your web host allows changes. Some hosts have strict rules. Follow them to avoid issues.
Missing files can cause broken links. Images might not load. Ensure all files are uploaded. Double-check file names. They should match in code. Look for missing images or files. Sometimes, file paths are incorrect. Fixing them solves issues. Keep files organized in folders. This helps in finding them fast. Use correct paths in your code.

Credit: srmehranclub.com
Frequently Asked Questions
How To Put An Html File On A Server?
Upload your HTML file using FTP client software. Enter your server credentials to connect. Navigate to the desired directory, then drag and drop your file. Confirm the upload and ensure your HTML file is in the correct location. Check the file by accessing your website URL.
How Do I Send My Html Website To Someone?
Compress your HTML files into a ZIP folder. Email or use cloud services like Google Drive to share. Ensure the recipient has access permissions.
How Do I Run Html Code On Local Host?
Install a local server like XAMPP or WAMP. Place your HTML files in the server’s ‘htdocs’ folder. Start the server and open a web browser. Enter ‘localhost/yourfilename. html’ in the address bar to view your HTML code.
Where Can I Host My Html Website For Free?
You can host your HTML website for free on platforms like GitHub Pages, Netlify, or Vercel. These services offer easy deployment, custom domains, and site management tools. Simply upload your files, configure settings, and launch your site without cost. Enjoy reliable hosting and seamless integration with your workflow.
Conclusion
Serving HTML to a web host is straightforward. Start by choosing a reliable host. Upload your HTML files via FTP or a control panel. Ensure your files are organized. Check if your website displays correctly. Address any errors promptly. By following these steps, your site will be online smoothly.
Remember, practice makes perfect. Keep your HTML updated for a seamless experience. With time, you’ll grow more confident. Happy hosting!


