Have you ever struggled to make your WordPress site visually appealing? You’re not alone.
Pictures can transform a bland webpage into something engaging and memorable. They breathe life into your content and keep your audience glued to the screen. But how do you seamlessly insert pictures into your WordPress theme without pulling your hair out?
Imagine your website with vibrant images that not only captivate your visitors but also tell your story more effectively. The good news is, adding pictures to your WordPress theme is simpler than you might think. In this guide, we’ll walk you through the easy steps to effortlessly embed images into your site, ensuring your content resonates with your audience. Stick with us to discover actionable tips that will empower you to enhance your site’s design and make your content pop. Whether you’re a novice or seasoned WordPress user, you’ll find the solutions you need to make your site visually stunning. Ready to dive in? Let’s unlock the potential of your WordPress theme together!
Choosing The Right Image
JPEG and PNG are popular image formats. JPEGs are good for photos. PNGs work well for graphics. Keep file sizes small. Large files slow down your site. WebP is another format. It has high quality and small size. It’s modern and efficient.
High resolution images look sharp. Resolution affects loading speed. Fast sites attract more visitors. Use 72 DPI for web images. Resize images to fit your theme. Avoid blurry images. Blurry images look unprofessional. Choose images that are clear.
Free images are available online. Websites like Unsplash and Pexels offer free images. Free images are easy to find. Paid images offer better quality. Sites like Shutterstock have paid options. Paid images are unique. Choose what fits your budget.
Preparing Your Image
Uploading images to a WordPress theme is simple. Select the image, upload it to the media library, and insert it into the page. Make sure the image fits well with the content.
Image Editing Tools
Use tools like Photoshop or GIMP to edit pictures. These tools help in cropping, adjusting colors, and resizing. Choose the right size for your theme. Smaller images load faster. Faster loading images make your website better.
Compressing For Web
Images should be compressed to reduce file size. Smaller files load quicker. Tools like TinyPNG or JPEGmini can help. They keep the quality good while reducing size. Always check the image after compressing.
Adding Alt Text
Alt text helps describe the image. It is useful for people who can’t see the image. It also helps search engines understand your image. Use simple words to describe. Keep it short and clear. This improves your site’s SEO.
Uploading To The Media Library
Easily upload images to the Media Library by navigating to your WordPress dashboard. Select ‘Add New’ under Media and drag your picture into the upload area. Once added, insert it into your theme by choosing the ‘Add Media’ button while editing a post or page.
Accessing The Media Library
First, log in to your WordPress dashboard. Look for the “Media” section on the left. Click on “Library” to see all uploaded files. This is where you can manage your images. Remember, this section is crucial for organizing media.
Uploading An Image File
To add a new image, click on “Add New.” Select the image file you want. Drag and drop it into the upload area. Wait for the upload to finish. Keep the file size small to save space. This helps your site load faster.
Organizing Images
Use categories and tags to sort images. This makes finding them later easier. Name your files clearly. For example, use “sunset-beach.jpg” instead of “IMG1234.jpg”. Always use the alt text field. Describe what the image shows. This helps with SEO and accessibility.
Inserting Image Into A Post Or Page
Adding a picture is easy. Use the WordPress Editor. Click on the “Add Media” button. Choose your image. Then, click “Insert into Post”. Your image will appear in your text.
Find the toolbar above your text box. Click the button that says “Add Media”. You will see a new window. This is the media library. Pick an image from here. Or, upload a new one. Click “Insert into Post.” Now, your image is in your post.
You can move your image left, right, or center. Click on your image. A small menu will show. Choose the alignment you want. To change size, click on the blue dots. Drag them to make the image bigger or smaller.
Add a caption to your image. Click on the image. Then, click “Edit.” A box will appear below the image. Type your caption here. Captions help readers understand pictures better. They are fun and useful.
Adding Image To Widgets
Start by going to the WordPress dashboard. Find the Appearance tab. Click on Widgets. This is where you can manage widgets. You will see many widget areas here. Choose the area you want to add your image to. It’s simple and quick.
Look for the Image Widget. Drag it to your chosen widget area. After dragging, click to open it. Now, you can upload an image. Choose an image from your library. Click Save when you are done. Your image is now in the widget.
There are options to customize the image. Adjust the size if needed. Add a title or caption. You can also add a link. This helps make the image more interactive. Finally, click Save. Check your site to see the changes.
Credit: tonjoostudio.com
Customizing Theme With Header Images
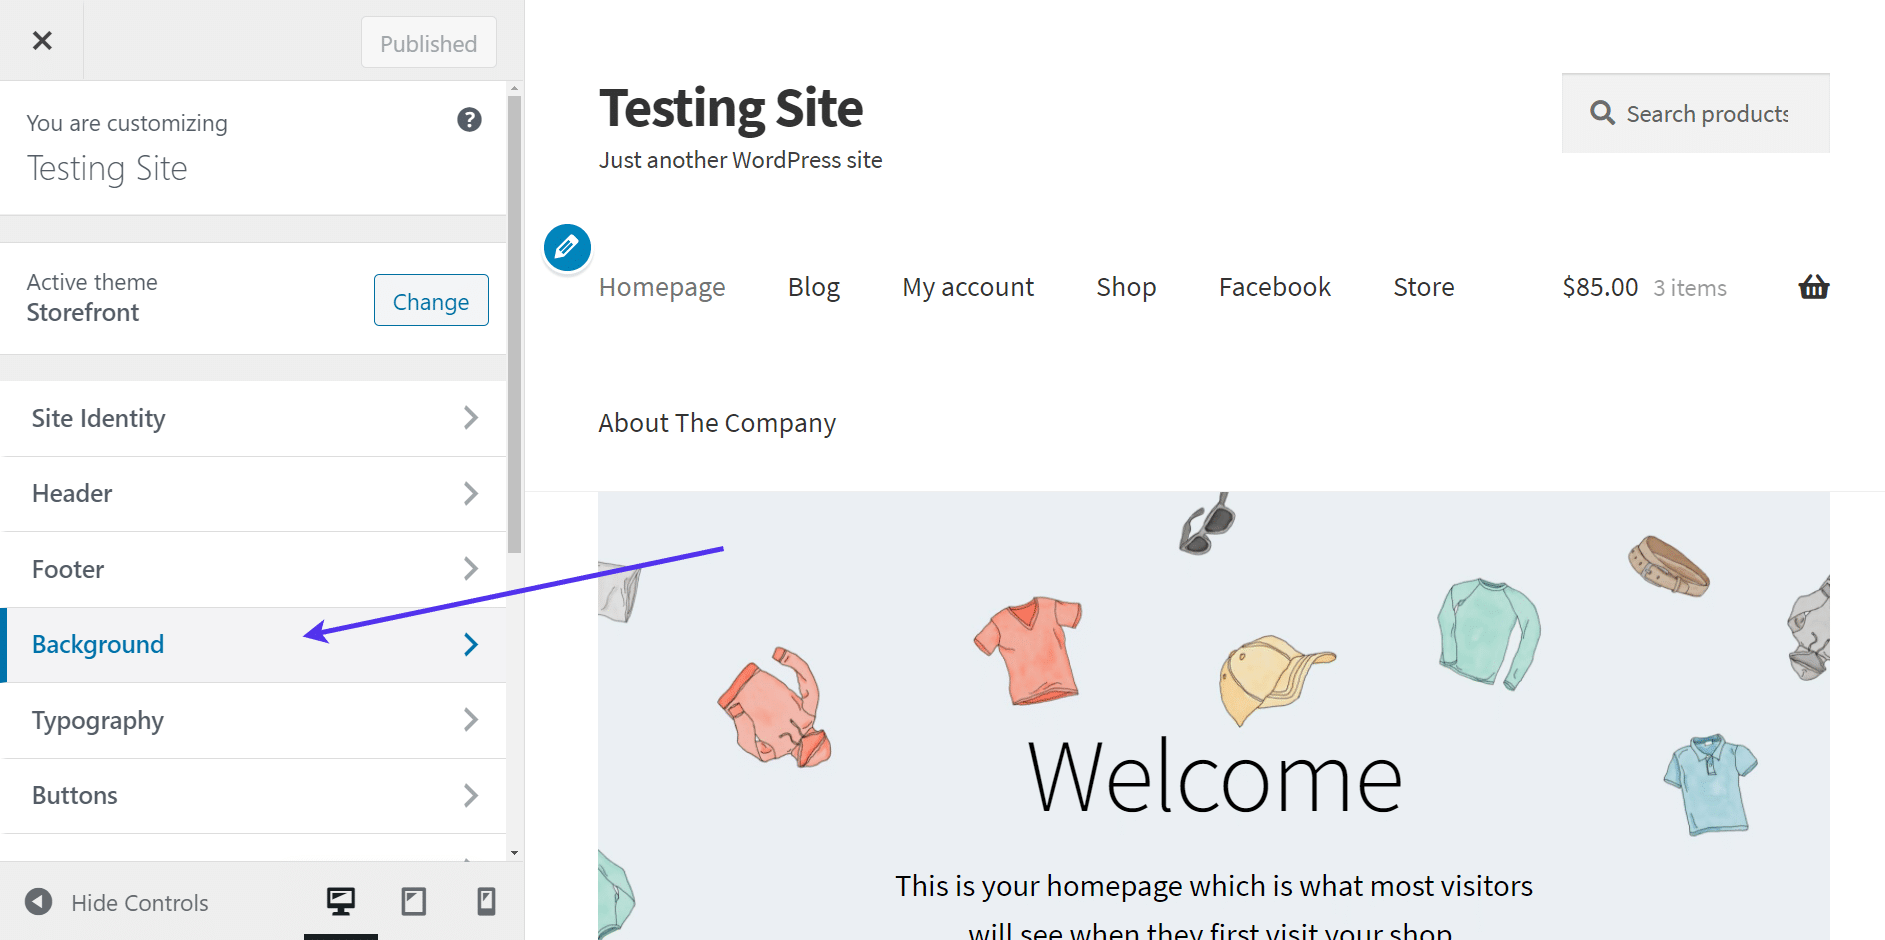
First, go to your WordPress dashboard. Look for the Appearance menu. Click on Customize. This opens the Theme Customizer. Here, you can make changes to your theme. It is simple and fun.
In the Customizer, find the Header Image section. Click on it. Now, click on Add New Image. Choose a picture from your computer. Make sure your picture looks nice. It should fit well in the header.
After uploading, adjust the image display. Use the Crop tool if needed. Position your image well. Check how it looks on the website. Happy with it? Click Save & Publish. Now your site looks great!
Embedding Images With Shortcodes
Shortcodes make adding pictures easy. They are like simple codes. Use them to place images in posts. Copy the shortcode and paste it where you want the picture. Shortcodes often look like [image]. This tells WordPress to put an image there. Shortcodes save time and effort. They are quick and handy. Everyone can use them. Even beginners find them simple.
Shortcodes can be changed. Add size to make images fit better. Use width and height to change size. Example: [image width="300" height="200"]. Add captions to explain pictures. Use for this. Make pictures clickable with links. Use [image link="URL"]. Customizing gives more control. Images look better with these changes.
Problems with shortcodes happen. Sometimes images don’t show. Check if the shortcode is correct. Missing brackets cause errors. Look for typos in the code. Check the image URL. Broken links stop images from showing. Update links if they change. WordPress themes affect shortcodes. Some themes don’t support all codes. Check theme settings. Troubleshooting helps solve these problems.

Credit: www.youtube.com
Seo Best Practices For Images
Always name your image files with care. Avoid generic names like “image1.jpg.” Use words that describe the picture. For example, “red-flower-garden.jpg” is clear. This helps search engines understand the image. It also improves your site’s ranking.
Alt tags are important for SEO. They describe the image for search engines and users. Always add alt tags that are short and clear. For a picture of a dog, use “brown dog playing.” This helps people who can’t see the image.
Sitemaps help search engines find your images. Create an image sitemap for your site. List all image URLs in the sitemap. Submit the sitemap to search engines. This way, your images can be found easily. It helps in boosting your site’s visibility.
Credit: kinsta.com
Frequently Asked Questions
How Do I Add A Picture In WordPress?
To add a picture in WordPress, navigate to your dashboard. Select ‘Media’ then ‘Add New’. Upload your picture, and you can insert it into posts or pages. Use the ‘Add Media’ button in the editor to place the picture where you want.
Can I Customize Image Size In WordPress?
Yes, you can customize image size in WordPress. After uploading, click on the image in the media library. Choose ‘Edit Image’ to resize or crop. You can also set custom dimensions when inserting the image into your post or page.
What Are The Best Image Formats For WordPress?
The best image formats for WordPress are JPEG, PNG, and GIF. JPEG is ideal for photographs due to its compression. PNG is perfect for graphics and images requiring transparency. GIFs are useful for animations. Choose based on your needs and image type.
How To Optimize Images For WordPress?
To optimize images for WordPress, reduce file size without losing quality. Use plugins like Smush or ShortPixel to compress images automatically. Ensure proper dimensions to fit your theme layout. Optimized images improve loading times and enhance user experience.
Conclusion
Inserting pictures into your WordPress theme enhances visual appeal. Start by choosing images that fit your content. Ensure high quality and proper dimensions for a polished look. Use WordPress tools to upload and manage your images. Try different placements to find the best fit.
Keep your site engaging and easy to navigate. Regularly update images to maintain freshness. Pictures make your website more dynamic. They catch the viewer’s eye and keep them interested. Follow these steps to effectively enhance your WordPress theme. Your site will look better and attract more visitors.