Do you want to share a map online but don’t know where to start? Hosting a web map on AWS might sound complex, but it’s easier than you think.
Imagine having the power to display real-time data or showcase geographical insights with just a few clicks. AWS provides a reliable and scalable platform to turn your idea into reality. By the end of this article, you’ll have the know-how to host your web map effortlessly.
Unlock the potential of AWS and give your audience a seamless map experience. Ready to dive in? Let’s explore how you can make it happen!
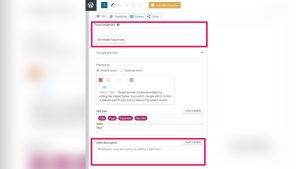
Credit: edrawmax.wondershare.com
Setting Up Aws Account
Visit the AWS website to begin. Click on the “Create an AWS Account” button. Fill in your email and choose a password. Verify your email. Choose the account type. Personal or professional. Enter your details. Name, phone, and country. Provide payment information. Credit card or debit card. Confirm and create your account.
Log into your new account. Navigate to the settings page. Find the security settings. Set up multi-factor authentication. This keeps your account safe. Check your billing settings. Ensure everything is correct. Review notification preferences. Choose how you get alerts. Explore the AWS dashboard. Familiarize yourself with the tools. Ready to host your web map.
Choosing The Right Aws Services
Amazon EC2 helps run your web map. It is a virtual server. You can choose the size you need. Small, medium, or large. EC2 is flexible and powerful. It scales up or down. You pay for what you use. No hidden costs. Set up is simple and fast. Just follow the steps.
Store your map data with Amazon S3. It is safe and secure. You can access it anytime. Share it with others easily. S3 keeps your data safe. It is cost-effective. Choose a storage class that fits. Standard or infrequent access. Large data is not a problem. S3 handles it all.
Amazon RDS manages your database. It is easy to use. RDS is fast and reliable. Set up in minutes. Choose the database type. MySQL, PostgreSQL, or others. It scales as your needs grow. Backups are automatic. No worries about data loss. It keeps your map data organized.
Preparing Web Map Data
Using the right data formats is important. Common formats include GeoJSON and Shapefiles. These formats help in storing and sharing map data. Always check for compatibility with your tools. Different tools may need different formats. Standards like OGC ensure data works well. Following standards keeps your data consistent and reliable.
Large data files can be slow. Splitting them into smaller pieces helps. Use compression methods like zip to reduce size. This makes data load faster. Simplifying complex shapes is another trick. Fewer points mean faster processing. Keep only necessary information. Remove any extra details. This keeps your web map quick and efficient.

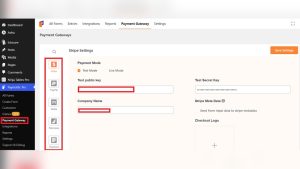
Credit: docs.aws.amazon.com
Deploying On Amazon Ec2
Start by opening the AWS Management Console. Click on EC2 under services. Choose Launch Instance. Select an Amazon Machine Image (AMI). This image contains the OS and software. Choose an instance type. This defines the hardware. Click Next. Configure instance details. Set network and key pair settings. Click Next again. Add storage if needed. Review your settings. Click Launch.
After launching, connect to your instance. Use SSH or EC2 Instance Connect. Update your package manager. Install necessary packages. You may need Apache or Nginx. Install Python or Java if required. Check software versions. Ensure compatibility with your web map. Finish by setting up firewall rules. Allow necessary ports. This enables web traffic.
Using Amazon S3 For Storage
Host your web map on AWS using Amazon S3 for reliable storage. This service offers easy access and secure data management. Users can efficiently store and retrieve map data, ensuring smooth web map performance.
Setting Up S3 Buckets
Amazon S3 stores files safely. First, create an S3 bucket. Choose a name for your bucket. Pick a region near you for faster access. Click ‘Create Bucket’ to finish. Now, your bucket is ready to use.
Managing Access And Permissions
Control who can see your files. Set permissions for users. Use AWS Identity and Access Management (IAM). IAM helps manage permissions. You can allow or deny access. Always secure your data carefully. Protect your files from strangers. Check permissions regularly. Update them if needed.
Database Setup With Amazon Rds
Start by logging into the AWS Management Console. Choose RDS from the services list. Click on Create database. Select the engine you prefer, like MySQL or PostgreSQL. Choose the free tier option if available. Fill in the database instance details like name and password. Finally, click Create to set up your RDS instance.
Open your computer’s terminal. Use the RDS endpoint to connect. Type the command: mysql -h your-endpoint -u your-username -p. Enter your password when asked. If everything is correct, you should connect to your database. Check your connection by typing SHOW DATABASES;. This will list all databases you have.
Configuring Network And Security
Create a Virtual Private Cloud (VPC) on AWS. Choose a region for your VPC. Define subnets within the VPC. Subnets help in organizing resources. Assign an IP address range to the VPC. This range must be unique. Enable internet gateway for VPC access. Connect the gateway to your VPC. This enables access to the web map.
Set up security groups for your VPC. Security groups control traffic. They act like virtual firewalls. Define rules for inbound and outbound traffic. Allow specific IP addresses only. Limit access to your web map. Use port numbers to secure connections. This ensures safe access to your map.
Publishing Web Map
Set up an AWS account. It’s essential for hosting. Choose a suitable EC2 instance. It should match your needs. Install a web server like Apache or Nginx. This helps in serving files. Ensure the server can handle map data. Configure the security groups. They control access to your server. Allow HTTP and HTTPS protocols. This ensures secure data transfer.
Access your web map through a browser. Use the public IP of your instance. Check if the map loads properly. Zoom in and out to test the map. Ensure all layers are visible. Test different devices. This checks responsiveness. Verify the map’s functionality. Make adjustments if needed. Monitor server logs. They show access issues. Regular testing is crucial. It ensures reliable map access.
Monitoring And Scaling
AWS CloudWatch is a tool that watches over your web maps. It checks if everything is working well. CloudWatch sends alerts if something is wrong. You get reports about your web map’s health. These reports help you fix issues quickly.
Auto Scaling helps your web map handle more visitors. It adds or removes servers automatically. This means your web map won’t slow down. Auto Scaling keeps your web map fast and available. This ensures a good experience for users.

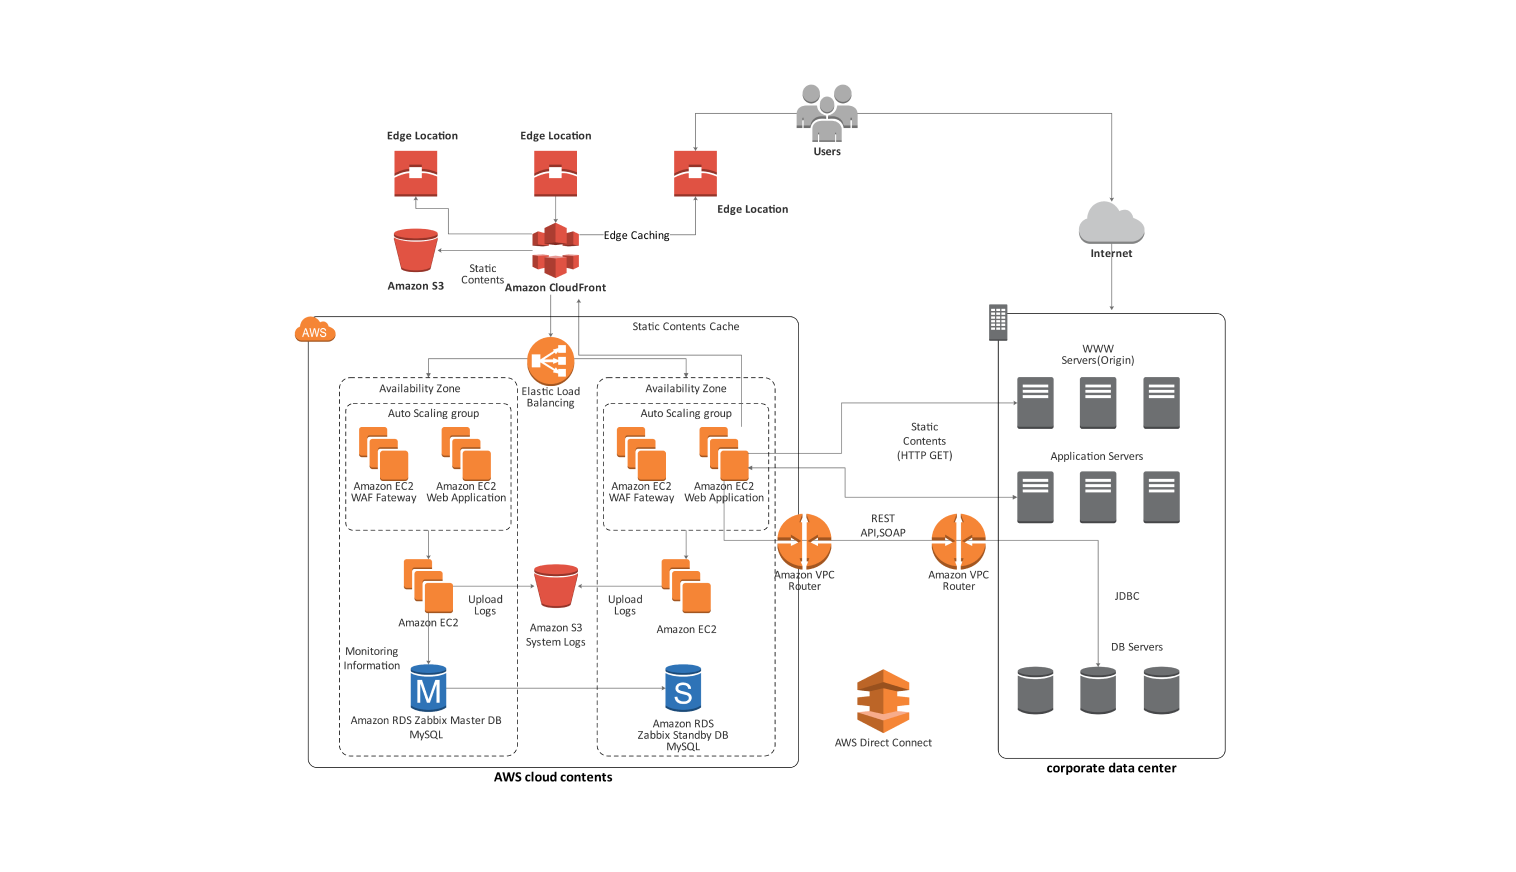
Credit: aws.amazon.com
Cost Management
Setting up a web map on AWS involves effective cost management. Choose cost-efficient services like Amazon S3 and EC2. Monitor usage to avoid unexpected charges.
Estimating Costs
Hosting a web map on AWS can cost money. Costs depend on services used. Compute power and storage are key factors. Bandwidth also affects the price. Check each service’s pricing page. Estimate usage for a better idea. Use AWS calculator tools for help. These tools show expected costs. Plan budget carefully to avoid surprises. Consider both short-term and long-term costs.
Reducing Expenses
Costs can be lowered with smart choices. Use spot instances for cheaper compute power. Reduce storage size when possible. Choose data transfer wisely to save money. Implement caching to minimize data requests. Use reserved instances for steady usage patterns. Review bills regularly to spot savings. Optimize resources to avoid waste. Keep track of usage to control costs. Consider free-tier options for small projects.
Frequently Asked Questions
Can You Host A Web App On Aws?
Yes, you can host a web app on AWS. AWS offers services like EC2, S3, and Elastic Beanstalk for hosting. These services provide scalability, security, and flexibility for web applications. AWS also supports various programming languages and frameworks, making it a versatile choice for developers.
How To Host A Website In Aws?
To host a website on AWS, first create an AWS account. Set up an EC2 instance, configure security groups, and install a web server. Upload website files and launch the application. Use Route 53 for domain management. Ensure regular backups and monitor performance for optimal results.
Can You Host A Website On Aws S3?
Yes, you can host static websites on AWS S3. It provides reliable, scalable storage and supports HTML, CSS, and JavaScript. Utilize S3’s static website hosting feature to serve content directly from the bucket. Ensure your bucket is publicly accessible and configure DNS settings for custom domains.
How To Host A Dynamic Website In Aws?
Host a dynamic website on AWS by using EC2 for servers and RDS for databases. Utilize S3 for storing static files. Use Route 53 for domain management. Implement Load Balancing and Auto Scaling for traffic management. Secure your site with IAM and Security Groups.
Conclusion
Hosting a web map on AWS is straightforward with some planning. Start by setting up an AWS account. Choose the right service for your needs. Use Amazon S3 for storage. Consider using Amazon EC2 for server hosting. Don’t forget to configure security settings carefully.
Test your map to ensure it runs smoothly. Remember, AWS offers scalability and reliability. This makes it a strong choice for web map hosting. With these steps, your map will be accessible and efficient. Enjoy sharing your maps with the world!