Are you looking to showcase your work online or share your ideas with the world? Hosting a web page on IIS (Internet Information Services) might be the perfect solution for you.
Whether you’re a budding developer or a business owner wanting to establish an online presence, understanding how to set up your web page on IIS can be a game-changer. Imagine the freedom of having your content accessible 24/7, right at the fingertips of your audience.
In this guide, we’ll walk you through the process step-by-step, using simple language and clear instructions. Get ready to transform your digital aspirations into reality, as you discover how to effectively host a web page on IIS. Don’t miss out on this opportunity to enhance your online skills and visibility!
Setting Up Iis
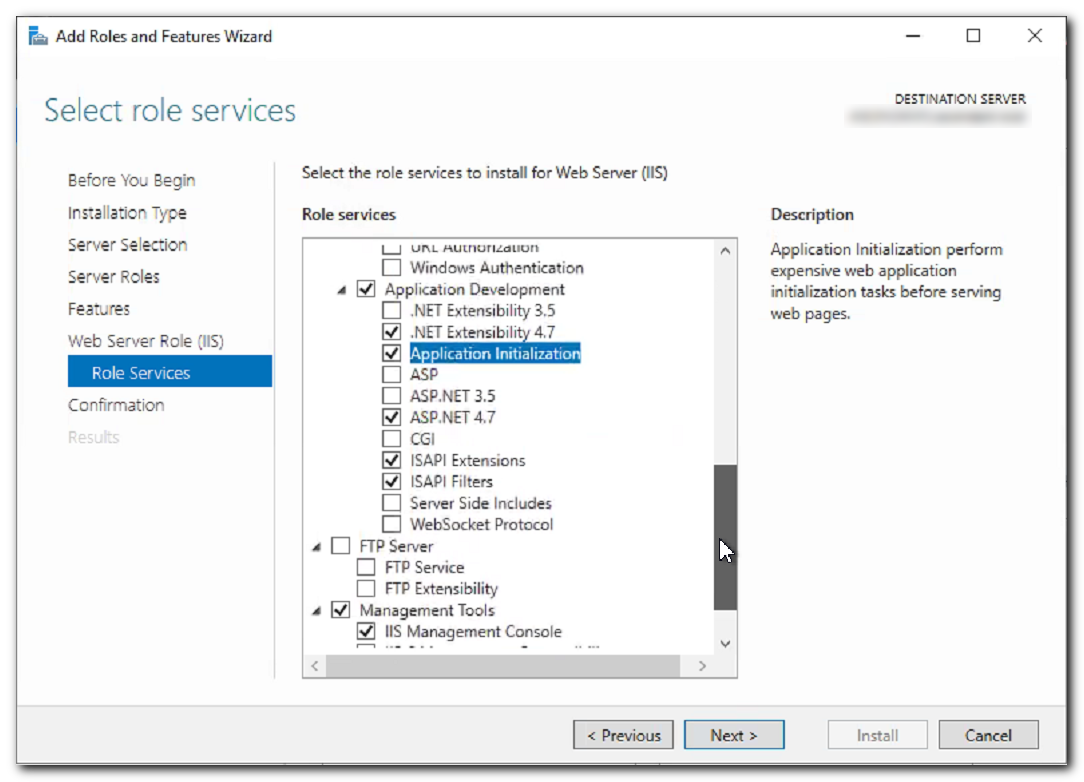
Open the Control Panel on your computer. Find and click on Programs. Choose Turn Windows features on or off. Look for Internet Information Services. Check the box next to it. Click OK to install. Wait for the process to complete. IIS is now installed!
Open the IIS Manager from the start menu. Choose the server name on the left. Click on Sites. Select Default Web Site. On the right, click Bindings. Check the settings for your site. You can change the port number here. Make sure the settings match your needs. Save changes by clicking OK. Your basic settings are ready!
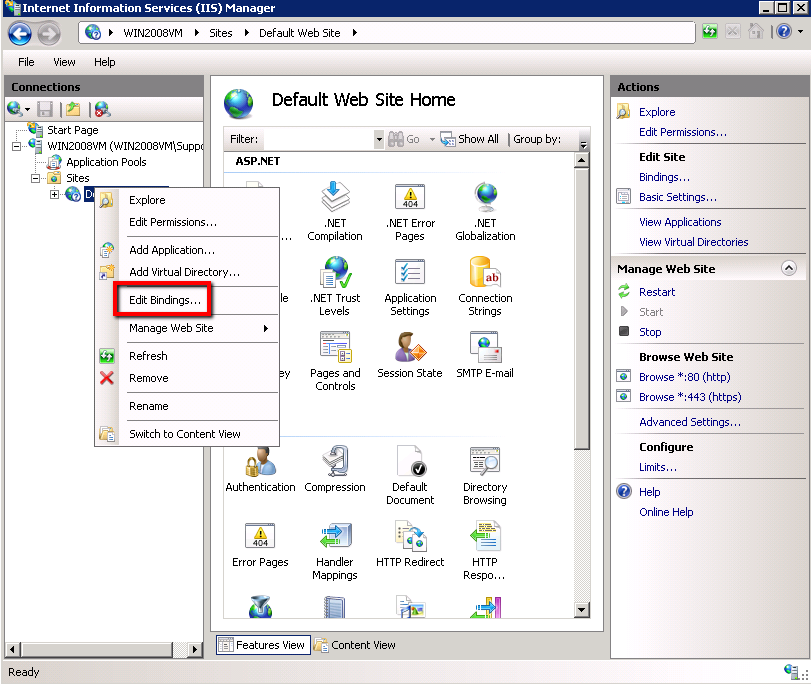
Credit: knowledge.digicert.com
Creating A Website
Open the IIS Manager on your computer. It helps manage websites. Click on the “Sites” folder in the left panel. Then, choose “Add Website” from the right panel. A new window will appear. Enter a name for your site in the “Site Name” box. This helps you identify your site.
Select a physical path. This is the folder where your web files are stored. Click “OK” to confirm. Your new site is now ready. Don’t forget to start the site. You can do this by clicking the “Start” button in the right panel.
First, you need a domain name. This is like a web address. Buy it from a domain registrar. Next, go to your IIS Manager. Click on your site. Then choose “Bindings” from the right panel. Click “Add” to create a new binding.
Choose “http” as the type. Enter your domain name in the “Host Name” box. Click “OK” to save. Your domain is now linked to your site. Remember to update DNS settings at your registrar. This connects your domain to your server’s IP address.
Deploying Web Files
First, open your IIS Manager. Then, locate your website in the list. Click on it to select. Now, find the root folder of your site. This is where you will put your files. Next, upload your HTML files here. Don’t forget the CSS files. They help make your site look nice. Ensure each file is in the correct place. This will help your site display correctly. Now, check your site in a browser. Make sure everything looks good.
You may need to add more files. These could be JavaScript files. They help your site do special things. Or maybe you need images. Put them in a folder called “images”. This keeps things tidy. Always check your site after changes. This helps catch any mistakes early. Remember to save your work often. This prevents loss of important files. Keep your site organized for easy updates.
Configuring Site Bindings
Protocols and ports help computers talk to each other. HTTP uses port 80. HTTPS, which is more secure, uses port 443. Each site needs a port to work. Always check which port your site uses. This helps in avoiding conflicts.
An SSL certificate keeps your site safe. It encrypts data so others can’t read it. To add SSL, buy a certificate from a trusted place. Install it on your web server. This step helps in making your site secure. Users will see a padlock icon in their browser. This tells them your site is safe.
Managing Permissions
Every user needs the right access. This helps them do their job. Assign roles based on tasks. Some users need read-only access. Others might need to edit files. Create groups for similar users. This makes it easy to manage. Always check who can see or change files. Keep your site safe.
Folders need special settings. Set permissions for each folder. Decide who can open or change them. Use Windows Explorer to adjust settings. Right-click on the folder. Choose “Properties” and then “Security”. From here, you can add or remove users. Make sure only trusted users have full control. This keeps your data safe.
Credit: pleasantsolutions.com
Monitoring And Logging
Site logs help track website activity. They show who visits your site. To enable logs, go to the IIS Manager. Click on the site you want. Find the Logging option in the Features view. Choose your log file format. Common formats are W3C and IIS. Select the folder to save logs. Make sure you check the Enable logging box. This will start recording visits.
Analyzing logs can help find website problems. Look for traffic patterns. See which pages get more visits. Check for errors in the logs. Find common error codes like 404 or 500. These codes show issues with page loading. Fixing these errors can improve your site. Logs can also show peak traffic times. Knowing this can help you manage server load.
Troubleshooting Common Issues
Connections can fail due to firewall settings. Check if the firewall allows web traffic. Also, ensure the port is open. Most web pages use port 80. If using a different port, adjust settings. Sometimes, a DNS issue causes trouble. Verify the domain name resolves correctly. Try using the IP address directly to test this. Remember, the server must be online.
Security warnings often appear due to certificate issues. Ensure the SSL certificate is valid. Check if the certificate matches the domain name. Sometimes, browser settings can trigger warnings. Ensure the browser trusts the certificate authority. Update expired certificates promptly. Another cause could be mixed content. Ensure all resources load over HTTPS. This includes images and scripts.

Credit: serverfault.com
Frequently Asked Questions
How To Host A Webpage In Iis?
Open IIS Manager and click on “Sites”. Select “Add Website”. Enter your site’s details. Choose a physical path for your website files. Assign a binding with a port and hostname. Click “OK” to finish. Your webpage is now hosted in IIS.
How To Create A Web Server In Iis?
Open IIS Manager and click “Add Website. ” Enter the site’s name, physical path, and binding settings. Click “OK” to create the web server.
How Do I Host A Web Page?
Choose a reliable web hosting provider. Register a domain name. Upload your web files using an FTP client. Ensure your website is live by checking its URL. Regularly update and maintain your site for optimal performance.
How Do I Host A .net Web Application In Iis?
Install IIS on your server. Publish your. NET application. Copy files to the IIS root folder. Open IIS Manager, add a new site, and point it to your application’s folder. Configure bindings and start the site. Make sure. NET Framework is properly configured in the application pool.
Conclusion
Hosting a web page on IIS is straightforward. Follow the steps carefully. Choose your server settings wisely. Configure your site for optimal performance. Secure your web page with proper settings. Regularly update your IIS server. Monitor your site’s traffic and performance.
Troubleshoot issues promptly to ensure smooth operation. IIS offers robust features for hosting. It’s a reliable choice for web hosting needs. Practice makes perfect; experiment and learn. With patience, you’ll become proficient in using IIS. Enjoy managing your web pages with confidence and ease.