
Are you looking to change your main domain in Cpanel through Namecheap but feeling a bit lost? You’re not alone.
Many users find themselves puzzled by the process, yet achieving this can significantly streamline your online presence and management. Imagine having everything perfectly organized and easily accessible, just the way you want it. This guide is crafted to help you navigate the steps seamlessly and confidently.
You’ll discover how simple tweaks can lead to a more efficient and controlled web hosting experience. Stick with us, and you’ll soon be managing your domains like a pro, with no stress and no hassle. Ready to take control? Let’s dive in!

Credit: www.youtube.com
Accessing Your Cpanel Account
Easily change your main domain in Namecheap’s Cpanel by accessing the “Domains” section. Select the domain you want as the main one, and follow the instructions provided. Ensure your domain settings are correct to prevent issues.
Accessing your cPanel account is the first step in changing your main domain on Namecheap. But, do you ever wonder why this process feels like you’re cracking open a digital safe? Navigating through cPanel can seem daunting if you’re not familiar with its layout. However, once you understand the basics, you’ll be surprised at how intuitive it becomes.Logging Into Your Cpanel
Begin by visiting Namecheap’s website. Locate the login area, and enter your credentials. If you’ve forgotten your password, don’t panic! Use the password recovery option. Once logged in, find the cPanel link or icon on your dashboard. Click it, and voila! You’re in your cPanel interface.Recognizing Cpanel’s Layout
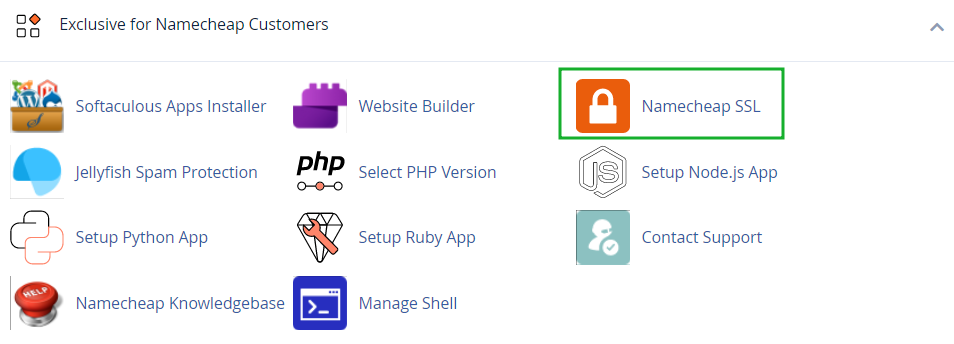
The cPanel layout might seem cluttered at first glance. But think of it as a busy marketplace; each section serves a purpose. Familiarize yourself with the categories like ‘Files’, ‘Domains’, and ‘Security’. Hover over each icon to read their descriptions. This practice will help you navigate more efficiently.Finding The Domain Section
Now, direct your attention to the ‘Domains’ category. This is where the magic happens. Look for the option labeled ‘Domain Manager’ or similar. Click on it, and a list of your domains will appear. Consider this your domain control center.Understanding Your Domain List
Your domain list includes all the domains associated with your account. Notice any patterns? Each domain has a unique identifier and options next to it. Select your current main domain. Think of this list as a library catalog; you’re choosing the book (domain) you want to read (modify).Engaging With Support For Assistance
Stuck in a digital maze? Don’t hesitate to reach out to Namecheap’s support. They’re a beacon of light in the labyrinth of tech woes. Use their live chat or submit a ticket. Why struggle alone when help is just a click away? As you navigate through cPanel, remember: every click is a step towards mastering your domain. What insights have you gained in your journey through cPanel? Share your thoughts in the comments below!
Credit: www.youtube.com
Preparing For Domain Change
Navigating domain changes in cPanel on Namecheap involves a few simple steps. Start by accessing your cPanel and selecting the “Domains” section. Follow the prompts to update your main domain, ensuring seamless site performance.
Preparing for a domain change in cPanel Namecheap is an important step that requires careful planning and execution. It’s like preparing for a big move—you want to ensure everything is packed, organized, and ready for transition. Before you start, it’s crucial to understand what needs to be done to make your domain change seamless and effective. ###Backup Your Data
Before making any changes, create a complete backup of your website. This includes files, databases, and email accounts. Imagine losing all your hard work because of a minor oversight! Use cPanel’s backup tools or download files manually to your local storage. This safety net ensures that you can easily restore your site if something goes wrong during the domain change. ###Check Domain Availability
Ensure your desired new domain is available and registered under your Namecheap account. It might sound obvious, but double-checking can save you from unexpected surprises. What if your chosen domain is already taken or has expired? A simple search in Namecheap will confirm its availability, allowing you to proceed with confidence. ###Update Dns Settings
Your domain’s DNS settings play a crucial role in directing traffic to the right server. Updating these settings is like changing your address so your mail gets delivered to the right place. Log into your Namecheap account and navigate to the DNS settings. Make necessary changes to point the domain to your cPanel server, ensuring visitors reach your site smoothly. ###Inform Your Audience
Changing your main domain is a significant event for your website. Have you considered how your audience will react? Inform them about the change through newsletters, social media, or a banner on your website. This proactive approach not only maintains trust but also prevents confusion, ensuring your visitors can easily find you after the switch. ###Test And Verify
After making the domain change, thoroughly test your website. Check all links, forms, and functionalities to ensure everything works as expected. Imagine visiting a site only to find broken links and inaccessible pages—frustrating, right? Conduct a detailed review to provide a seamless experience for your visitors, ensuring your hard work pays off. In preparing for your domain change, each step brings you closer to a smooth transition. Are you ready to take the plunge and switch your main domain?Executing Domain Change Process
Changing the main domain in cPanel on Namecheap is a straightforward process. With the right steps, you can manage your website’s identity effectively. This guide will walk you through the necessary actions to achieve a successful domain change.
Understanding The Importance Of Backing Up Data
Before starting, ensure you back up all important data. This prevents any loss during the domain change process. Use cPanel’s backup feature for a hassle-free experience.
Accessing The Domain Management Section In Cpanel
Log into your cPanel account. Navigate to the domain management section. Here, you can view and manage all domains associated with your account.
Initiating The Domain Change Request
Locate the option to change your main domain. Enter the new domain name you wish to set. Ensure the new domain is registered and active.
Updating Website Configuration Files
After changing the domain, update your website’s configuration files. This includes updating links and paths to reflect the new domain. Check your .htaccess and other relevant files.
Verifying Dns Settings
Ensure your DNS settings point to the new domain. Check the Namecheap dashboard to manage DNS records. This ensures your website is accessible under the new domain.
Testing The New Domain Setup
Visit your website using the new domain. Confirm all pages and features load correctly. Fix any broken links or errors promptly.
Communicating Domain Change To Users
Inform your audience about the domain change. Update social media profiles and email signatures. Clear communication helps maintain your brand’s presence.
Credit: www.namecheap.com
Frequently Asked Questions
How Do I Change The Main Domain On Cpanel?
To change the main domain in cPanel, contact your hosting provider for assistance. They will guide you through the process. Ensure you back up your data before making changes. Adjust your DNS settings and update any necessary configurations after the switch.
How To Change Document Root Of Main Domain In Cpanel Namecheap?
Log in to cPanel. Navigate to ‘Domains’, then ‘Addon Domains’. Edit your main domain’s document root path. Save changes.
How Do I Change My Domain On Namecheap?
Log into your Namecheap account. Go to “Domain List,” select the domain, and click “Manage. ” Choose “Advanced DNS” or “Domain Transfer” to change. Follow the prompts and save your settings. Contact support for assistance if needed.
How To Change Primary Domain In Hosting?
Log into your hosting account. Navigate to the domain management section. Select the option to change the primary domain. Enter the new domain name. Save the changes and clear your browser cache. Contact support if necessary for assistance.
Conclusion
Changing your main domain in Namecheap’s cPanel is simpler than it seems. Follow the steps carefully and ensure your new domain settings are correct. Backup important files to prevent data loss during the process. Verify DNS settings to avoid downtime.
Use Namecheap’s support if you encounter issues. Regularly update your domain details to keep your website secure. A smooth domain transition enhances your site’s functionality. Stay patient and thorough for best results. Adjustments may take time, but they improve your site’s performance.
Practice regularly and gain confidence in managing domain settings.
