Navigating the digital landscape can sometimes feel like decoding a complex puzzle, especially when it comes to managing your domain’s DNS settings. If you’re looking to enhance your website’s security or improve its functionalities, understanding how to add a TXT record to your DNS with Namecheap is a crucial skill.
But don’t worry, you’re not alone in this! Imagine having the power to verify your domain ownership, improve email deliverability, or even boost your SEO just by mastering a simple procedure. This guide is designed to empower you with the knowledge to confidently update your DNS settings, ensuring your website operates smoothly and securely.
With clear steps and easy-to-follow instructions, you’ll find adding a TXT record to your DNS with Namecheap isn’t just another daunting tech task—it’s an opportunity to take control of your online presence. Ready to unlock the full potential of your domain? Let’s dive in and demystify the process, so you can achieve your digital goals with ease.
Credit: www.zoho.com
Accessing Namecheap Account
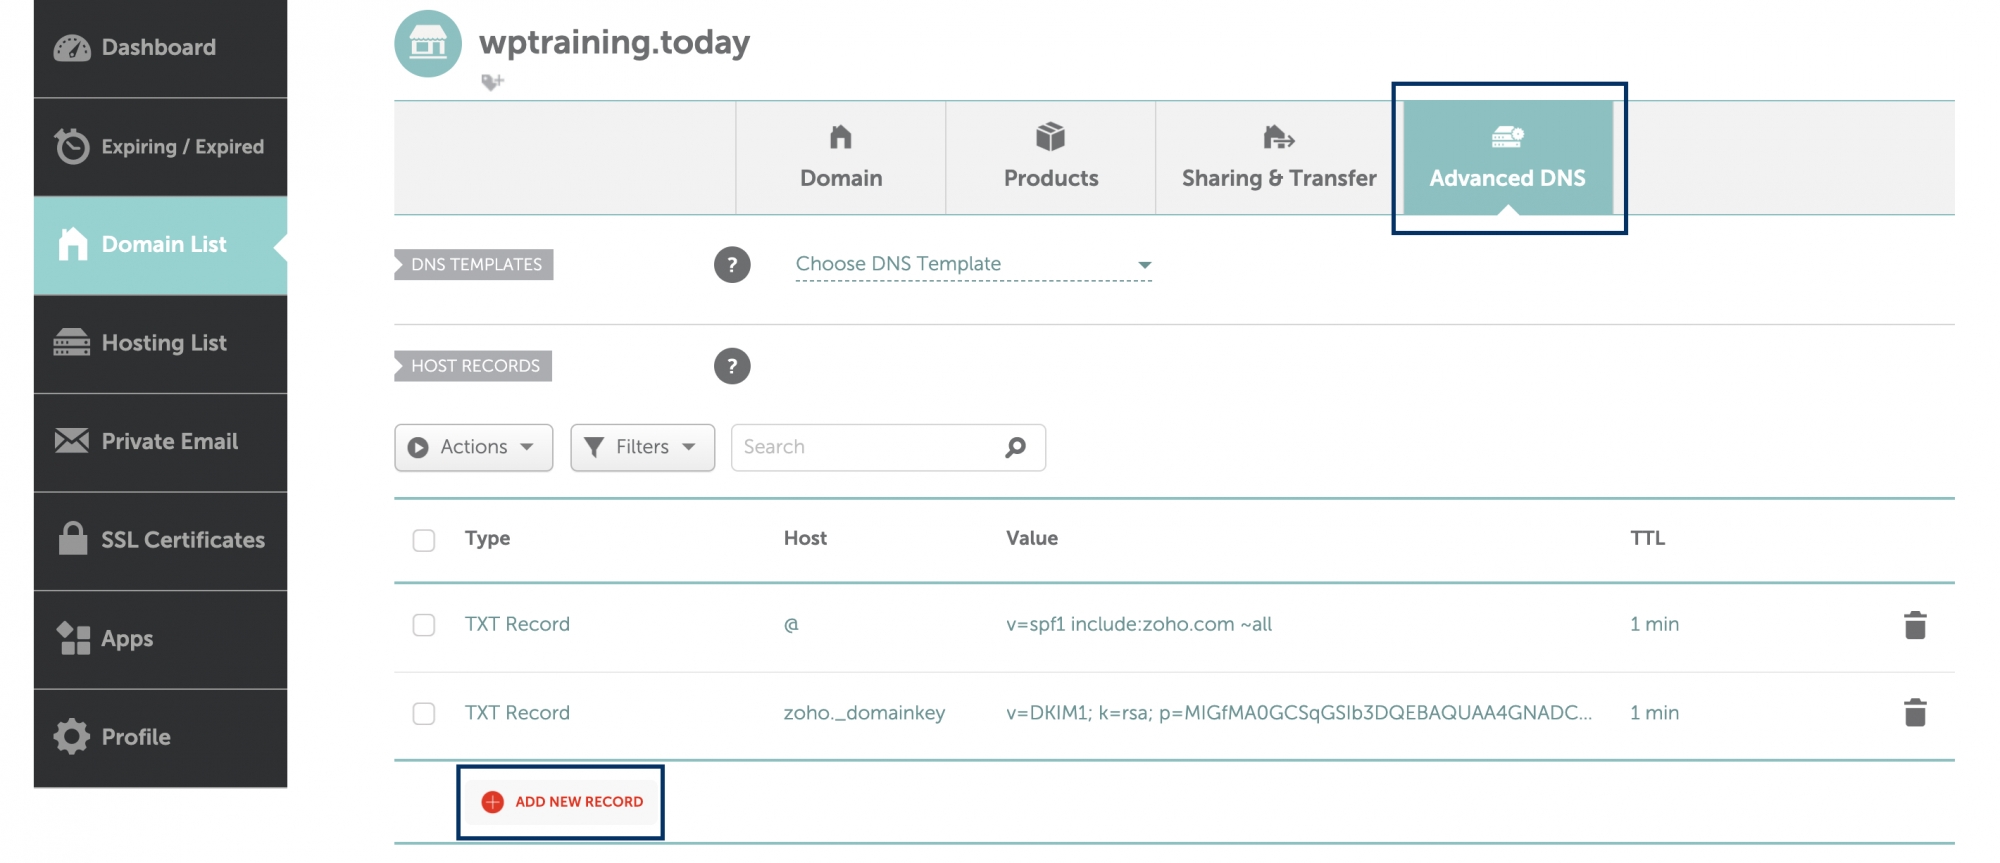
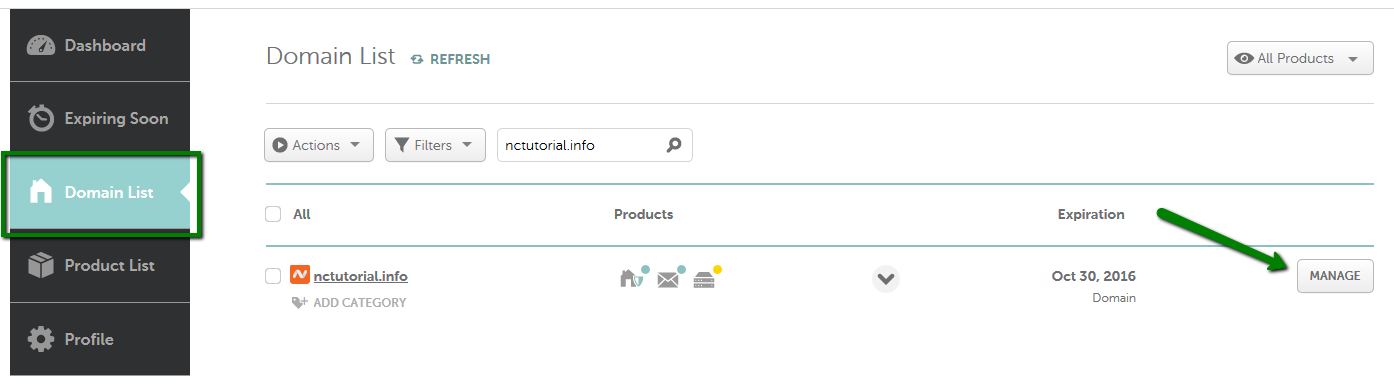
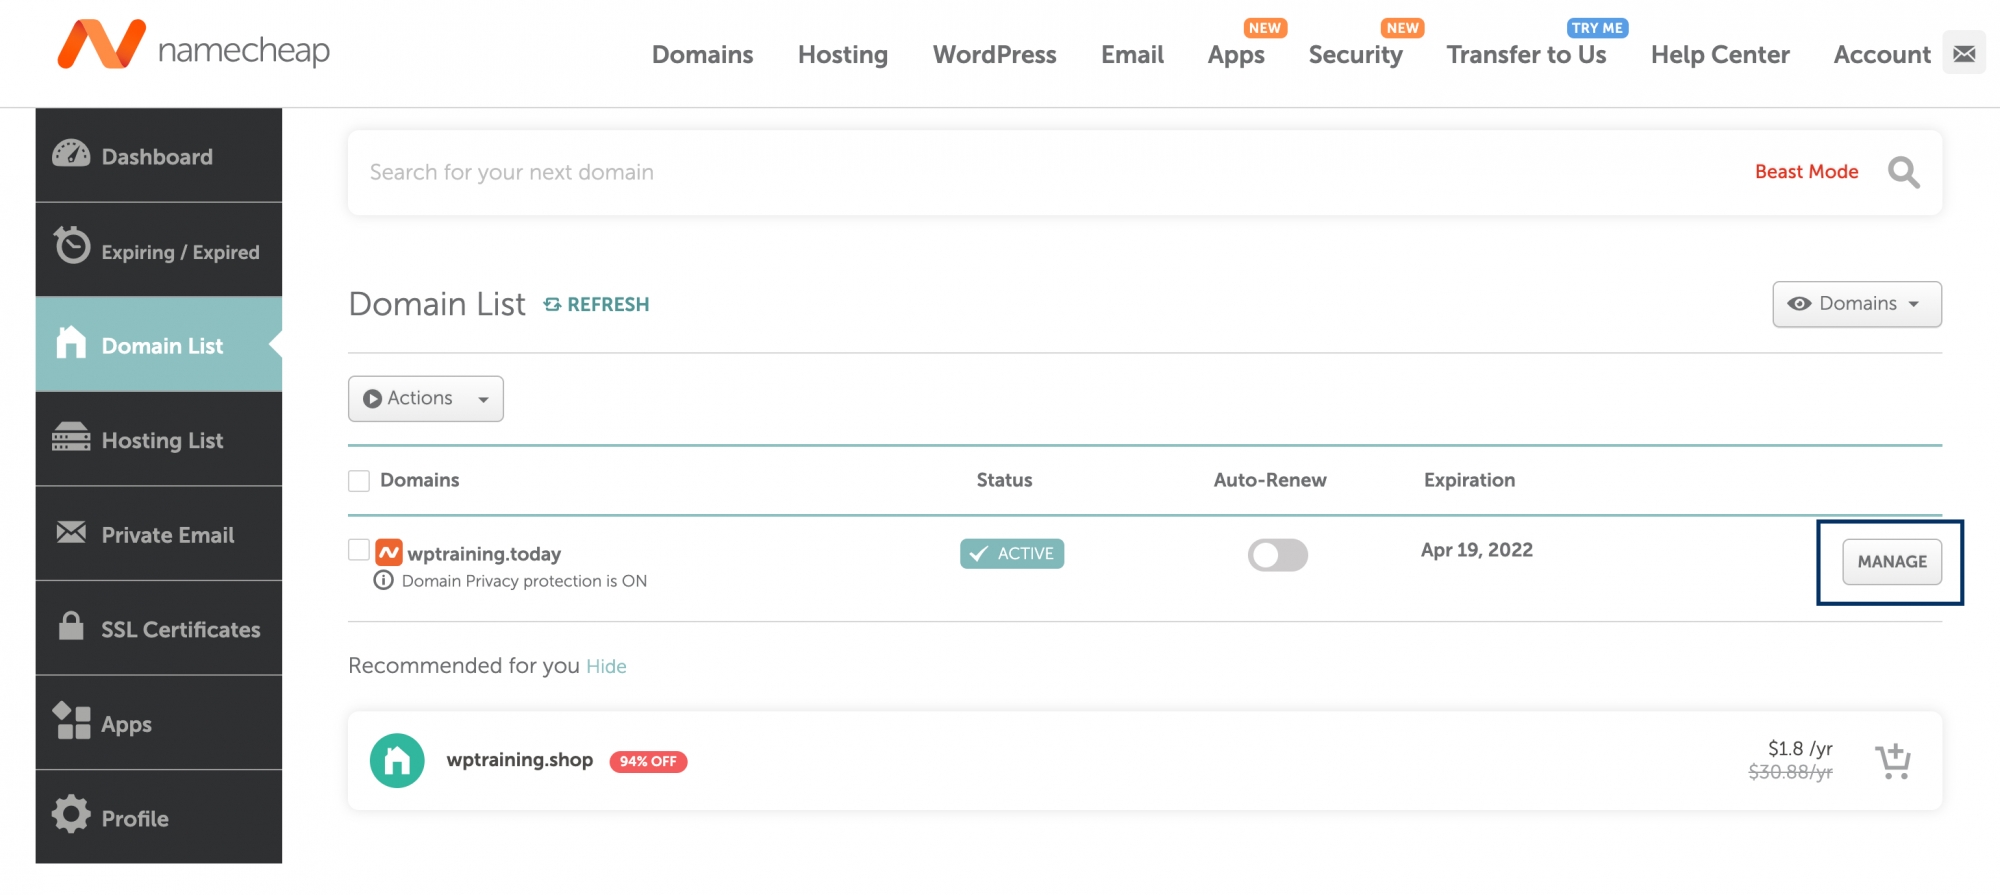
To add a TXT record in Namecheap, first access your account and navigate to the Domain List. Select ‘Manage’ next to your domain, then open the ‘Advanced DNS’ tab. Scroll down to the ‘Host Records’ section and click ‘Add New Record’.
Fill in the details for your TXT record and save changes.
Accessing your Namecheap account is the first step in managing your DNS settings. It’s essential to have your login credentials ready. This ensures a smooth process as you proceed with adding a TXT record. Let’s walk through the simple steps to access your account.Logging Into Namecheap
Begin by visiting the Namecheap website. Locate the login button at the top right corner. Click it to open the login page. Enter your username and password carefully. Double-check for typos before clicking the ‘Sign In’ button.Locating The Domain List
Once logged in, navigate to the dashboard. Find the ‘Domain List’ section. This section contains all your registered domains. It’s usually located on the left side of the dashboard. Click ‘Domain List’ to view your domains.Selecting Your Domain
Identify the domain you want to modify. Click on it to access its settings. This opens a new page with detailed domain information. Look for the ‘Advanced DNS’ tab to proceed.Opening Advanced Dns Settings
Click on the ‘Advanced DNS’ tab. This tab allows you to manage DNS records. It’s essential for adding, editing, or removing DNS entries. Ensure you’re in the correct tab before continuing. Following these steps ensures you’re correctly accessing your Namecheap account. This is crucial for adding a TXT record without any hassle.Navigating To Dns Settings
Accessing DNS settings on Namecheap allows users to add a TXT record easily. Navigate to the dashboard, select the domain, and find the Advanced DNS tab. Adding TXT records involves specifying host and value, ensuring seamless configuration for domain verification or email authentication.
Navigating to DNS settings on Namecheap might feel like a complex task, especially if you’re new to managing domain settings. However, once you know where to look, the process becomes straightforward. Let’s break it down into manageable steps so you can confidently add that TXT record without feeling overwhelmed.Access Your Namecheap Account
First, log into your Namecheap account. You’ll find the login button at the top right corner of the Namecheap homepage. Enter your username and password, and you’re ready to dive into your domain settings.Find Your Domain List
Once logged in, navigate to the dashboard. Look for the “Domain List” on the left-hand side of the screen. Clicking on it will show you all the domains you own.Select The Domain
Choose the domain you wish to edit by clicking on the “Manage” button next to it. This action will open up a new set of options specific to that domain.Locate The Dns Settings
On the domain management page, scroll down to find the “Advanced DNS” tab. Clicking on it will lead you to the section where you can add or modify DNS records.Adding A New Txt Record
In the “Advanced DNS” settings, look for the “ADD NEW RECORD” button. Click it and select “TXT Record” from the dropdown menu. Enter the necessary details such as the host and value for your TXT record.Save Your Changes
After entering the required information, make sure to save your changes. There’s usually a green checkmark or a “Save” button to click. This step ensures your new TXT record is successfully added to your DNS settings. Navigating through DNS settings can be daunting, but with a clear path, it becomes a breeze. Have you found any unique tips that make this process easier for you? Share them in the comments below!Adding Txt Record
Adding a TXT record to your DNS settings in Namecheap is simple. These records help verify domain ownership and improve email security. They are essential for various services and applications. Follow the steps below for a smooth process.
How To Access Your Domain List
Log into your Namecheap account. Click on the “Domain List” from the dashboard. Find your domain and click “Manage” next to it.
Navigate To The Advanced Dns Tab
Once in the domain settings, locate the “Advanced DNS” tab. Click on it to open detailed DNS management options.
Add A New Record
Scroll down to the “Host Records” section. Click “Add New Record” button. Choose “TXT” as the type of record.
Enter The Record Details
Provide the necessary information for the TXT record. Enter the host, value, and TTL settings as required. Ensure accuracy to avoid issues.
Save Your Changes
After entering the details, click the “Save All Changes” button. Wait a few minutes for the DNS settings to update.
Verify The Txt Record
Check if the TXT record is active. Use online tools to verify if the record is correctly set up.
Credit: www.namecheap.com
Credit: www.zoho.com
Frequently Asked Questions
Where To Add Txt Record In Namecheap?
Log in to your Namecheap account. Go to the “Domain List” section. Click “Manage” next to your domain. Select the “Advanced DNS” tab. Under “Host Records,” click “Add New Record. ” Choose “TXT Record” from the dropdown. Enter the required details, then save changes.
How Do I Add A Txt Record To My Dns?
Access your DNS provider’s dashboard. Navigate to DNS settings. Select “Add Record. ” Choose “TXT” from the options. Enter the required details, including the host and value. Save the changes to update the DNS.
How To Add Dns Record In Namecheap?
Log in to Namecheap account. Go to “Domain List” and click “Manage. ” Select “Advanced DNS. ” Click “Add New Record. ” Enter the DNS details. Save changes.
How To Add Dns Txt Record For Domain Verification In Godaddy?
Log in to GoDaddy, access your domain’s DNS settings, and select “Add” under TXT Records. Enter the required TXT record details for domain verification and save changes.
Conclusion
Adding a TXT record on Namecheap is straightforward. Start by logging into your account. Navigate to the Domain List and select your domain. Find the Advanced DNS tab. Add a new TXT record with the required details. Save changes to update DNS settings.
These steps ensure smooth integration with various services. Understanding this process empowers you to manage domain settings confidently. Regularly check your DNS records. This ensures everything functions correctly. Practice makes it easier over time. Keep learning to maintain effective domain management.
Stay informed and make the most of your Namecheap account.