
Are you struggling with adding a TXT record in Namecheap? You’re not alone.
Whether you’re verifying your domain with Google, setting up email services, or enhancing your website’s security, understanding how to add a TXT record is essential. But don’t worry—it’s not as complicated as it seems. Imagine the peace of mind you’ll feel when everything is set up correctly and your online presence is running smoothly.
Stick with us, and you’ll discover just how straightforward this process can be. By the end of this article, you’ll be able to effortlessly navigate your Namecheap account like a pro, ensuring your domain is optimized and secure. Ready to take control? Let’s dive in.
Credit: www.namecheap.com
Accessing Your Domain Settings
To add a TXT record in Namecheap, first access your domain settings. Locate the ‘Advanced DNS’ tab. Then, click ‘Add New Record’ and select ‘TXT Record. ‘ Fill in the necessary details and save changes. This process helps verify domain ownership or configure email settings.
Accessing your domain settings in Namecheap is the first step to adding a TXT record. This process might seem daunting initially, but with clear instructions, it becomes straightforward. You’ll be diving into the heart of your domain’s dashboard, where all the magic happens. When I first tackled this task, I was surprised at how intuitive the platform is. Namecheap’s interface is designed to be user-friendly, ensuring you don’t feel overwhelmed. Are you ready to make your domain work for you? Let’s get started! ###Logging Into Your Namecheap Account
Begin by visiting Namecheap’s website. Enter your credentials to log in. If you’ve forgotten your password, use the “Forgot Password” feature to reset it. Once inside, you’ll see your dashboard. Take a moment to familiarize yourself with the layout. It’s like stepping into a control room, where every button has a purpose. ###Navigating To Domain List
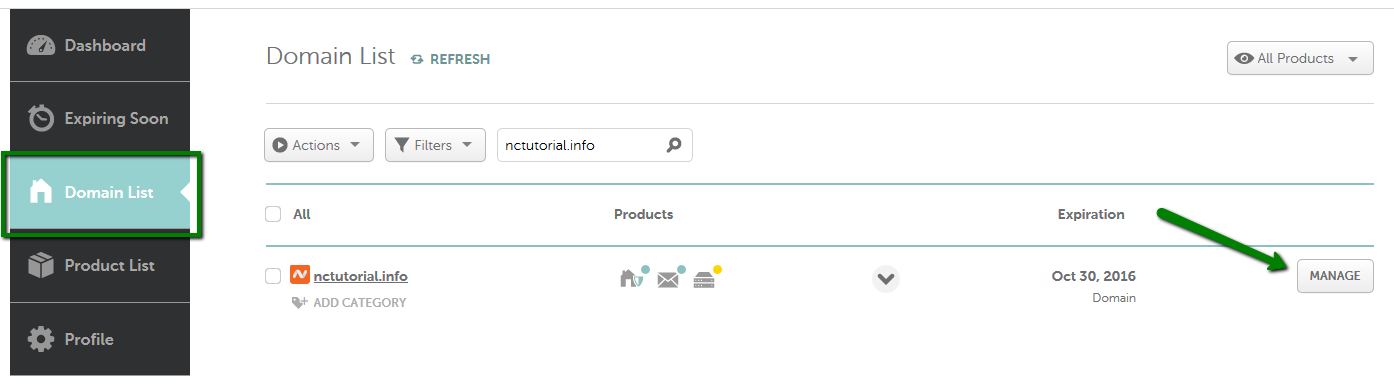
On the left-hand side, you’ll find the “Domain List” tab. Click on it. This section displays all the domains you own. Find the domain you want to modify. Clicking on it will open up a world of options. It’s a bit like opening a toolbox, each tool ready to be used. ###Accessing Advanced Dns Settings
Locate the “Manage” button next to your domain. Clicking this will take you to the domain management page. Here, you’ll see various settings. Scroll down to find “Advanced DNS.” Click on it to reveal the DNS settings. This is where the real work begins. Are you prepared to transform your domain? ### In the Advanced DNS section, look for “Add New Record.” Choose “TXT Record” from the dropdown menu. Enter the details for your TXT record. This might be a verification code or other specific info. Double-check your entry to avoid errors. ###Saving Your Changes
Once you’ve added the TXT record, hit the “Save” button. Your changes will take effect shortly. Pat yourself on the back; you’ve just modified your domain settings! Is there anything else you want to achieve with your domain today? ###Verifying Your Txt Record
To ensure your TXT record is active, use a DNS lookup tool. Enter your domain and check the records. Seeing your new record in action is incredibly satisfying. Have you thought about what other tweaks you might make to your domain settings?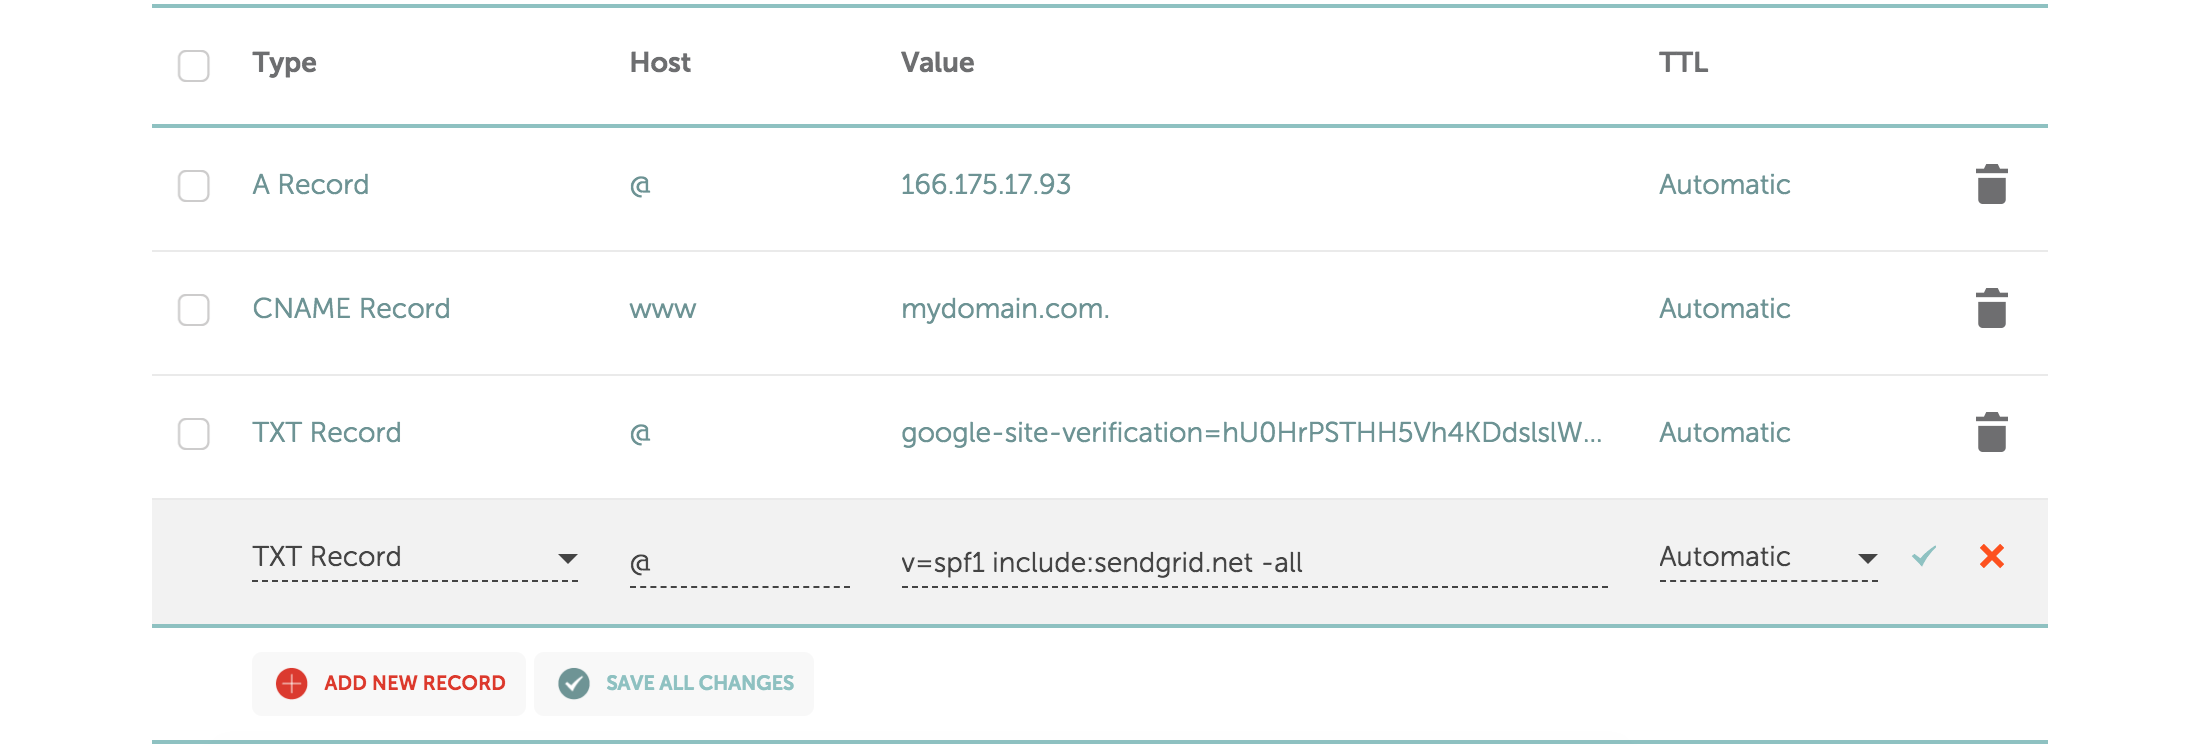
Credit: dmarcly.com
Navigating To Dns Management
Accessing DNS management in Namecheap is straightforward. Navigate to the domain list, click “Manage,” and select “Advanced DNS. ” Here, adding a TXT record is simple. Locate the “Add New Record” button, choose “TXT Record,” and input the required details.
Navigating to DNS Management in Namecheap is an essential step when you want to manage your domain settings, like adding a TXT record. This process can be a bit daunting if you’re unfamiliar with DNS settings, but don’t worry. With a little guidance, you’ll be managing your DNS settings like a pro.Step 1: Log Into Your Namecheap Account
The first step to accessing DNS Management is logging into your Namecheap account. Ensure you have your credentials ready. Once logged in, you will see your dashboard with a list of your domains.Step 2: Access Your Domain List
In your dashboard, locate the Domain List tab on the left-hand side. Click on it to view all the domains associated with your account. Each domain will have several management options displayed next to it.Step 3: Select The Domain
Identify the domain where you need to add a TXT record. Click on the Manage button next to this domain. This action will take you to a new page with various domain management settings.Step 4: Go To Advanced Dns
On the domain management page, find the Advanced DNS tab. Click on it to access DNS settings. Here, you can see all the records associated with your domain, including A, CNAME, and TXT records.Step 5: Understanding The Dns Interface
The DNS interface might look complex, but it’s straightforward once you get the hang of it. You’ll see options to add new records or edit existing ones. Notice the different types of records you can add, each serving a unique purpose.Step 6: Preparing To Add A Txt Record
Before adding a TXT record, ensure you have the exact TXT value you need to add. This value is usually provided by the service you are configuring. Having accurate information is crucial to avoid any misconfigurations.Step 7: Adding The Txt Record
Click the Add New Record button. Select TXT Record from the dropdown menu and enter the necessary details. Save your changes and allow some time for DNS propagation. Navigating Namecheap’s DNS Management gets easier with practice. Have you encountered any challenges in managing DNS settings? Share your experiences or tips in the comments below!Adding A Txt Record
Adding a TXT record in Namecheap is simple. Log into your account, navigate to the Domain List, and select Manage. Under the Advanced DNS tab, add your TXT record in the provided fields. Save your changes to complete the process.
Adding a TXT record in Namecheap might sound technical, but it’s a straightforward process once you get the hang of it. Whether you’re verifying your domain with Google, setting up email services, or enhancing your website’s security, understanding how to add a TXT record is essential. Let’s walk through the steps to make this task as easy as possible for you. ###Step 1: Log Into Your Namecheap Account
First things first, head over to [Namecheap’s website](https://www.namecheap.com) and log into your account. Use your username and password. If you’ve forgotten your password, there’s a handy ‘Forgot Password?’ link to help you reset it. Once logged in, you’re ready to move to the next step. ###Step 2: Access The Domain List
After logging in, navigate to your dashboard. Here, you’ll find a menu on the left-hand side. Click on “Domain List” to see all your domains. Find the domain you want to add the TXT record to. It’s usually just a scroll away. ###Step 3: Manage Domain
Next, click the “Manage” button next to your domain. This takes you to a new page with various options. Don’t feel overwhelmed; you’re in the right place. Look for the “Advanced DNS” tab, and click it. ###Step 4: Add A New Record
Under the “Advanced DNS” tab, scroll down to the “Host Records” section. Here, you’ll see an option to add a new record. Click the “+ Add New Record” button. A dropdown menu will appear. Select “TXT Record” from the list. ###Step 5: Enter Txt Record Details
Now, enter the specifics for your TXT record. In the “Host” field, you usually enter ‘@’ for root domain or a specific subdomain. In the “Value” field, input the TXT record value provided by the service you’re configuring. This might be a string of text or numbers. ###Step 6: Save Changes
Once you’ve entered the details, click the green checkmark to save your changes. Double-check everything before you do this. A small mistake can cause issues down the line. Your changes might take a few minutes to propagate, so be patient. ###Final Thoughts: Why Does This Matter?
Why is adding a TXT record important? It can help verify domain ownership, improve email deliverability, or enhance security. Have you ever faced issues with your domain? Sometimes, a simple TXT record can resolve those headaches. Are there any tasks you’ve been putting off because they seem too technical? Remember, breaking things down into smaller steps can make them more manageable. What’s your next digital challenge? Maybe it’s time to tackle it head-on.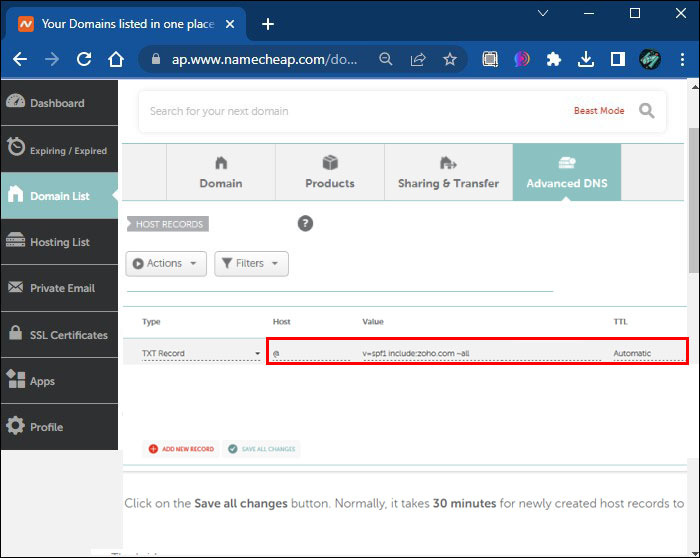
Credit: www.alphr.com
Frequently Asked Questions
Where To Add Txt Record In Namecheap?
Log in to your Namecheap account. Go to the Domain List. Click “Manage” next to your domain. Select the “Advanced DNS” tab. Scroll to “Host Records” and click “Add New Record. ” Choose “TXT Record” from the dropdown and enter the required details.
Save changes to update the DNS.
How Do I Add A Txt Record To My Domain Host?
Log in to your domain host account. Go to the DNS settings. Select “Add Record” and choose TXT. Enter the required details, then save the changes. Your TXT record will be added successfully.
How Do I Add A Txt Record?
Log into your domain registrar’s account. Go to DNS settings and locate the option to add a new record. Select “TXT” as the record type, enter the required details, and save changes. It may take a few minutes for the changes to propagate.
How Do I Add A Record On Namecheap?
Log into your Namecheap account. Navigate to “Domain List” and click “Manage” next to your domain. Select the “Advanced DNS” tab. Click “Add New Record,” choose the record type, and fill in the details. Save changes to add the record successfully.
Conclusion
Adding a TXT record in Namecheap is simple. First, log into your account. Then, navigate to the “Domain List” section. Click “Manage” next to your domain. Choose the “Advanced DNS” tab. Here, add a new record. Select “TXT Record” from the dropdown.
Enter your desired details. Save changes. And you’re done! This process secures your domain. It also helps with email and website verification. Remember, each step counts. Follow them carefully. Your domain will be updated swiftly. Now you know how to manage TXT records.
Keep your domain settings in check. Happy managing!
