
Imagine you’re about to walk into a store. You notice two shops side by side.
One has a sturdy, secure door while the other has a flimsy entrance. Which one would you trust with your valuables? The same principle applies to websites. Without a robust security system, your visitors might hesitate to trust you. Adding an SSL certificate to your website is like installing that sturdy door.
It’s essential for protecting your site and building trust with your audience. If you’re using Namecheap for your website, you’re in luck. The process is straightforward and can significantly enhance your site’s security. In this guide, you’ll discover simple steps to add an SSL certificate to your website through Namecheap. It’s not just about security; it’s about making sure your visitors feel safe and valued. Let’s dive in and make your website a fortress!
Credit: www.namecheap.com
Choosing The Right Ssl Certificate
Securing your website with an SSL certificate from Namecheap is straightforward. Choose the appropriate SSL type for your needs. Follow Namecheap’s instructions to easily add it to your site, ensuring data protection and trust.
Adding an SSL certificate to your website is crucial for ensuring the security and credibility of your online presence. But, with various types of SSL certificates available on Namecheap, how do you choose the right one for your website? Selecting the appropriate SSL certificate can be a bit tricky, especially if you’re not familiar with the technical jargon. However, understanding the basics can help you make an informed decision that aligns with your website’s needs and goals.Understanding The Different Types Of Ssl Certificates
SSL certificates come in various types, each designed to meet different security needs. Domain Validation (DV) SSL certificates are the most basic and are ideal for small websites or blogs. They confirm that you own the domain but don’t provide extensive verification of your business identity. Organization Validation (OV) certificates offer a higher level of security, verifying both your domain ownership and business legitimacy. These are suitable for small to medium-sized businesses. Extended Validation (EV) certificates offer the highest level of trust and are recommended for e-commerce sites or businesses dealing with sensitive information. These display a green address bar in browsers, assuring visitors of your website’s safety.Evaluating Your Website’s Needs
Before choosing an SSL certificate, consider what your website requires. Ask yourself if you handle sensitive customer data such as credit card information. If yes, an EV certificate might be necessary to build trust. For a simple blog or informational site, a DV certificate could suffice. Think about your future growth plans as well. If you plan to expand, investing in a higher-level certificate now might save you time and effort later.Budget Considerations
SSL certificates vary in price, so it’s essential to consider your budget. While it’s tempting to opt for the cheapest option, remember that security is an investment. Look at what each certificate offers in terms of features and support. Sometimes paying a bit more upfront can save you from potential issues and provide better customer support. Consider what value you place on your site’s credibility and customer trust.Consulting With Experts
If you’re unsure about which SSL certificate to choose, don’t hesitate to seek advice. Many web hosting services, including Namecheap, offer support and guidance in selecting the right certificate. Discussing your website’s specific needs with an expert can provide clarity and ensure you’re making the right choice. Have you ever overlooked a technical detail only to realize its importance later? Consulting with someone knowledgeable can help you avoid such pitfalls. By carefully assessing these factors, you can confidently select an SSL certificate that meets your website’s security needs and enhances its reputation. Your decision will not only protect your site but also foster trust with your visitors.Installing Ssl Certificate Via Namecheap
Secure your website by installing an SSL certificate via Namecheap. Purchase the certificate, then follow Namecheap’s step-by-step guide. Boost trust and protect data with easy SSL integration today.
Adding an SSL certificate to your website is essential for security and trustworthiness. Installing an SSL certificate via Namecheap is straightforward, even if you’re new to web management. You’ll not only protect sensitive information but also boost your site’s credibility. Let’s walk through the process of getting your SSL certificate up and running on Namecheap.Understanding Ssl Certificates
SSL certificates encrypt the data exchanged between your website and its visitors. This means that any information, like passwords or credit card details, is protected from hackers. If you’ve ever seen a padlock icon next to a URL, that’s SSL at work.Why Choose Namecheap For Ssl Installation?
Namecheap is known for its user-friendly interface and reliable services. They offer a variety of SSL certificates to suit different needs, whether you’re running a blog or an online store. Namecheap’s support team is helpful, making it easier to address any hiccups during installation.Preparing For Ssl Installation
Before diving into installation, make sure you have administrative access to your website’s hosting account. Double-check your domain registration with Namecheap. Having all your login details handy will save you time and frustration.Purchasing An Ssl Certificate From Namecheap
Log into your Namecheap account and head to the SSL section. Browse through the available options and choose one that fits your needs. After purchase, Namecheap will guide you through the activation process. The site is intuitive, so don’t worry if you’re not tech-savvy.Generating A Certificate Signing Request (csr)
A CSR is crucial for SSL installation. It’s a block of encoded text given to the Certificate Authority (CA) to create your SSL certificate. You can generate a CSR via your hosting control panel. Follow the specific instructions provided by Namecheap to ensure accuracy.Completing Domain Verification
Namecheap requires domain verification for SSL activation. You can choose email verification, DNS modification, or HTTP-based validation. Consider which method is easiest for you. Once verified, your SSL certificate will be issued.Installing The Ssl Certificate
With your issued SSL certificate, log into your hosting control panel. There, you’ll find an option to install SSL certificates. Upload the certificate files provided by Namecheap. If unsure, Namecheap’s support is just a click away to guide you through.Testing The Ssl Installation
After installation, ensure your SSL certificate is functioning correctly. Visit your website and check for the padlock icon in the browser’s URL bar. Use online SSL checker tools for comprehensive testing. You want to guarantee everything is secure before your visitors start browsing.Monitoring And Renewing Your Ssl Certificate
SSL certificates typically last for one year. Make a note to renew it before expiration to avoid disruptions. Namecheap offers automatic renewal options, keeping your website secure without extra hassle. Keep an eye on any alerts from Namecheap regarding your certificate’s status. Are you ready to enhance your site’s security with Namecheap’s SSL? Jump in and follow these steps. You’ll find the process more straightforward than you might expect, and the benefits are well worth the effort. Secure your site today!Verifying Ssl Installation
To verify SSL installation on Namecheap, check the certificate status in your hosting account. Confirm the SSL is active by accessing your website using “https://” and ensuring there’s a secure padlock icon in the address bar.
Verifying that your SSL certificate is properly installed on your Namecheap-hosted website is a crucial step in ensuring your site is secure. You don’t want to leave this to chance. With the right approach, verifying SSL installation can be straightforward and even empowering.1. check Ssl Certificate With Online Tools
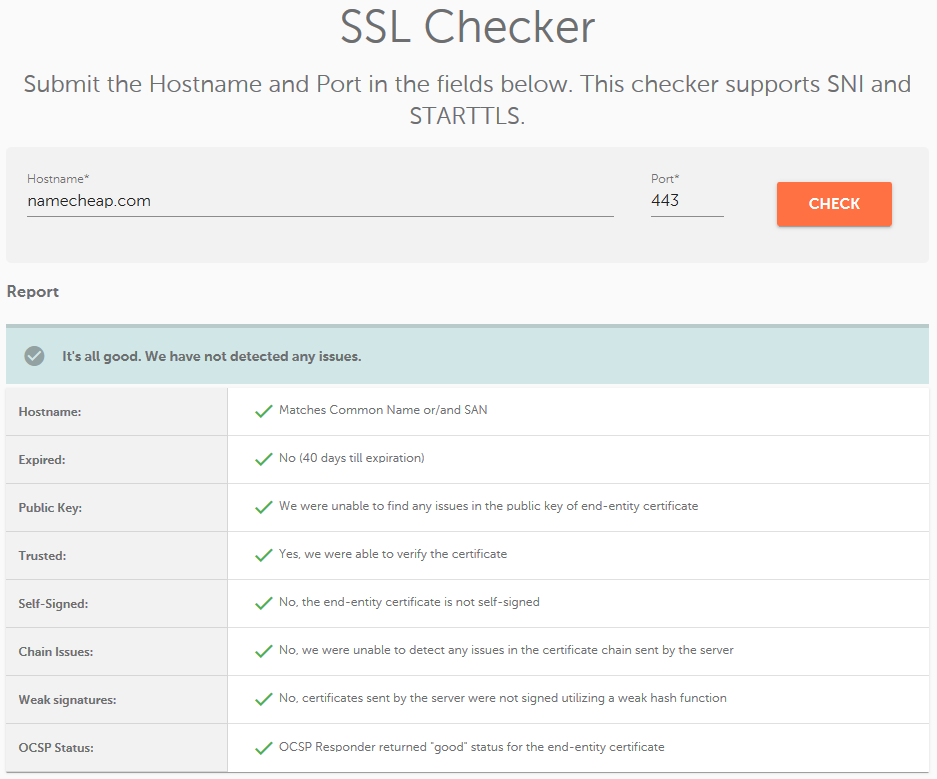
Several online tools are available to verify your SSL installation. Websites like SSL Labs or SSL Shopper provide comprehensive checks. Simply enter your website’s URL, and these tools will analyze your SSL certificate for you. This process not only confirms the installation but also highlights any potential issues. It’s a great way to ensure everything is functioning as expected.2. look For The Padlock Icon
Once you’ve installed your SSL certificate, visit your website in a web browser. A padlock icon should appear in the address bar, indicating that the connection is secure. Click on the padlock to see more details about the SSL certificate. It shows important information like the certificate authority and validity period.3. ensure Https Is Active
The presence of HTTPS in your website’s URL is a clear sign of SSL installation. If your site still shows HTTP, there might be an issue with the installation. Consider implementing a redirect from HTTP to HTTPS to ensure all traffic is secure. This step not only improves security but can also boost your SEO ranking.4. test Across Different Browsers
Different browsers may show SSL certificates in slightly different ways. Testing your website on multiple browsers ensures compatibility and consistency. If any browser doesn’t display the security features, revisit your SSL settings. This can help catch any discrepancies early on.5. consult Your Hosting Provider
If you encounter any issues during verification, don’t hesitate to reach out to Namecheap’s support. They can provide detailed guidance and troubleshoot any problems you face. Remember, a secure website builds trust with your visitors. Ensuring your SSL certificate is correctly installed is a significant step in maintaining that trust. What steps have you found most effective in verifying your SSL installation? Let’s hear your thoughts and experiences.
Credit: www.youtube.com

Credit: www.youtube.com
Frequently Asked Questions
How Do I Add Ssl To My Domain Namecheap?
Log into Namecheap account. Select “SSL Certificates” under “Product List. ” Purchase an SSL certificate. Navigate to “Domain List,” click “Manage” next to your domain. Go to “Advanced DNS,” find “SSL” section, and install the certificate. Verify installation with Namecheap’s SSL tool.
How Do I Add An Ssl Certificate To My Website?
To add an SSL certificate, purchase one from a trusted provider. Install it via your hosting account’s control panel. Update your website URLs to HTTPS. Test your site for any mixed content issues. Ensure your SSL is renewed before expiration.
Is An Ssl Certificate Free In Namecheap?
Yes, Namecheap offers free SSL certificates. You can obtain a basic SSL through their PositiveSSL plan for free.
How To Update Ssl Certificate Namecheap?
To update your SSL certificate on Namecheap, log in to your account, go to the “SSL Certificates” section, select your certificate, and follow the renewal process. Ensure you have your CSR ready.
Conclusion
Securing your website with an SSL certificate boosts user trust. Namecheap makes the process straightforward. Follow the steps carefully to ensure success. Check your website’s secure status after installation. This helps protect user data and improves search rankings. SSL certificates are essential for modern websites.
They guard against data breaches and build credibility. Regularly update and renew your SSL certificate. This ensures ongoing protection and reliability. With Namecheap, securing your site becomes an easier task. Start today and keep your visitors safe.
