
Imagine you’re sending an important email, but it lands in the recipient’s spam folder instead of their inbox. Frustrating, right?
This is a common issue that many face, and one effective solution is adding an SPF record to your domain. If you’re using Namecheap for your domain hosting, you’re in luck. You can easily add an SPF record to improve your email deliverability and protect against spoofing.
This guide will show you exactly how to do it, step by step, ensuring your emails reach their intended destination. By the end of this article, you will have the knowledge and confidence to enhance your email security and reliability. Dive in and discover how you can optimize your Namecheap settings today!
Credit: dmarcly.com
Setting Up Your Namecheap Account
Setting up your Namecheap account is the first step in managing your domain effectively. Whether you’re a beginner or have some experience, this process can be straightforward if you follow the right steps. You’ll find that Namecheap offers a user-friendly interface that makes adding an SPF record a breeze.
Create Your Namecheap Account
Begin by visiting Namecheap’s website. Click on the “Sign Up” button located at the top of the homepage.
Fill in your personal details, ensuring accuracy for easy management later. Use a strong password to safeguard your account.
Once completed, check your email for a verification link. Clicking this link will activate your account.
Log Into Your Account
With your account verified, return to Namecheap’s homepage and click “Log In”.
Enter your username and password. If you’ve forgotten your password, use the “Forgot Password” option to reset it.
Once logged in, you’ll be directed to the dashboard where you can manage your domains and settings.
Navigate To Your Domain List
In the dashboard, locate the “Domain List” section. This is typically found in the menu on the left.
Clicking here will display all the domains associated with your account. If you just bought your domain, it should appear here.
Select the domain you wish to modify by clicking on it, which will lead you to its settings page.
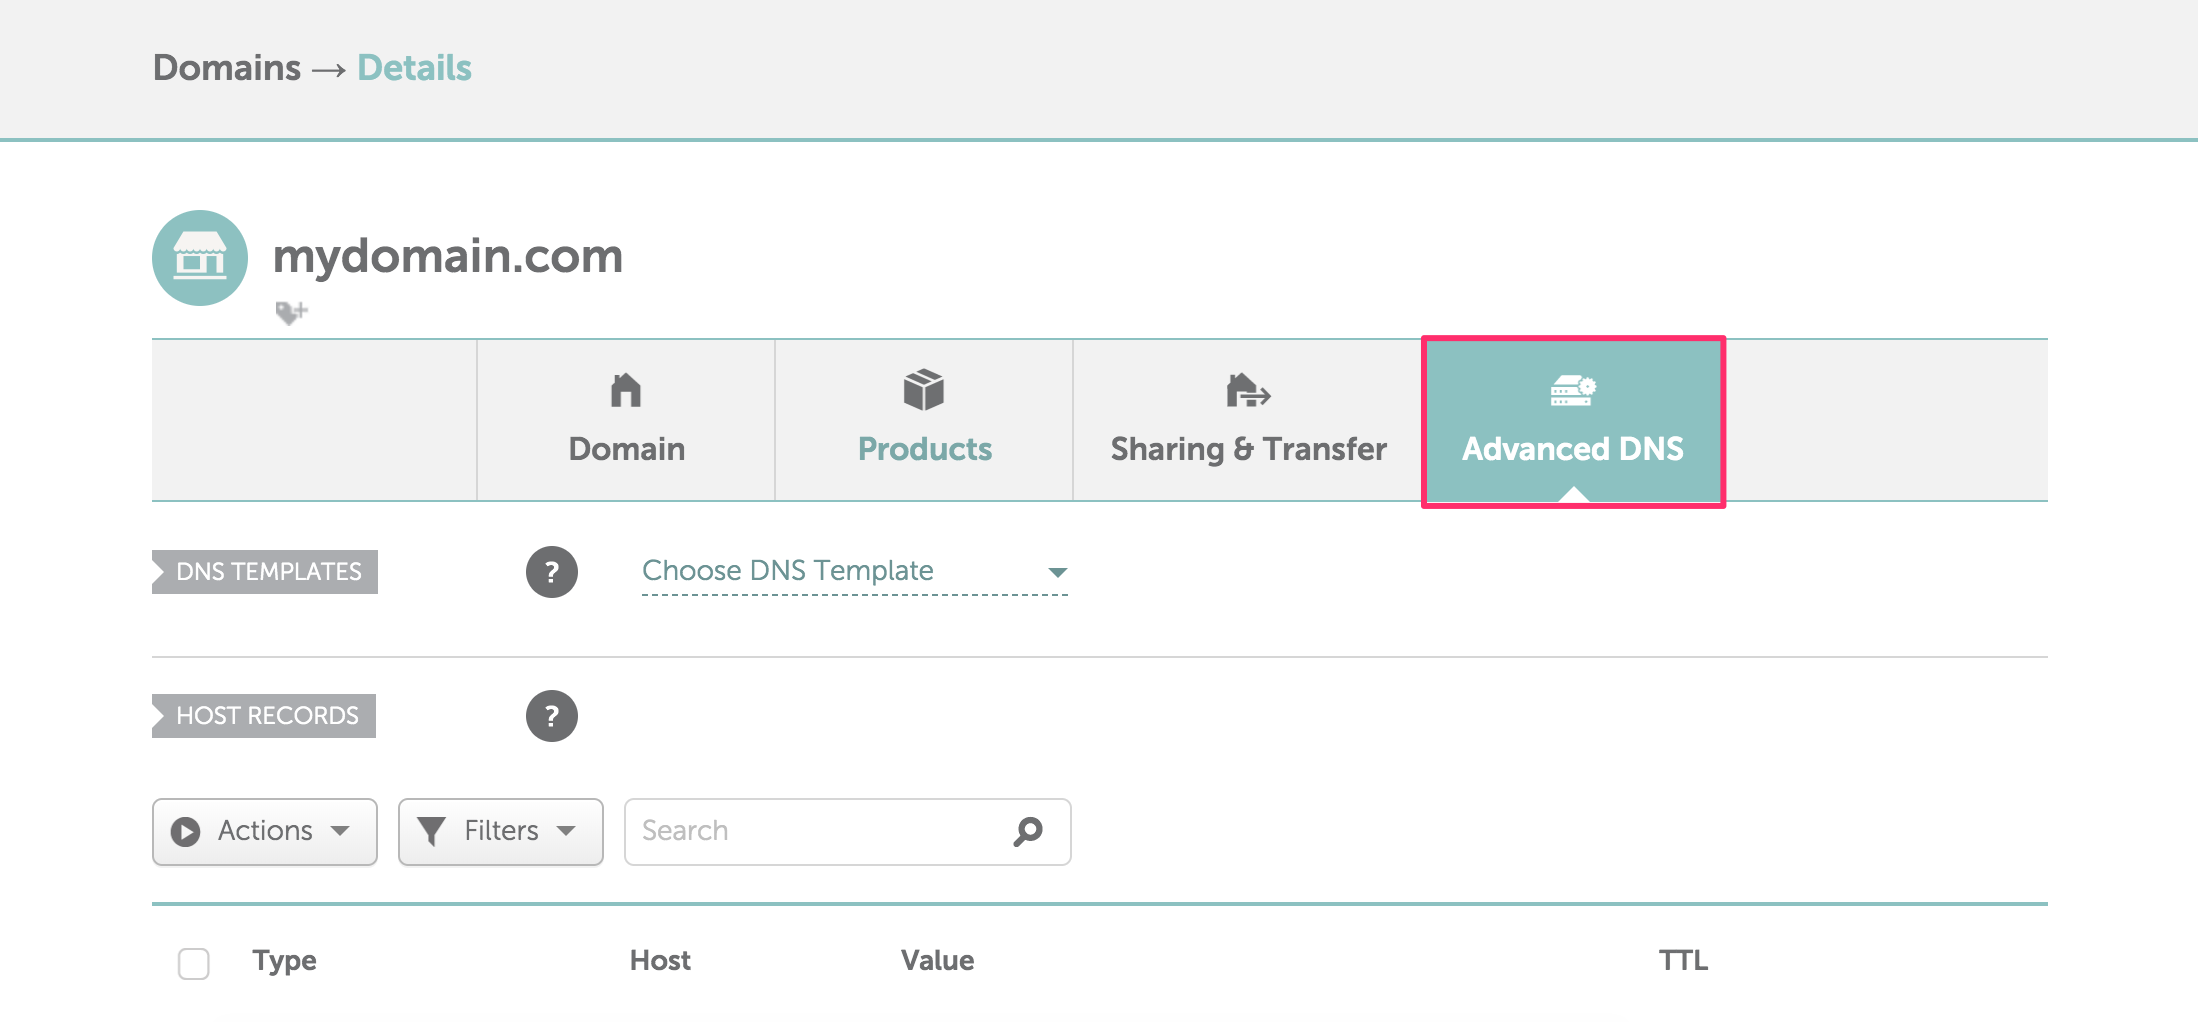
Open Advanced Dns Settings
On the domain settings page, find the “Advanced DNS” tab. This is where you’ll add your SPF record.
Clicking this tab reveals various DNS settings including records like A, CNAME, MX, and TXT.
To add an SPF record, you’ll focus on the TXT records section. This might sound technical, but it’s essentially straightforward.
Have you ever wondered why setting up these records is crucial? They protect your domain from being used for spam. That’s why getting the SPF record right is essential.
Now, with your Namecheap account set up and domain ready, you’re all set to enhance your domain’s security with an SPF record. Take a moment to familiarize yourself with these steps and consider how they empower you to manage your online presence effectively.
Locating Dns Settings
Before adding an SPF record, find your DNS settings in Namecheap. This is crucial for making any DNS changes, including SPF records.
Below are step-by-step instructions to help you locate these settings easily.
Step 1: Log Into Your Namecheap Account
Visit the Namecheap website. Enter your username and password to log in. You’ll see your dashboard upon successful login.
Step 2: Access Domain List
Look for the sidebar on the left. Click on “Domain List.” This will show all domains associated with your account.
Step 3: Select The Domain
Find the domain you wish to update. Click the “Manage” button next to it. This takes you to the domain management page.
Step 4: Go To Advanced Dns
In the domain management page, locate the “Advanced DNS” tab. Click on it to access your DNS settings.
Step 5: Locate Dns Records
Within the Advanced DNS section, you’ll see your DNS records. Here, you can add, edit, or delete DNS records.
With these steps, you’ve successfully located your DNS settings in Namecheap.
Creating And Adding Spf Record
Creating and adding an SPF record in Namecheap is essential for email security. An SPF record helps prevent email spoofing and ensures your messages are trusted. It tells email servers which IP addresses are allowed to send emails on behalf of your domain. Let’s dive into the steps for creating and adding an SPF record in Namecheap.
Access Your Namecheap Account
Log into your Namecheap account. Go to the “Domain List” section.
Select the domain you want to add an SPF record to. Click on “Manage” next to your domain name.
Navigate To Dns Settings
Once in the domain’s dashboard, find the “Advanced DNS” tab. Click on it to open the DNS settings page.
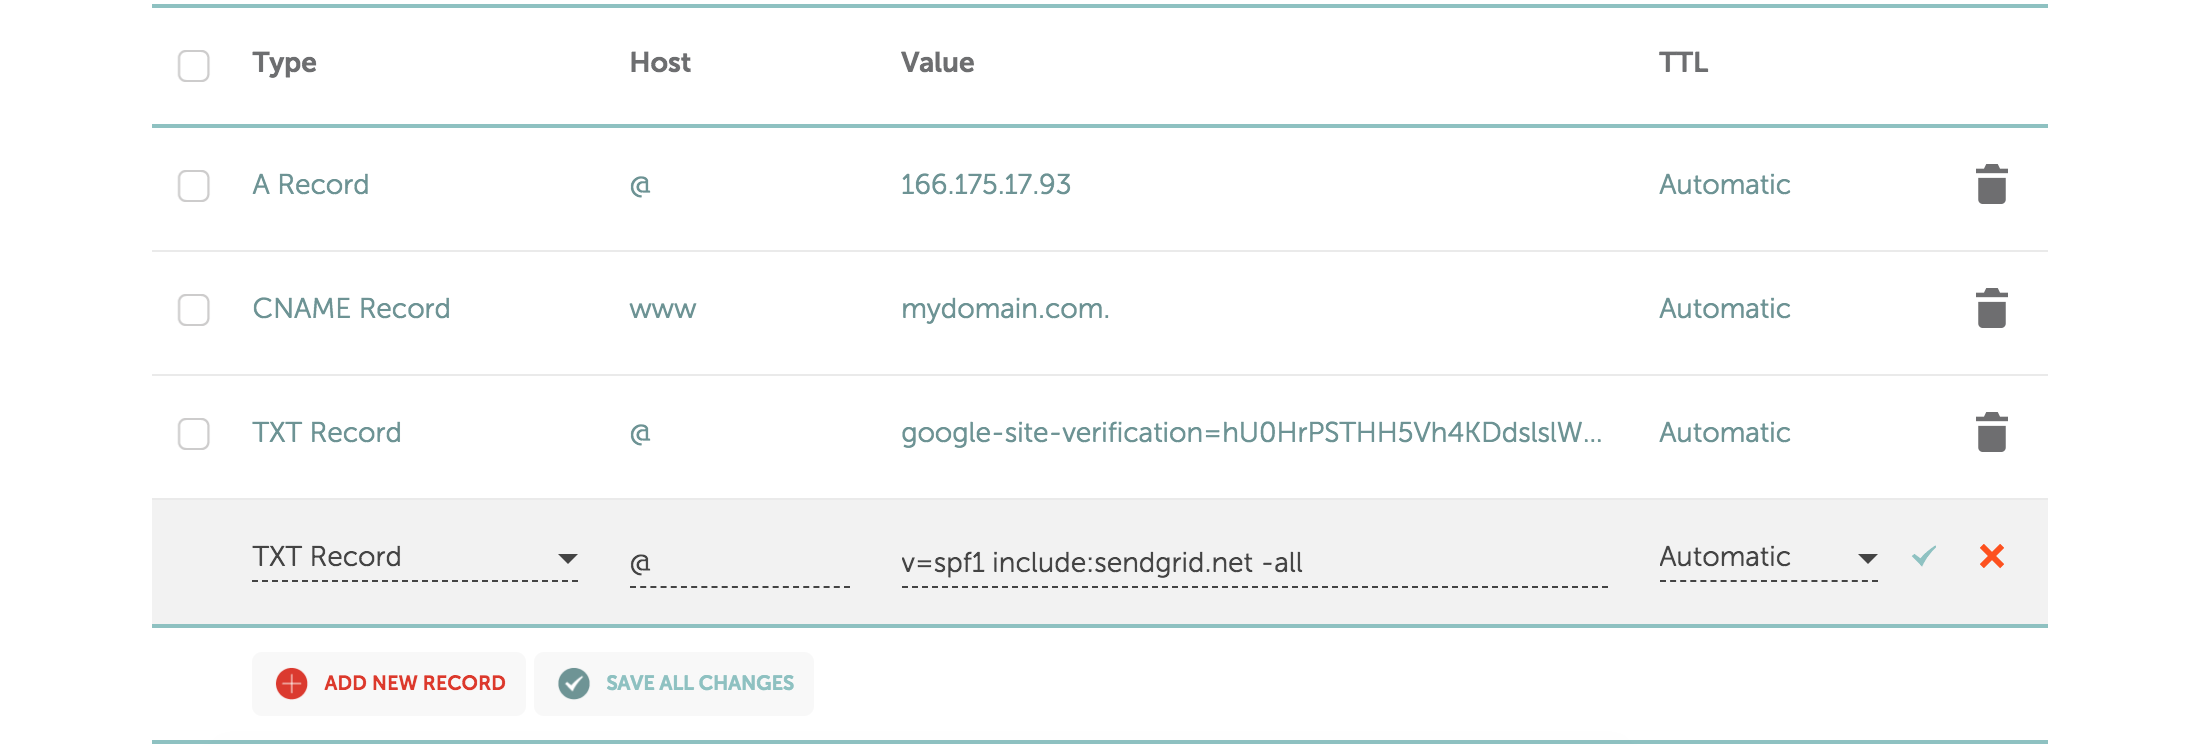
Add A New Record
Look for the “Host Records” section. Click on “Add New Record.” Choose “TXT Record” from the dropdown menu.
Configure The Spf Record
In the “Host” field, enter “@”. This symbol represents your root domain.
For the “Value” field, type your SPF record. It usually looks like “v=spf1 a mx ~all”.
Ensure your SPF record reflects all valid IP addresses for sending emails.
Save Changes
After entering the SPF record, click “Save All Changes.” Allow some time for DNS propagation.
Verify the record using online SPF validation tools.
Credit: dmarcly.com
Credit: www.namecheap.com
Frequently Asked Questions
How Do I Add An Spf Record On Namecheap?
Log into your Namecheap account. Navigate to “Domain List” and select “Manage” next to your domain. Go to “Advanced DNS” and click “Add New Record. ” Choose “TXT Record” and enter your SPF details. Save changes to finalize your SPF record setup.
How Do I Add A Spf Record?
To add an SPF record, access your domain’s DNS settings. Create a new TXT record with “v=spf1” followed by IP addresses or domains authorized to send emails on your behalf. Save changes to update DNS. Ensure SPF syntax is correct to avoid email delivery issues.
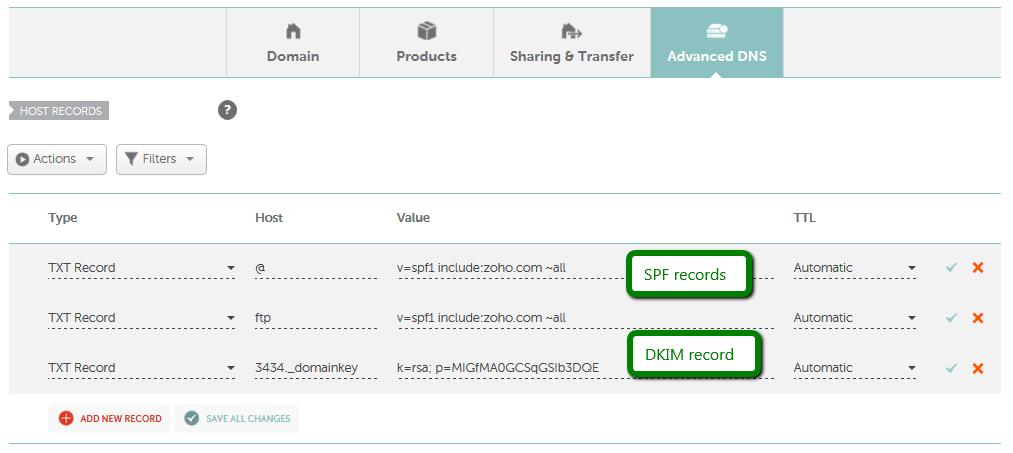
How To Add A Dkim Record On Namecheap?
Log into your Namecheap account. Go to the “Domain List” tab. Click “Manage” next to your domain. Navigate to the “Advanced DNS” tab. Add a new CNAME record with your DKIM details. Save the changes. Your DKIM record is now added.
How Do I Add A Record On Namecheap?
Log into your Namecheap account. Navigate to “Domain List” and select your domain. Click “Manage,” then “Advanced DNS. ” Choose “Add New Record” and fill in the required fields. Save changes to update your DNS settings.
Conclusion
Adding an SPF record in Namecheap enhances email security. It helps prevent spam and phishing attacks. The process is straightforward. Follow the steps carefully to ensure success. Double-check entries for accuracy. Your emails will be safer and more trusted. This small step makes a big difference.
Regularly update your records as needed. Stay informed about any changes in email policies. With these actions, you protect your domain effectively. Your online presence remains secure and credible. Keep practicing good email management habits. This ensures lasting security for your communications.
