
Adding products to your WordPress site doesn’t have to be confusing or time-consuming. Whether you’re starting a new online store or expanding your existing one, knowing the right steps can save you hours of frustration.
In this guide, you’ll discover simple, clear instructions that anyone can follow—no tech skills needed. By the end, you’ll have your products live and ready to attract customers. Ready to boost your sales and make your site work for you?
Let’s dive in.
Credit: support.themewinter.com
Prepare Your WordPress Site
Preparing your WordPress site is the first step to selling products online. A well-prepared site ensures a smooth experience for visitors and makes managing products easier. Focus on three main tasks: choosing the right theme, installing the WooCommerce plugin, and setting up basic configurations. These steps create a solid foundation for your online store.
Choose A Suitable Theme
Select a theme designed for online stores. Themes made for WooCommerce work best. They display products clearly and look professional. Pick a theme that loads fast and is mobile-friendly. Test the theme’s demo to see how your products will appear.
Install Woocommerce Plugin
WooCommerce is a free plugin that turns WordPress into a store. Go to your WordPress dashboard. Click on “Plugins” and then “Add New.” Search for “WooCommerce.” Click “Install” and then “Activate.” This plugin adds all the tools needed to list products and manage sales.
Configure Basic Settings
After activating WooCommerce, set up your store basics. Enter your store address, currency, and payment options. Choose shipping methods and tax settings if needed. These settings help your store work properly and keep customers happy. Keep it simple at first; you can always update later.
Create Product Categories
Creating product categories is an important step in managing your online store. It helps keep your products organized and easy to find. Well-structured categories improve the shopping experience. They also help search engines understand your site better. This can boost your SEO and bring more visitors.
Organize Products Effectively
Organizing products into categories makes browsing simple for customers. Categories group similar items together. This reduces confusion and speeds up the buying process. Clear categories also help you manage your inventory. You can quickly see which types of products sell best. Good organization saves time and effort in the long run.
Add New Categories
To add new categories, go to your WordPress dashboard. Navigate to the Products section, then click on Categories. Enter the name of your new category. Add a description to explain what products belong there. You can also set a parent category to create subcategories. Click the Add New Category button to save it. Now, assign products to your new categories during product creation or editing.
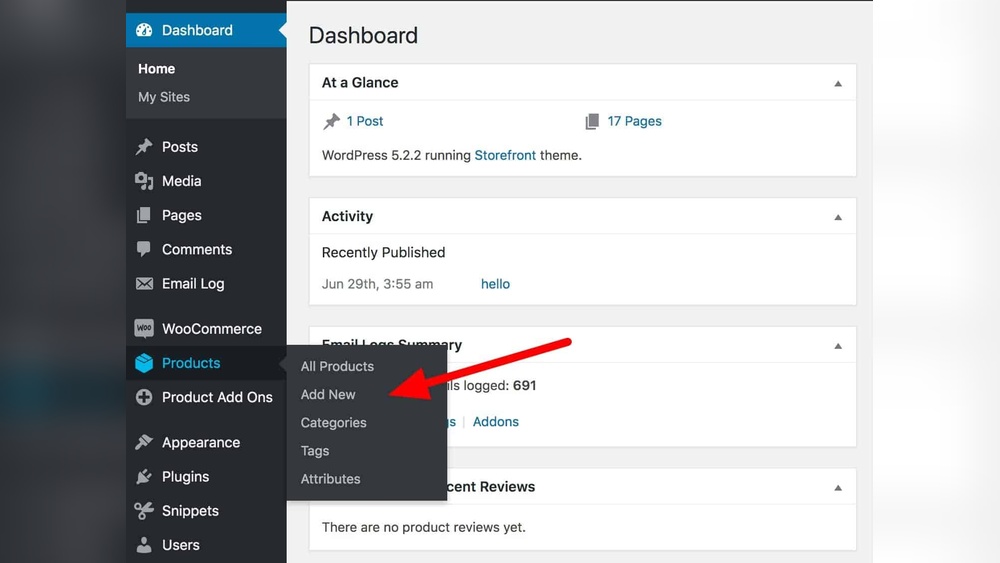
Add A New Product
Adding a new product to your WordPress store is simple and fast. This step is key for selling online. Follow each step carefully to set up your product right. Clear titles, correct pricing, and good images help customers decide.
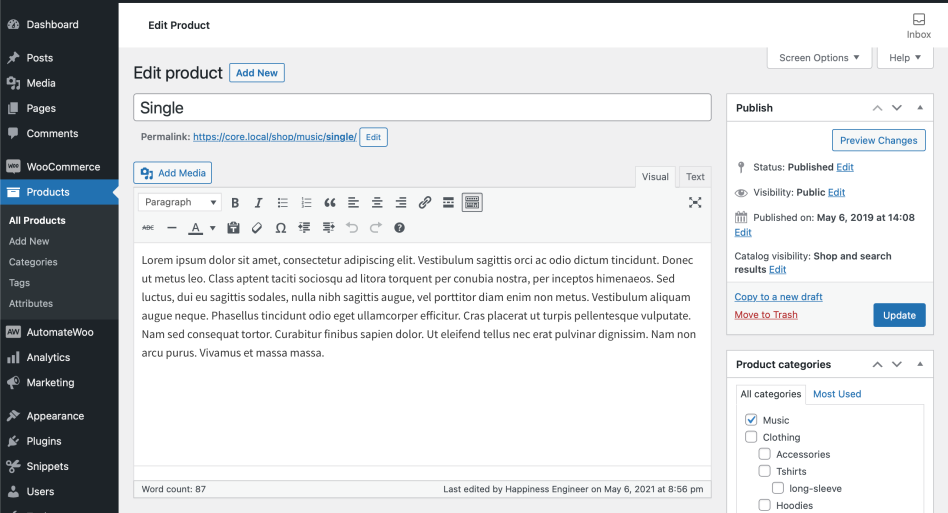
Enter Product Title And Description
Start by typing the product name in the title box. Make it clear and short. Next, write a description that explains the product well. Use simple words to describe its features and uses. A good description helps buyers understand your product quickly.
Set Product Data And Pricing
Look for the product data section below the description. Choose the product type like simple or variable. Enter the price in the regular price field. If needed, add a sale price for discounts. Fill in stock status to show if the product is available.
Upload Product Images
Images show your product to customers. Click on the product image box to upload pictures. Use clear, high-quality photos from different angles. Add a main image and extra gallery images to give a full view. Pictures help buyers trust your product.
Assign Product Categories And Tags
Categories group your products by type or theme. Pick the best category that fits your product. Tags are keywords that describe your product’s details. Add a few tags to help buyers find your product easily. This improves your store’s search and organization.
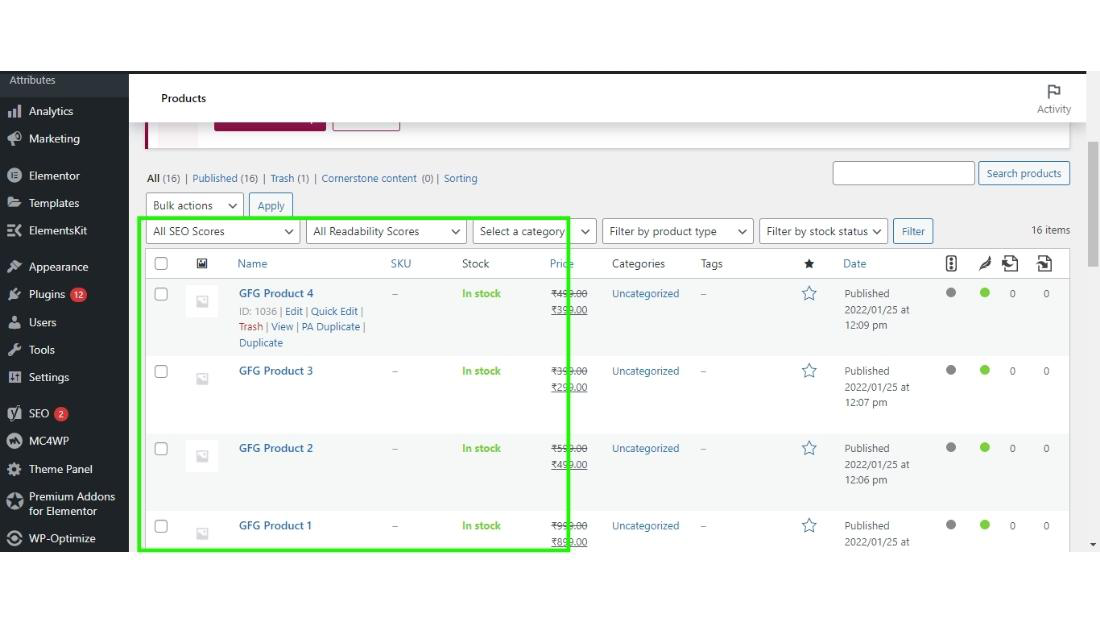
Manage Product Inventory
Managing product inventory is key for any online store. It helps you keep track of stock and avoid selling items that are out of stock. WordPress makes it simple to control your product inventory. This section explains how to manage stock effectively.
Enable Stock Management
First, turn on stock management for your product. Go to the product edit page and find the inventory tab. Check the option to enable stock management. This lets WordPress track your stock automatically.
Enabling stock management helps you avoid overselling. It also sends alerts when stock runs low. This keeps your store running smoothly and customers happy.
Set Stock Quantity And Status
Next, enter the quantity of items you have in stock. This number updates as customers buy products. You can also set the stock status to “In stock,” “Out of stock,” or “On backorder.”
Setting the correct stock status informs customers about product availability. It prevents confusion and improves the shopping experience. Keep these details up to date for best results.
Configure Shipping Details
Configuring shipping details is an important step when adding products on WordPress. It helps set correct shipping costs and ensures smooth delivery. Proper settings avoid issues with orders and customer complaints. This section covers how to enter weight, size, and shipping classes for each product.
Set Weight And Dimensions
Start by entering the product’s weight. Use the unit your store uses, like pounds or kilograms. Weight affects shipping fees and carrier options. Next, add the product dimensions: length, width, and height. Accurate sizes help calculate shipping costs and package fit. This data also helps carriers prepare for delivery.
Choose Shipping Classes
Shipping classes group products with similar shipping needs. For example, heavy items may share one class, light items another. Assign the correct class to your product to control shipping rates. Shipping classes work with your shipping methods to set fees. They keep shipping charges fair and clear for customers.
Publish And Preview Products
Publishing and previewing products in WordPress is a key step in managing your online store. It lets you check how your product looks before customers see it. You can save your work, review the product page, and then make it live for buyers.
This process helps you avoid errors and ensures your product details are clear and attractive. Taking time to preview saves effort later and improves customer experience.
Save Drafts
Saving drafts keeps your product information safe without publishing it. You can return later to add or change details. This option is useful when your product description or images are not yet ready.
Click the “Save Draft” button on the product editing screen. WordPress stores your work quietly in the background. Drafts allow you to work step-by-step without rushing.
Preview Product Page
The preview option shows your product page as customers will see it. It opens in a new tab or window, displaying all text and images. This feature helps spot mistakes or layout issues early.
Use the “Preview” button near the save options. Check product titles, prices, and photos carefully. Make sure the page looks neat and professional before publishing.
Publish Product
Publishing makes your product visible on your live website. Visitors can then browse, read details, and buy your product. Before clicking “Publish,” double-check all information is correct.
Hit the “Publish” button on the right side of the product editor. WordPress quickly updates your site and lists the new product. After publishing, monitor your product page to ensure it loads well.
Optimize Product Listings
Optimizing product listings improves your online store’s visibility and sales. Clear, detailed listings help customers find and choose products faster. Well-optimized products rank higher on search engines. This brings more visitors to your site.
Add Seo Titles And Descriptions
Use clear and simple titles with main keywords. Keep titles under 60 characters for better display on search engines. Write descriptions that explain the product clearly. Include keywords naturally without overstuffing. Descriptions should be around 150-160 characters. This helps search engines understand your product better.
Use Product Reviews
Encourage customers to leave reviews. Reviews build trust and show real experiences. They also add fresh content to your product page. More content means better chances to rank higher. Display reviews prominently on the product page. Respond to reviews to engage customers and show you care.
Enhance With Product Attributes
Use attributes like size, color, and material to describe products. Attributes help customers filter and find products quickly. They also improve search engine indexing. Make sure attributes are accurate and relevant. Use consistent terms for easier management and better search results.
Credit: www.geeksforgeeks.org
Credit: aovup.com
Frequently Asked Questions
How Do I Add A New Product In WordPress?
To add a new product, go to your WordPress dashboard. Click on “Products” and then “Add New. ” Enter the product title, description, price, and images. Finally, publish your product to make it live on your site.
Which Plugin Is Best For Adding Products On WordPress?
WooCommerce is the most popular plugin for adding products. It offers powerful features for product management, payment gateways, and inventory. It is user-friendly and SEO optimized, making it ideal for most WordPress e-commerce sites.
Can I Add Product Variations In WordPress?
Yes, you can add product variations like size or color. Use WooCommerce’s variable product option to set different prices and stock for each variant. This helps customers choose exactly what they want easily.
How To Optimize Product Pages For Seo In WordPress?
Use clear product titles and unique descriptions with relevant keywords. Add alt text to images and use SEO-friendly URLs. Also, enable product reviews and ensure fast loading speed to improve search rankings.
Conclusion
Adding products on WordPress is simple and quick. Follow the steps carefully to avoid mistakes. Use clear titles and descriptions for each product. Upload good images to attract buyers. Set prices and categories to organize your store well. Keep your product list updated to help customers find what they want.
Practice makes perfect, so try adding a few products first. Your WordPress store can grow steadily with patience and care. Start now and watch your online shop come alive.


