
Are you trying to set up your email service but feel lost in the technicalities of MX records? You’re not alone.
For many, managing domain settings can feel like navigating a maze. But don’t worry—you’re in the right place! In this guide, we’ll break down the steps to add an MX record on Namecheap in simple, easy-to-follow instructions. By the end of this article, you’ll have the confidence and knowledge to manage your domain like a pro.
Stay with us, and let’s simplify the world of domain settings together.

Credit: support.titan.email
Setting Up Your Namecheap Account
Setting up your Namecheap account is a crucial step before you can add MX records. It might seem daunting at first, but with the right guidance, it becomes a straightforward process. Whether you’re new to domain management or have dabbled in it before, getting your Namecheap account ready will set the stage for efficient email handling.
How To Create A Namecheap Account
First, visit the Namecheap website and click on the “Sign Up” button. You’ll need to provide your email address, a password, and a username. Choose a strong password to keep your account secure. Once you’ve filled out the form, click “Create Account” to get started.
Verify Your Email Address
After signing up, Namecheap will send a verification email. Check your inbox and click the verification link. This step ensures your account is ready for all the features Namecheap offers. Have you checked your spam folder if you can’t find the email?
Log In To Your Account
Once verified, log in using your username and password. You’ll be greeted with your dashboard, where all domain management takes place. Familiarize yourself with the layout; it’s user-friendly and intuitive.
Navigate To Your Domain List
From the dashboard, go to the “Domain List” section. This is where you’ll see all the domains you’ve registered. Click on the domain for which you want to add MX records. Do you see your domain listed there?
Access The Advanced Dns Settings
Click on “Manage” next to your domain name. This brings you to the settings page. Look for the “Advanced DNS” tab. This is where you’ll add and modify your DNS records. Ready to dive into the specifics of your domain?
Setting up your Namecheap account isn’t just about the technical steps. It’s about creating a foundation for your online presence. Each click and confirmation is a step toward better email management and domain control. Are you prepared to take control and make your digital mark?
Navigating To Dns Settings
Access DNS settings on Namecheap to add an MX record. Log in, select “Domain List”, and click “Manage”. Navigate to “Advanced DNS” and add your MX record under “Mail Settings”. Save changes to update your email configuration.
Navigating to DNS settings can seem intimidating, especially if you’re new to managing domain records. But once you know where to go, it’s a straightforward process. Let’s walk through accessing DNS settings on Namecheap to add an MX record and ensure your email gets delivered to the right place. ###1. Logging Into Your Namecheap Account
First, head to the Namecheap website and log in with your credentials. If you don’t have an account, you’ll need to create one and purchase a domain. Once you’re logged in, you’ll see your dashboard—this is your command center for managing domains. ###2. Accessing The Domain List
After logging in, look for the “Domain List” tab on the left-hand side. Click on it, and you’ll see a list of all the domains you own. It’s like a digital bookshelf filled with your domain names. Select the domain you want to edit by clicking the “Manage” button next to it. ###3. Finding Dns Settings
Once you’re in the domain management section, click on the “Advanced DNS” tab. This is where all the magic happens. Here, you can manage DNS records like A records, CNAME records, and of course, MX records. ###4. Adding An Mx Record
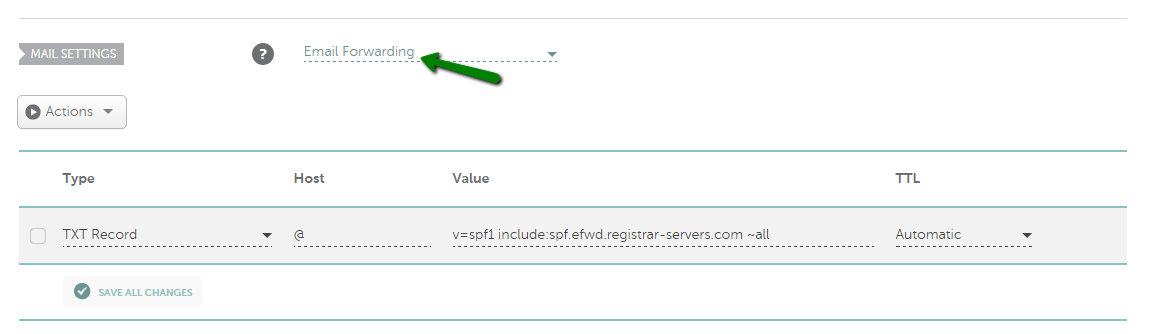
Scroll down to the “Mail Settings” section. You might feel a bit like a digital locksmith here, but it’s simpler than it looks. Click on “Add New Record,” select “MX Record” from the dropdown menu, and fill in the necessary details. For example, you might need to input the mail server’s address and priority level, which determines the order of server use. ###5. Saving Your Changes
Once you’ve added the MX record, don’t forget to click the save button. It’s easy to overlook, but this step is crucial for ensuring your changes take effect. After saving, give it a few minutes for the new records to propagate across the internet. Have you ever found yourself stuck in the DNS settings maze? Or maybe you had a moment of triumph when everything finally clicked? Share your experiences in the comments. Remember, every expert was once a beginner, and navigating these settings with ease just requires practice and a bit of patience.Adding Mx Records
Adding MX records is essential for email functionality. These records direct email traffic to your mail server. If you use Namecheap, the process is straightforward. Follow this guide to ensure your emails reach the right destination.
How To Access Your Namecheap Account
First, log into your Namecheap account. Use your username and password. Once logged in, navigate to the “Domain List” section. This is where you manage domain settings.
Finding The Correct Domain
Identify the domain for which you want to add MX records. Click the “Manage” button next to it. This takes you to the settings page for that domain.
Accessing Advanced Dns Settings
In the domain settings, locate the “Advanced DNS” tab. Click on it to access your DNS settings. Here, you can add or modify DNS records.
Adding New Mx Records
Scroll to the “Mail Settings” section. Click “Add New Record.” Choose “MX” from the dropdown menu. Enter the details provided by your email service.
Configuring Mx Record Details
Enter the mail server name in the “Mail Server” field. Set the priority number. Lower numbers have higher priority. Ensure the record points to the correct server.
Saving Your Changes
After entering the details, click the “Save Changes” button. This saves the new MX records. It may take some time for changes to propagate.
Verifying Mx Record Setup
Check if the MX records are working. Send a test email. Confirm it reaches your email account. If not, verify the settings again.
Credit: www.namecheap.com

Credit: www.lemwarm.com
Frequently Asked Questions
How Do I Add An Mx Record To Namecheap?
Log into your Namecheap account. Go to “Domain List” and click “Manage” next to your domain. Select the “Advanced DNS” tab. In the “Mail Settings” section, add your MX record by clicking “Add New Record. ” Enter the required details and save changes.
How Do I Add A Mx Record To My Domain?
Log in to your domain registrar’s dashboard. Navigate to DNS settings. Add a new MX record. Enter the mail server details and priority. Save changes.
How Do I Add A Record In Namecheap?
Log in to your Namecheap account. Navigate to “Domain List” and select your domain. Click “Manage” and go to the “Advanced DNS” tab. Add your record by clicking “Add New Record. ” Save changes to update DNS settings.
Where To Add Txt Record In Namecheap?
Log into Namecheap, click “Domain List”, then “Manage”. Navigate to “Advanced DNS”, and add your TXT record under “Host Records”.
Conclusion
Adding an MX record on Namecheap is simple. Follow the steps carefully. First, log in to your Namecheap account. Then, navigate to the Domain List. Select the domain you wish to modify. Click on the “Advanced DNS” tab. Next, click “Add New Record” and choose MX Record.
Enter the required details from your email provider. Save your changes. Double-check your entries. This ensures your email works correctly. With practice, it becomes second nature. Now, you’re equipped to manage MX records confidently. Your emails will function smoothly without any hassle.
