
Are you ready to boost your website’s security and trustworthiness? Activating an SSL certificate on Namecheap is a crucial step to protect your online presence.
Not only does it encrypt your data, but it also reassures your visitors that their information is safe. Imagine the peace of mind knowing your website is secure while also enjoying a potential bump in your search engine rankings. In this guide, we’ll walk you through the simple steps to activate your SSL certificate on Namecheap, ensuring you gain that competitive edge.
Stay with us, and let’s make your website a safer and more trusted place for your visitors.

Credit: www.youtube.com
Choosing The Right Ssl Certificate
Activating an SSL certificate on Namecheap ensures website security and trust. Start by purchasing the certificate from Namecheap. Follow the step-by-step instructions in your account to complete the activation process smoothly.
Choosing the right SSL certificate for your website can feel like picking the perfect outfit for a special occasion. You want something that not only fits well but also reflects your style and needs. With Namecheap offering a range of SSL certificates, it’s essential to understand which one best suits your website’s requirements. Whether you’re running a simple blog or an e-commerce site, selecting the right SSL certificate ensures your visitors feel secure and trust your site. Let’s dive into how you can make the best choice. ###Understanding The Types Of Ssl Certificates
SSL certificates come in various types, each catering to different needs. You might encounter options like Domain Validated (DV), Organization Validated (OV), and Extended Validation (EV). Are you wondering which one is right for your website? If you’re running a personal blog or a small business site, a DV certificate might be sufficient. It’s quick to set up and provides basic encryption. On the other hand, if your site handles sensitive data, consider an OV or EV certificate for added security and trust. ###Assessing Your Website’s Needs
Think about the nature of your website. Does it process transactions or store personal data? If yes, you need a certificate that offers robust security features. Consider the level of trust you want to establish with your visitors. An EV certificate provides the highest level of validation and displays your company name in the browser’s address bar. This can significantly boost your site’s credibility. ###Evaluating Costs And Benefits
Budget is a crucial factor in choosing an SSL certificate. While a DV certificate is often cheaper, investing in an OV or EV certificate could pay off in the long run. Ask yourself: Is the increased trust and security worth the additional cost? A more expensive certificate can enhance your brand’s reputation and potentially increase conversions. Weigh the costs against the benefits to make an informed decision. ###Considering Future Growth
If your website is expected to grow, opt for an SSL certificate that supports scalability. This means considering wildcard certificates if you plan on adding multiple subdomains. It’s like buying a pair of shoes that can last through different seasons. Think ahead, and choose a certificate that won’t require frequent upgrades as your website expands. ###Seeking Expert Advice
Sometimes, you might feel overwhelmed by the technical jargon. If that happens, don’t hesitate to reach out for expert advice. Namecheap provides excellent customer support that can guide you through the process. Have you ever felt unsure about a tech decision? Getting advice from someone who understands the ins and outs of SSL certificates can make a world of difference. By taking these steps, you can confidently choose an SSL certificate that aligns with your website’s goals and enhances user trust. Remember, the right choice can set the foundation for a secure and successful online presence.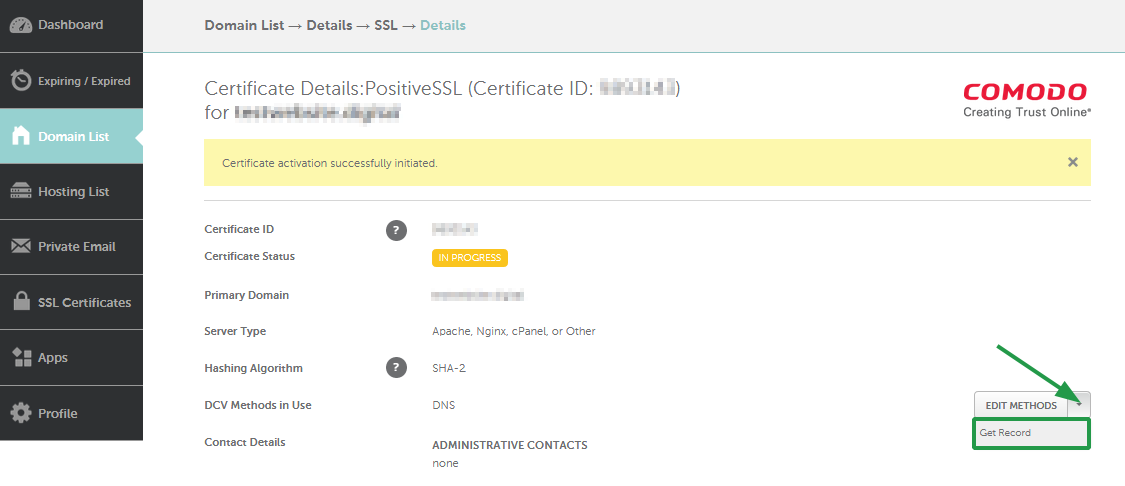
Credit: www.namecheap.com
Generating A Certificate Signing Request
Activating an SSL certificate on Namecheap requires a vital step: generating a Certificate Signing Request (CSR). This process ensures your website’s secure connection. Creating a CSR is a crucial part of setting up SSL. It involves providing essential information about your domain and organization. This request is a block of encoded text. It’s sent to the Certificate Authority (CA) to authenticate your SSL certificate. The CSR contains details like your domain name and company information. Without a proper CSR, SSL activation can’t proceed.
How To Generate A Csr
Begin by accessing your web hosting control panel. Look for the SSL/TLS section. Here, you can create a new CSR. Follow the prompts to enter your domain name. Include your organization name and location. Ensure all details are accurate. Incorrect information can delay the process.
Using Openssl To Create A Csr
OpenSSL is a tool often used for generating CSRs. If you’re comfortable with command-line tools, OpenSSL is efficient. Start by opening your terminal or command prompt. Use the command to generate a CSR. Input your domain details when prompted. Save the generated CSR file securely. You’ll need it for the next steps.
Submitting Your Csr To Namecheap
Once your CSR is ready, submit it to Namecheap. Log into your Namecheap account. Navigate to the SSL certificate section. Upload your CSR file as instructed. Double-check the information before submission. Correct details ensure a smooth SSL activation.
Installing And Activating Your Ssl Certificate
Activating an SSL certificate on Namecheap involves simple steps. Log into your account, choose your domain, and follow the SSL setup wizard. Complete the validation process to secure your website quickly.
Installing and activating your SSL certificate on Namecheap is a crucial step in securing your website. Not only does it protect sensitive information, but it also boosts your site’s credibility and improves search engine ranking. The process might seem daunting, but with the right steps, it can be straightforward. Let’s dive into the specifics.Step 1: Purchase Your Ssl Certificate
Start by purchasing an SSL certificate from Namecheap. They offer a range of options tailored to different needs. Consider what suits your website best—whether it’s a single domain, wildcard, or multi-domain certificate. Once you’ve made your choice, follow the purchase instructions. Namecheap provides clear guidance on their platform, making it easy even for beginners.Step 2: Generate A Certificate Signing Request (csr)
After purchasing, the next step is generating a Certificate Signing Request (CSR). This is crucial as it contains the information needed to create your SSL certificate. Use your hosting provider’s control panel to generate the CSR. Keep your details accurate—this ensures your certificate is valid and properly linked to your domain.Step 3: Submit The Csr To Namecheap
Once your CSR is ready, submit it to Namecheap. They will use this to issue your SSL certificate. Be attentive during this step. Double-check that all information matches your domain specifics. Any discrepancies can delay the activation process.Step 4: Install The Ssl Certificate
With your certificate issued, it’s time to install it on your server. Access your hosting control panel—most providers have straightforward SSL installation features. Follow Namecheap’s installation instructions closely. They provide detailed guides to ensure smooth integration with various hosting environments.Step 5: Verify Installation
After installation, verify if the SSL is active. Check your website URL—look for the padlock symbol next to your domain name. This indicates that your site is secure. Do a quick check with online SSL tools, which can confirm your certificate’s installation and validity. This step ensures your security measures are correctly in place.Step 6: Update Your Website Links
Post installation, update all website links to HTTPS. This is crucial for maintaining security and avoiding broken links. Use a plugin or manual update in your CMS to ensure all internal links reflect the SSL activation. This enhances site integrity and user trust. Activating your SSL certificate is more than a technical task; it’s a commitment to your site’s security and user trust. Have you ever wondered how a small padlock icon can impact your site’s reputation? Take this step seriously—it’s a wise investment for your online presence.
Credit: www.youtube.com
Frequently Asked Questions
How To Activate An Ssl Certificate In Namecheap?
Log in to your Namecheap account. Go to the “SSL Certificates” section. Click “Activate” next to your certificate. Follow the step-by-step instructions. Complete the domain validation process. Once validated, install the SSL on your server.
How To Enable An Ssl Certificate?
Enable an SSL certificate by purchasing it from a trusted provider. Install it on your server. Update website settings to use HTTPS. Ensure all site links and resources are secure. Verify the SSL certificate is working correctly through testing tools.
How Do I Renew My Ssl Certificate On Namecheap?
Log in to your Namecheap account. Go to the “SSL Certificates” section. Select the certificate to renew. Follow the prompts to complete the renewal process. Ensure payment information is updated.
How Long Does It Take For An Ssl Certificate To Work On Namecheap?
An SSL certificate from Namecheap typically takes a few minutes to a few hours to activate. Ensure DNS settings are correct for faster processing.
Conclusion
Activating an SSL certificate on Namecheap is straightforward. Follow the steps carefully. Secure your site to build trust with visitors. SSL protects data and boosts your site’s credibility. Users expect safe browsing experiences. Implementing SSL enhances website security. It also improves your search engine rankings.
Namecheap provides user-friendly guides and support. With SSL, your website becomes more reliable. Ensure that your visitors feel safe. Safety leads to increased engagement and satisfaction. Start today and secure your online presence efficiently. Remember, a secure site is a successful site.
Stay protected and keep your visitors happy.
