
Are you ready to take your web application to the next level by hosting it on your own server? Hosting a Web API in IIS (Internet Information Services) might sound daunting, but it’s a game-changer for anyone looking to enhance the performance and accessibility of their application.
Imagine having full control over your web services, with the ability to optimize and scale them to meet your specific needs. This guide will break down the process into simple, actionable steps, ensuring you can confidently set up your Web API in IIS.
By the end of this article, you’ll not only have a clear understanding of the process but also the satisfaction of having achieved a significant milestone in your web development journey. Dive in, and let’s transform your hosting capabilities!
Credit: www.c-sharpcorner.com
Prerequisites For Hosting
To host a Web API in IIS, ensure. NET Framework is installed. Confirm IIS features are activated. Set up the application pool. Deploy your Web API files. Configure necessary permissions and bindings. Test the setup to ensure functionality.
Software Requirements
To host a Web API in IIS, certain software is needed. First, install IIS on your Windows machine. Ensure that .NET Framework is installed. The API should be compatible with it. Visual Studio is useful for development. Having SQL Server can help if your API needs a database.
Configuration Settings
Configuring IIS is crucial for hosting. Enable Application Development features in IIS. Set up bindings to connect your API with a domain. Adjust authentication settings to secure the API. Ensure the firewall allows traffic to your API. Set up logging to monitor API activities.
Credit: geeksarray.com
Setting Up Iis
First, open the Control Panel on your computer. Navigate to Programs and click Turn Windows features on or off. A new window will open. Look for Internet Information Services. Check the box next to it to install IIS. This will take a few minutes. Once done, click OK to complete the installation.
After installing IIS, it’s time to enable some features. Go back to Control Panel and Turn Windows features on or off. Expand Internet Information Services. Check the boxes for Web Management Tools and World Wide Web Services. Make sure Application Development Features is also checked. Click OK to apply these changes. Your IIS setup is now ready for hosting Web APIs.
Deploying Web Api
First, check your code. It should be ready for production. Remove all debugging lines and unnecessary comments. Create a release build of your Web API. This makes the application optimized and faster. Ensure all external resources are reachable. This includes databases and API keys. Check the web.config file. Make sure it has all necessary settings. These steps help in smooth deployment.
Open Visual Studio to publish your Web API. Select your project and click on Publish. Choose the Web Deploy method. Enter the server name, site name, and credentials. Click on the Publish button. This sends your files to the server. Log in to your IIS Manager. Find your site and click on it. Ensure that the application pool is set correctly. Test your Web API. Make sure it works without errors.
Configuring Application Pool
Open the IIS Manager tool. Click on the “Application Pools” option. Choose “Add Application Pool” from the right pane. Enter a name for your new pool. Ensure the .NET CLR version matches your application. Click OK to create the pool. That’s it! Your application pool is ready.
Select your application pool in IIS. Click on “Advanced Settings”. Locate the “Identity” section. Click the three dots next to the identity. Choose “Custom account” and enter your credentials. Click OK to save changes. The application pool now runs under this identity.
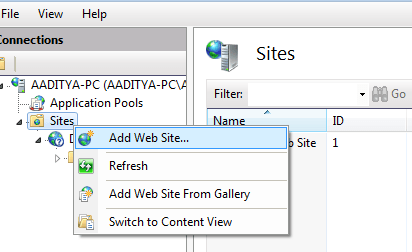
Creating A Website In Iis
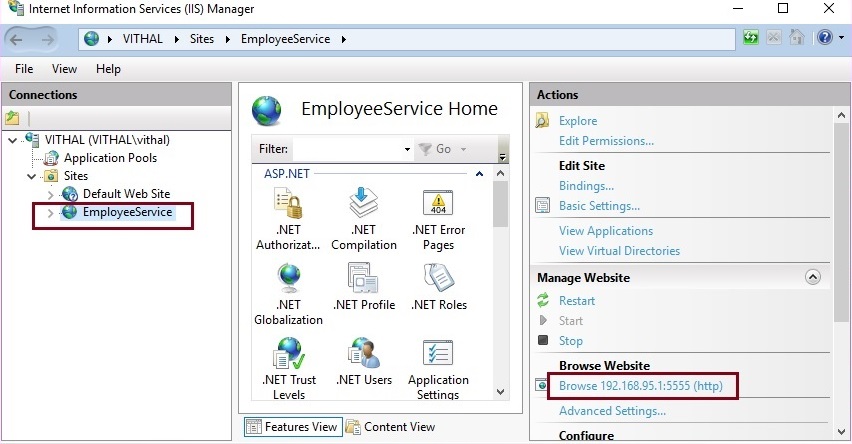
First, open IIS Manager on your computer. Find the Sites folder. Right-click on it. Select Add Website. A new window will appear. Enter the site name. Choose a folder for the site. You need the folder for your files. Click the OK button.
Next, assign a binding to your site. In the Add Website window, find the binding section. Choose a type, like HTTP. Enter a host name. This name helps to find your site. Click OK. Your site is now ready to use. It will show on the internet.
Configuring Web Api In Iis
MIME types help the server know what file types it sends. Add correct MIME types for your files. Go to IIS Manager. Click on your site. Find the MIME Types icon. Add new types if needed. For example, add .json with application/json type. This tells IIS how to handle JSON files. Ensure all necessary types are present.
URL rewrites help in making URLs user-friendly. Open the URL Rewrite module in IIS. Add a new rule for your API. Use conditions to match the URL patterns. This helps in routing requests correctly. Test the rule to ensure it works. URL rewrites also help with SEO. Clear URLs are better for users and search engines.
Testing And Troubleshooting
Hosting a Web API in IIS involves setting up the server to handle requests efficiently. Start by configuring application pools and binding the site to a port. Ensure permissions are correctly set to avoid access issues. Troubleshooting involves checking logs for errors and ensuring firewall settings allow traffic.
Testing The Hosted Api
Testing the hosted API is very important. Open your browser or a tool like Postman. Enter the API URL. Check if it responds. A 200 OK status means it’s working. Sometimes, you might see a 404 error. This means the API route is wrong. Fix it by checking the URL path. Also, check the firewall settings. It should allow access to the API.
Common Issues And Fixes
Sometimes, the API may not work. A common issue is a port conflict. Check if another app uses the same port. Change the port if needed. Another issue is authentication errors. Ensure correct username and password. Double-check the API’s configuration files. Look for any typos or missing values. Restart the server after making changes. This helps apply new settings.
Security Considerations
SSL keeps data safe. It uses encryption to protect information. Make sure SSL is enabled for your web API. It is important for secure communication. Install an SSL certificate on your server. This will help in encrypting data. Always check the certificate’s validity. Renew it before it expires. This ensures the data stays protected. Use strong encryption methods.
Permissions control access to your API. Only give necessary permissions. Avoid giving admin rights to everyone. Check user roles regularly. Update them as needed. Protect sensitive data from unauthorized access. Use firewalls to block suspicious activity. Keep your server updated with security patches. This helps in preventing breaches. Regularly monitor permission settings.
Optimizing Performance
Enabling compression can make your website faster. It helps in reducing the size of files. Smaller files load quickly. This improves the user experience. To enable it, go to IIS Manager. Find the Compression feature. Check both static and dynamic compression. Save changes. Your site should now load faster. Speed is important for users.
Caching helps in storing data temporarily. It reduces the load on the server. The server doesn’t process the same request again. This makes the site faster. Use output caching in IIS. It stores the output of pages. Users get the page quickly next time. Another way is to use client-side caching. It stores files in the user’s browser. This reduces data transfer. Always clear the cache when updates occur. It ensures users get the latest content.

Credit: www.dotnetcurry.com
Frequently Asked Questions
Can Web Api Be Hosted In Iis?
Yes, you can host Web API in IIS. It supports ASP. NET applications, including Web APIs, for efficient deployment. Ensure IIS is properly configured to handle API requests for smooth operation. Hosting on IIS offers security, scalability, and easy management, making it a preferred choice for many developers.
How Do I Host My Web Api?
Host your Web API using cloud services like AWS or Azure. Choose a server, configure settings, and deploy. Ensure security and scalability for optimal performance.
How To Host A Web Service On Iis?
Install IIS via Windows Features. Open IIS Manager, create a new site. Set physical path and assign a port. Configure bindings and permissions. Deploy your web service files to the specified folder. Start the site and test using the browser.
Ensure firewall settings allow access.
Can Web Api Be Self Hosted?
Yes, you can self-host a Web API using. NET Core or other technologies on your own server. This allows more control over configurations and security settings. Ensure your server meets the necessary requirements and is properly maintained for optimal performance and reliability.
Conclusion
Hosting a Web API in IIS can be straightforward. Follow the steps carefully. Test your API to ensure it’s working. Make sure your server settings are correct. Secure your API with proper authentication. Regularly update IIS for best performance. Keep your files organized for easy management.
Troubleshoot issues promptly to avoid downtime. Practice makes perfect, so don’t hesitate to try again. Hosting Web APIs gets easier with experience. Enjoy your journey in web development.


