Have you ever felt overwhelmed trying to manage your website’s DNS settings? You’re not alone.
Navigating through DNS records might seem daunting at first, but it’s crucial for your website’s functionality and performance. If you’re using Namecheap as your domain registrar, you’re in luck. Namecheap offers a user-friendly interface that makes handling DNS records a breeze.
In this guide, we’ll show you how to add DNS records in Namecheap, empowering you to take control of your website’s destiny. Picture this: your website loading faster, your email accounts seamlessly integrated, and your online presence stronger than ever. Sounds appealing, right? By understanding how to tweak DNS settings, you can make these dreams a reality. So, why should you care about DNS records? Because they are the backbone of your website’s communication with the internet. Getting them right can mean the difference between a smooth user experience and technical headaches. You’re about to unlock the secrets to optimizing your site’s speed and reliability. Stay with us as we break down the steps to add DNS records in Namecheap, ensuring you have the tools you need for ultimate control and success. Ready to dive in? Let’s get started!
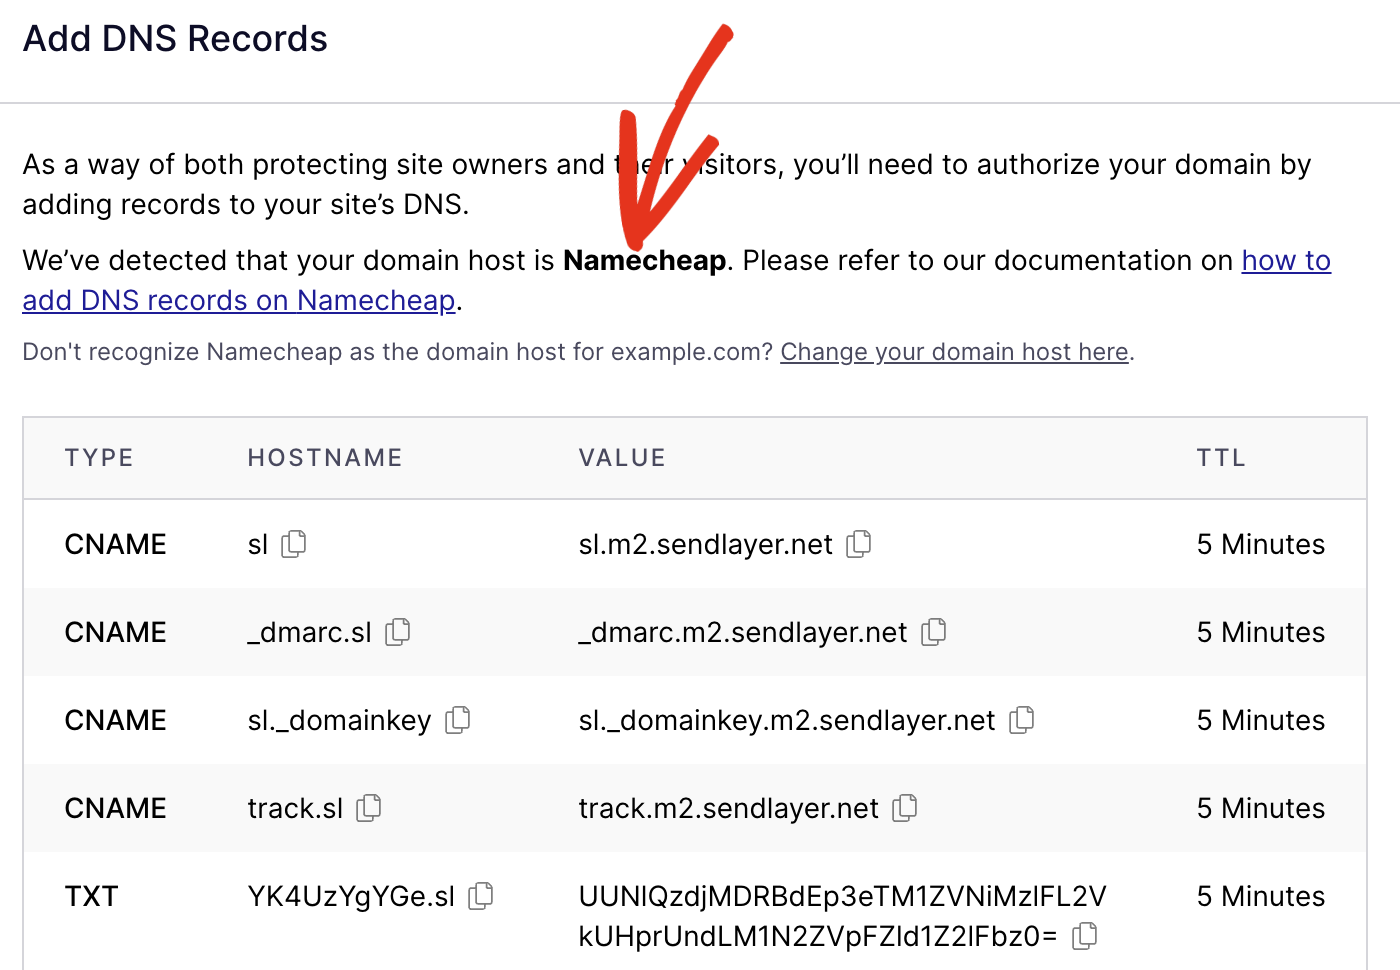
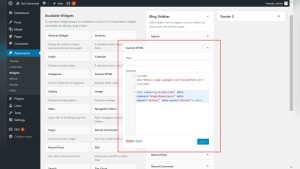
Credit: sendlayer.com
Accessing The Domain Management Area
Navigate to Namecheap’s Domain Management Area to add DNS records. Select your domain, click “Manage,” and then the “Advanced DNS” tab. Here, you can input new DNS entries, ensuring proper website functionality.
Accessing the Domain Management Area is your first step in adding DNS records in Namecheap. It’s akin to unlocking the control panel of your domain, where you can customize and manage various settings. This area is crucial for making sure your website functions smoothly and responds accurately to the server requests.How To Find Your Domain List
To access the Domain Management Area, first, log in to your Namecheap account. You’ll find yourself on the dashboard, your home base for all domain-related activities. Navigate to the ‘Domain List’ on the left sidebar. This is where you’ll see all the domains registered under your account.Selecting Your Domain
Once you’re in the domain list, identify the domain you want to manage. Click on the domain name to open its management interface. This action will lead you to a page filled with various options, including DNS settings. Here, you can make adjustments specific to this domain.Accessing Dns Settings
On the domain management page, look for the ‘Advanced DNS’ tab. Clicking this tab opens up the DNS settings area. This is where the magic happens. You’ll find existing DNS records and options to add new ones.Understanding Dns Record Types
Before you add or edit DNS records, it’s useful to know the types available. Common types include A records, CNAME records, and MX records. Each serves a unique purpose, such as directing traffic or handling emails. Have you ever wondered why your website’s speed fluctuates? DNS settings could be the answer. Tweaking them correctly can improve your website’s performance and reliability. Accessing the Domain Management Area is not just a technical step; it’s an opportunity to optimize your site’s operations. By familiarizing yourself with these settings, you gain control over your domain’s destiny. So, dive in and explore the possibilities.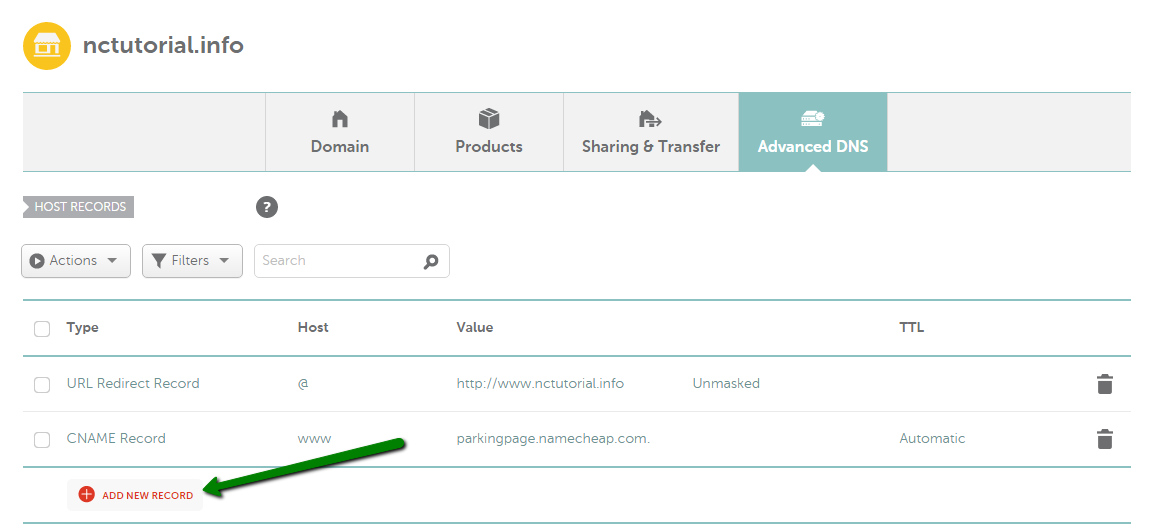
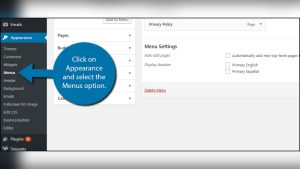
Credit: www.namecheap.com
Choosing The Right Dns Record Type
Adding DNS records in Namecheap involves selecting the correct DNS record type. Ensure you understand each type’s purpose. This helps in managing domain settings effectively.
Choosing the right DNS record type is crucial when managing your domain settings in Namecheap. If you’ve ever felt overwhelmed by the variety of DNS records available, you’re not alone. Understanding the purpose of each type can make the process much smoother and ensure that your website functions correctly.Understanding The Basics Of Dns Records
DNS records are like the address book for your domain. They tell the internet how to handle your domain’s traffic. Without the right records, visitors might not reach your site.Common Dns Record Types Explained
The most common DNS records include A, CNAME, MX, and TXT records. Each serves a different function: – A Record: Directs a domain to an IP address. It’s like giving your domain a home address. – CNAME Record: Points a domain to another domain name. It’s useful for subdomains. – MX Record: Determines the mail servers for your domain. Essential for email routing. – TXT Record: Provides text-based information. Often used for verification purposes.How To Choose The Right Dns Record For Your Needs
Consider what you need to achieve. If you want to link your domain to a specific IP, you’ll use an A record. For email services, MX records are vital. Think about your website’s unique requirements. Do you need to redirect a subdomain? A CNAME might be your best bet.Personal Experience With Choosing Dns Records
When I first set up my website, I was baffled by DNS records. I needed to connect my domain to a hosting service and enable email. After some research, I successfully used A and MX records. It was a small victory, but it taught me the value of understanding DNS.Checking And Verifying Your Dns Changes
Once you’ve added your DNS records, it’s essential to verify them. Tools like DNSChecker can help ensure everything is set up correctly. Have you ever experienced issues with DNS records? Double-checking your entries can save you from potential headaches.Final Thoughts On Dns Record Management
Managing DNS records may seem daunting at first, but with the right knowledge, it becomes manageable. Take the time to understand what each record does and how it can benefit your domain. Your online presence depends on it.Entering And Saving Dns Records
Easily manage DNS records in Namecheap by accessing the Domain List and selecting your domain. Choose the Advanced DNS tab to add or edit records. Save changes to update your DNS settings successfully.
When you need to configure your domain settings, adding DNS records in Namecheap is a crucial task. It sounds technical, but once you get the hang of it, it’s straightforward. Entering and saving DNS records correctly ensures that your domain points to the right server, making your website accessible to the world. Let’s dive into how you can enter and save these records efficiently. ###Understanding Dns Records
Before you start, it’s essential to understand what DNS records are. DNS records are like instructions that tell the internet how to find your website. They include information such as IP addresses and mail settings. Knowing what type you need will help streamline the process. ###Accessing The Dns Settings In Namecheap
To add DNS records, first log in to your Namecheap account. Navigate to the “Domain List” and find the domain you want to configure. Click on “Manage” next to your domain, and head over to the “Advanced DNS” tab. This is where the magic happens. ###Entering New Dns Records
Once in the Advanced DNS section, you can begin adding records. Click on the “Add New Record” button. A dropdown menu will appear, allowing you to select the type of DNS record you want to add, such as A, CNAME, or MX. Enter the required details. For an A record, you’ll need the host and the IP address. A personal tip: always double-check the information you enter. One wrong digit can lead to hours of troubleshooting. ###Saving Your Dns Records
After entering your DNS records, don’t forget to save your changes. At the bottom of the DNS management page, there’s a “Save All Changes” button. Click it to ensure your records are updated. Remember, DNS changes might take some time to propagate across the web. It’s normal for this to take up to 48 hours. Have you ever waited for what seemed like an eternity for changes to take effect? Patience is key in the world of DNS. ###Verifying Dns Record Changes
Once you’ve saved your changes, it’s a good idea to verify them. You can use online tools like DNS Checker to see if your records are live. This step ensures that everything is working as expected. Does this process seem easier than you thought? With practice, managing DNS records becomes a breeze. Empower yourself with these skills, and take control of your domain’s destiny!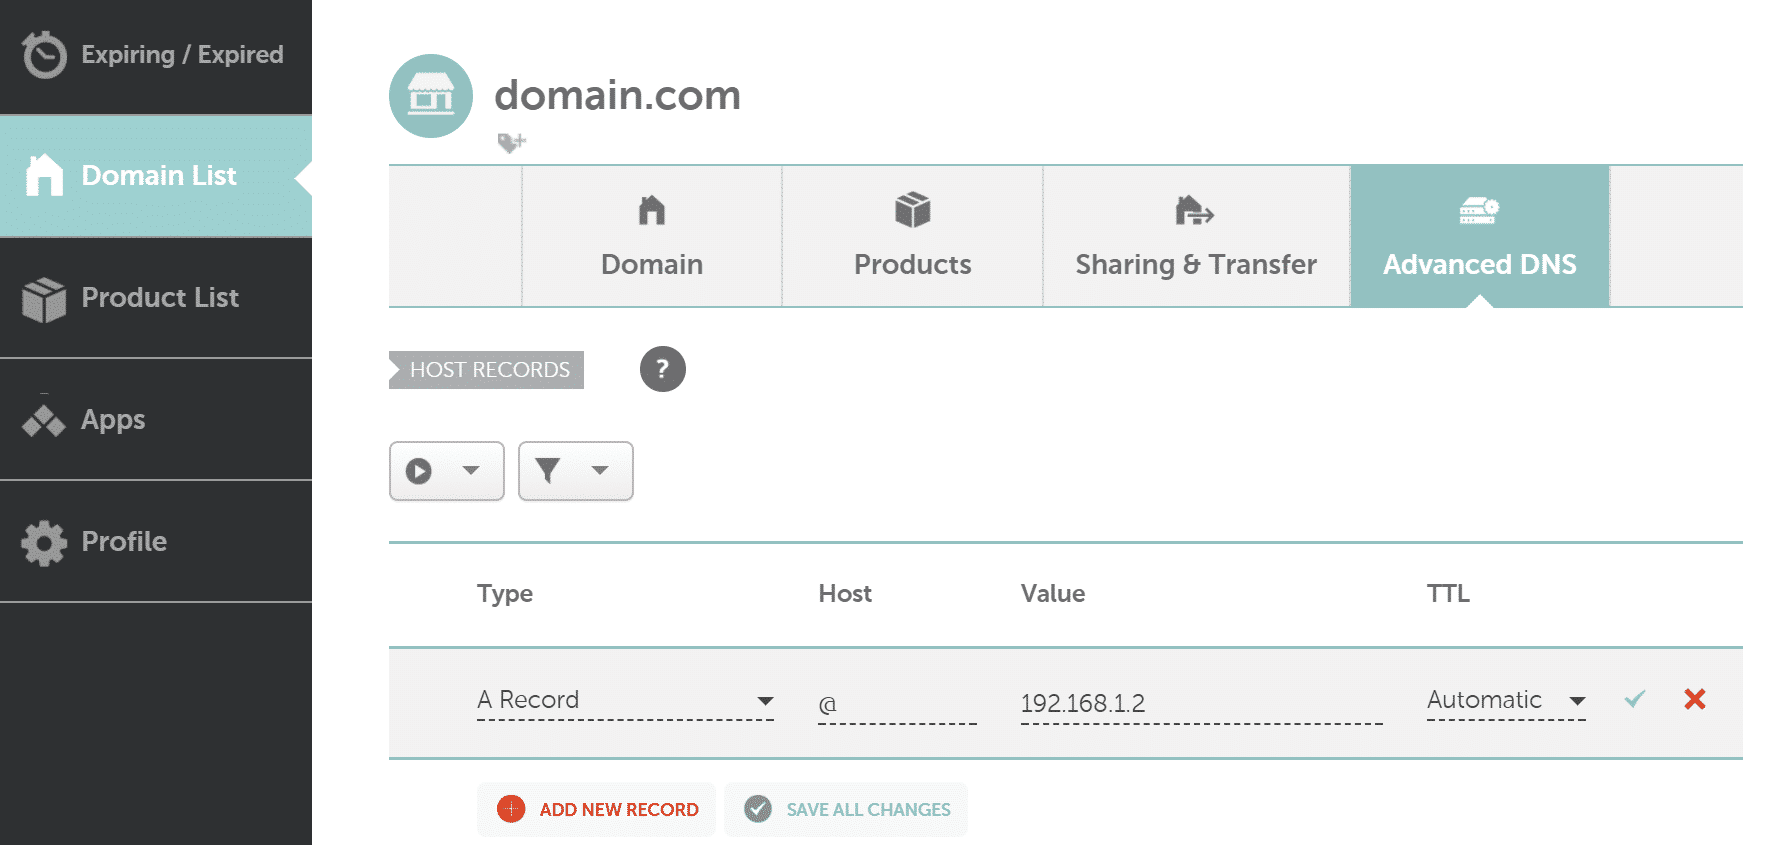
Credit: kinsta.com
Frequently Asked Questions
How To Add A Dns Record On Namecheap?
Log into Namecheap account, navigate to “Domain List”. Click “Manage” next to your domain. Go to “Advanced DNS”. Select “Add New Record”, choose the type, enter details, and save changes.
How Do I Add Dns Resource Records?
Access your DNS management tool. Select the domain to modify. Add a new record by entering the desired type, name, and value. Save changes to update the DNS settings.
How Do I Manually Add Dns Records?
Access your DNS provider’s dashboard. Locate the DNS management section. Choose the record type (A, CNAME, etc. ). Enter the required details such as name, value, and TTL. Save the changes.
How Do I Add A Dns Record To My Domain?
Log into your domain registrar’s account. Locate the DNS management section. Select “Add Record. ” Enter the type, name, and value. Save the changes.
Conclusion
Adding DNS records in Namecheap is simple with these steps. Follow the guide to ensure accurate settings. Consistency in records is crucial for effective website performance. Double-check entries to avoid potential issues. DNS management is key for smooth online operations.
With practice, this process becomes second nature. Remember, patience leads to success. Now, you’re ready to manage DNS with confidence. Keep practicing, and you’ll get better over time. Happy managing!